I APOLOGIZE FOR MANY OF THE PHOTOS NOT SHOWING UP. Photobucket really screwed over a lot of people, I have to re-host them.
I was interviewed in the June 2016 issue of Road & Track Magazine discussing the 1991-1994 Nissan Sentra SE-R. You can read the article by CLICKING HERE

Nissan SR20VE & SR20DE motors / 1991-94 Nissan Sentra SE-R / 1995-98 Nissan 200SX SE-R / 1999-2002 Infiniti G20t mini-site
"The Last of the SE-Rs"
This mini-site is dedicated to the amazing 1991-1994
Nissan Sentra SE-R, 1991-1993 NX2000, 1995-1998 Nissan 200SX SE-R, the 1999-2002 Infiniti G20 and their fantastic SR20DE & SR20VE 2.0 liter motors. In my opinion, the SR20 motor is pound for pound, dollar for dollar one of the greatest motors in automotive history.
While I am of course an
avid music lover, singer, guitarist, pianist, and
songwriter, this is my second passion.
~ SCROLL DOWN FOR TONS OF SR20 INFO! ~
Click here for the actual website ----> www.JordanWhiteMusic.com <----Click here for the actual
website
Last Updated: 11.2.18
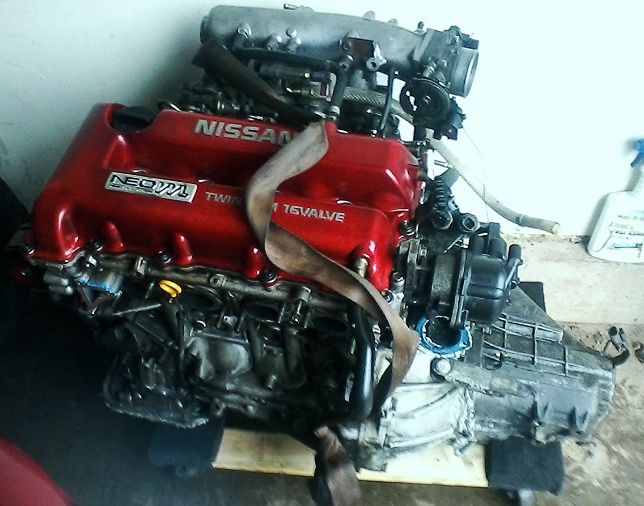
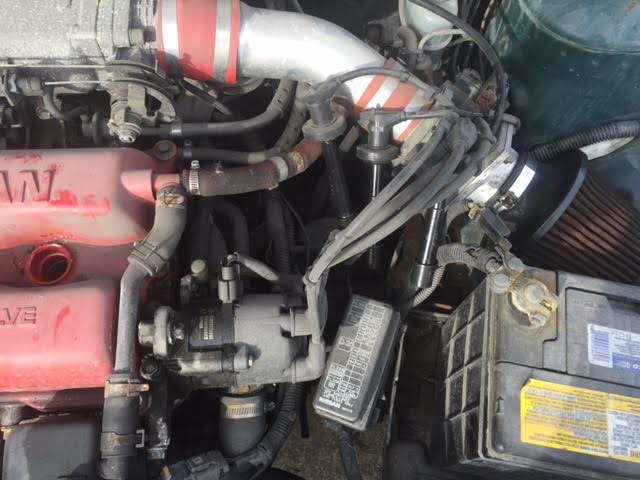
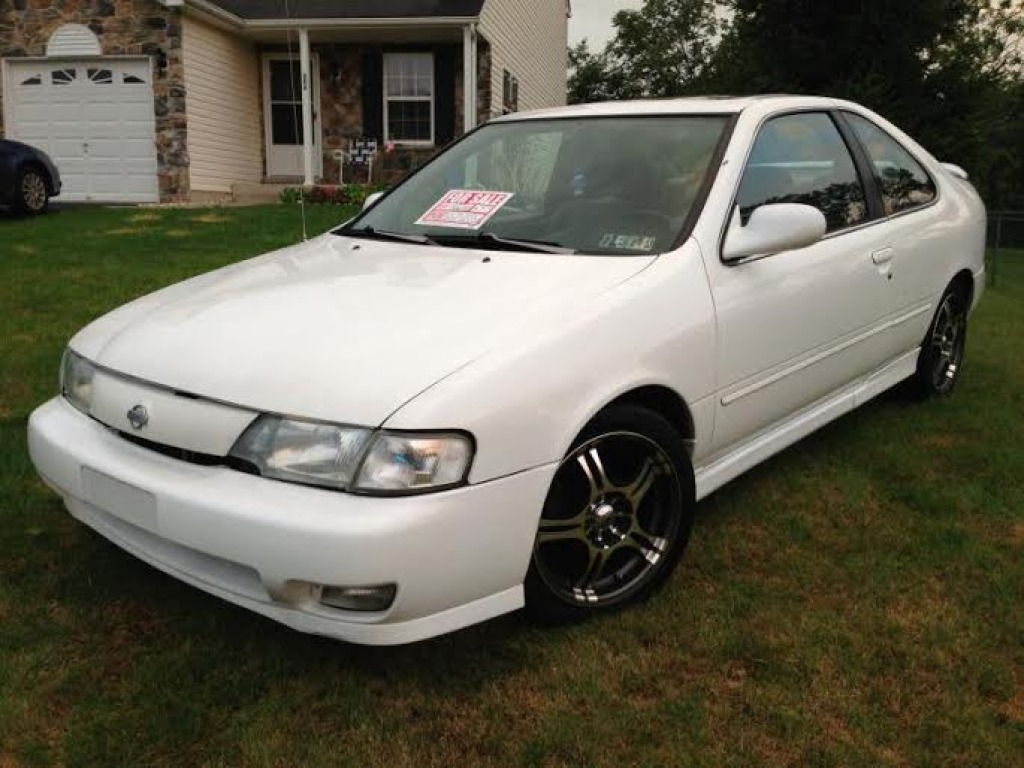
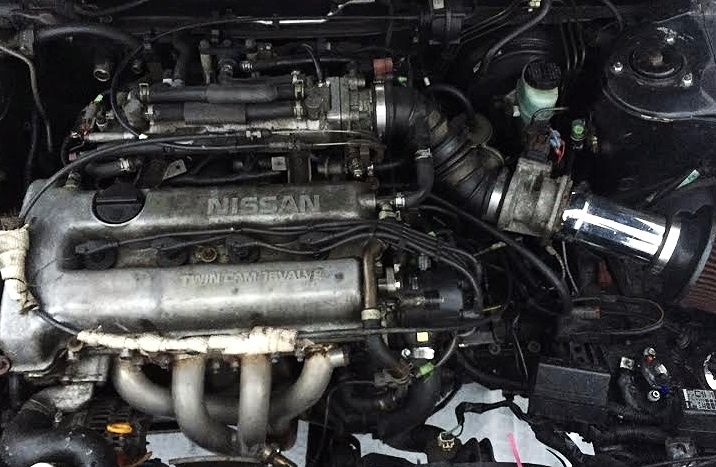
(the SR20VE motor and transmission, freshly pulled from the 1992 Sentra SE-R B13 chassis)
**CLICK HERE TO WATCH MY MOM'S REACTION TO THIS CAR ON HIDDEN CAMERA, quite funny:
https://www.youtube.com/watch?v=UiKZROwaFNs
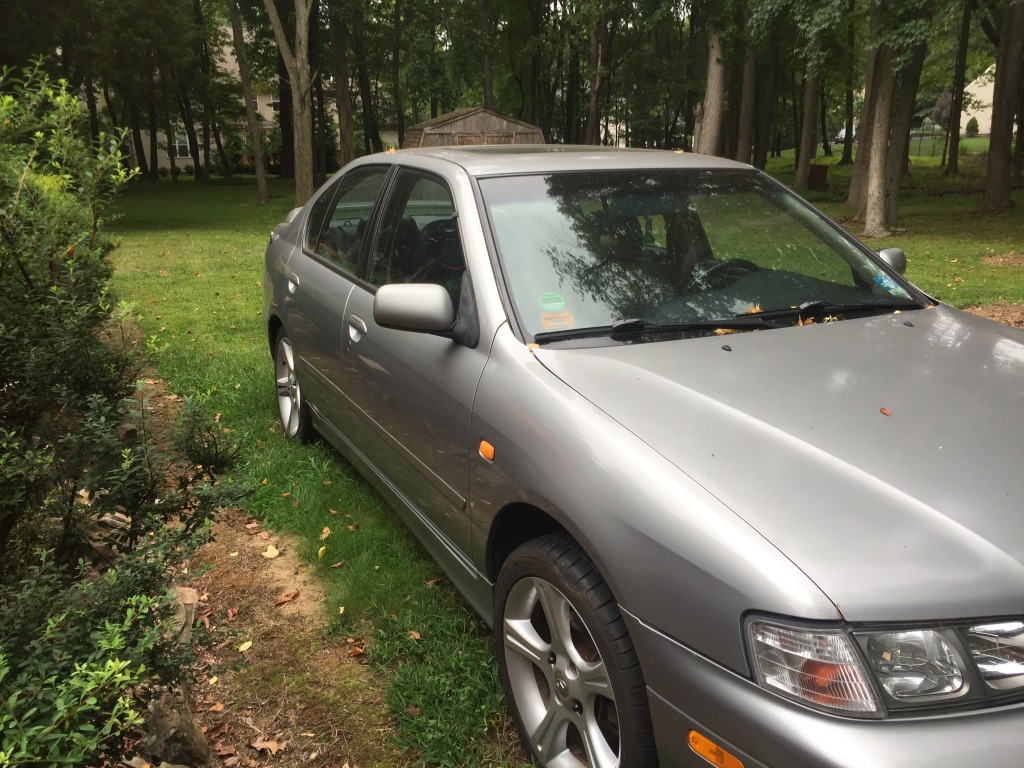
2018: The 2000 Infiniti G20t (aka Nissan Primera):
Introducing my newest project, a very specific vehicle I have searched many years for. A P11 chassis Infiniti G20t w/ a manual transmission - nearly 80% of all G20s sold were automatic.
OVERVIEW OF THE INFINITI G20:-Infiniti stock/promotional photos of the 1991-1996 G20 (P10 chassis) and the 1999-2002 G20 (P11 chassis)
As you can see, the new G20, when unveiled in the summer of 1998, looked quite different and got a lot of people excited, especially in the automotive press. The edges were softened, and while it initially contained the same motor, the P11 came with bigger wheels, bigger brakes, a much improved interior, and more room. The press reviews were mostly positive, however the biggest complaint was the lackluster acceleration, as the 99-02 G20 is the *HEAVIEST* of all originally powered SR20 powered-cars ever sold in the United States, and it contained virtually the same motor as the lighter 91-96 model. It's a good 500lbs fatter than the '91-94 B13 Sentra SE-R & around 400lbs heavier than the B14 '95-98 200SX SE-R. This is due to many factors such as the extra sound proofing, full leather bucket seats, large sunroof, suspension components, powered & heated seats, longer & wider wheelbase, and many other things designed to give the appearance of and feel of "luxury" in the Infiniti product line. The version of the P11 Infiniti G20 in Europe & Japan is actually just called the Nissan Primera; it was offered with a few variants of the SR20VE motor, but as usual, in the United States, we got the shaft and it wasn't offered:
1999 Infiniti G20 base: SR20DE motor, no LSD trans. 140hp/132 ft-lbs torque.
1999 Infiniti G20t: same as above BUT w/ a limited slip differential (in the manual transmission models). The transmission is considerably stronger than the transmission that came in the '91-94 Sentra SE-R & the '95-98 200SX SE-R.
2000-2002 Infiniti G20t/G20 Sport: 145hp/136 ft-lbs torque w/ the newer "roller rocker" (RR) SR20DE motor (which was also used in the Nissan Sentra 2000-2001 SE model).
While the 1999 model is the easiest to swap motors in due to the ECU, the 2002 Sport model is arguably the best of them all, has the best interior, and the last year of it's production - but good luck finding a manual one. And in this car, a manual transmission is a *MUST* - the automatic transmission P11 G20, in stock form, all years, had 1/4 mile times in the upper 17 second range, which is absolutely horrendous, considering the stock B13 Sentra SE-R manual transmission could hit the quarter mile in 15.6 seconds and even the automatic was only about a second slower.
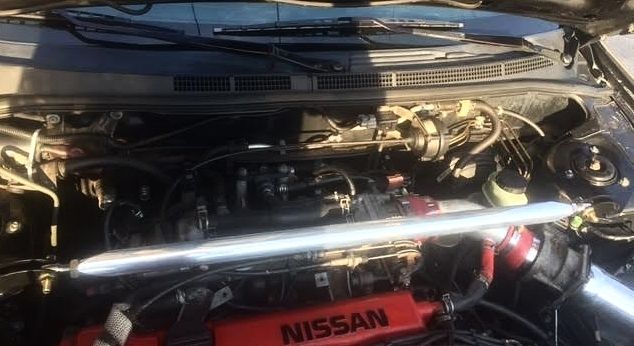
My G20t:
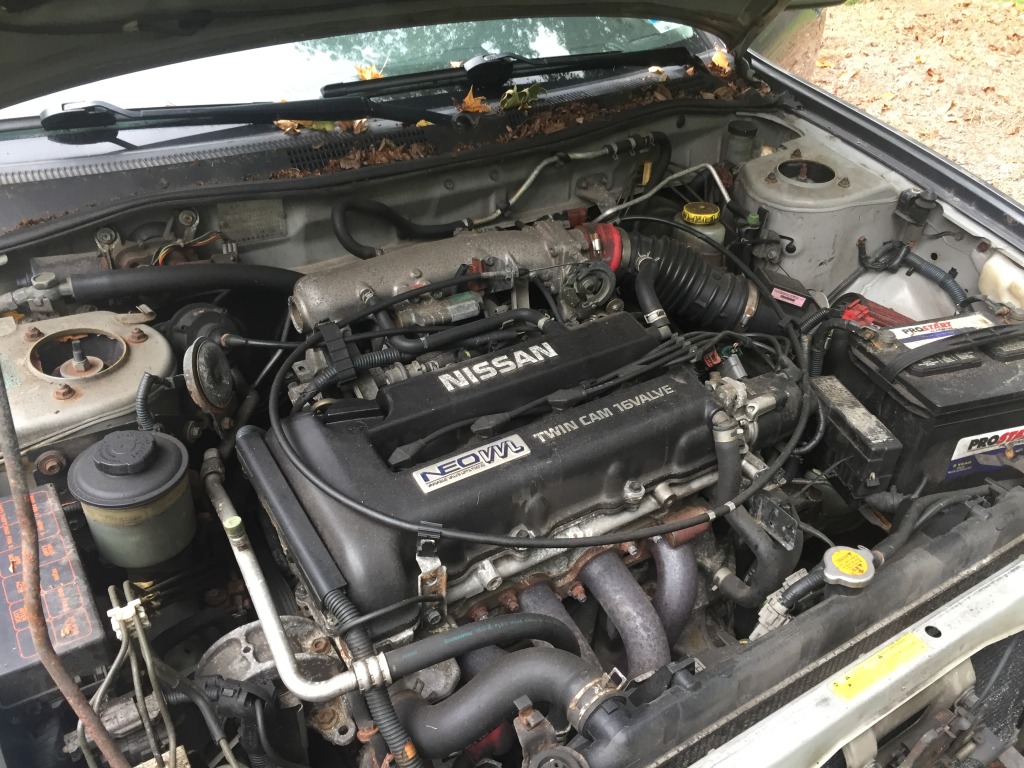
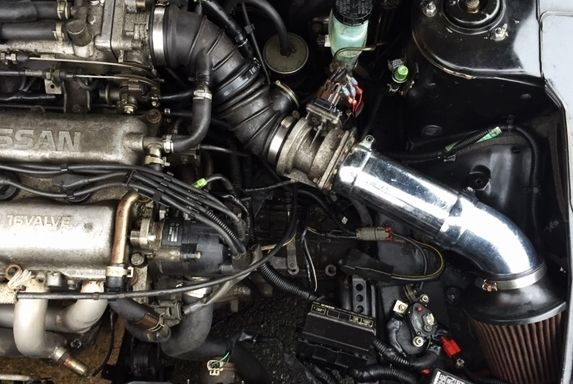
So if you have a keen eye, you probably noticed the SR20VE motor swap in the pictures above of my G20t. Thank the heavens above for this motor, because this motor makes it FEEL like it's supposed to be in there (and it WAS originally in there in Europe and Japan) - and it helps to equalize the major weight differences between it and other U.S. SR20 powered vehicles.
Even with the SR20VE motor (187hp, 144 ft-lbs torque) - an aftermarket 4-2-1 header, a 2.5 " Borla exhaust, a custom cold air intake, and a custom JWT ECU - the car still isn't all that fast. Don't get me wrong, it's "QUICK" but nothing like the B13 SE-R w/ SR20VE motor swap I had before. That car ran mid 13's in the 1/4 mile, this one I'd be happy to run high 14's. It's the WEIGHT - however one positive aspect of that is this is by FAR the smoothest and nicest riding SR20 powered vehicle I've ever had, and I've had over a dozen. All that extra sound deadening and ride-smoothing suspension makes a HUGE difference in ride quality, but you pay for it with slower acceleration.
Some Strengths & Weaknesses of the P11 G20:

(Infiniti stock/promotional photo of the '02 G20 Sport model)
So I have officially been a G20 owner for over six months now, and I have really gotten to know the car inside and out, just as I did with all my prior SR20 powered cars. I admit I never actually expected to find a G20 in such good condition *AND* w/ manual transmission, that I had sort of given up. Given up just like I have in trying to find a clean 1993 Nissan NX2000 T-Tops, because they're all either junked, modified to death, or destroyed. Every month, every week, hell - every DAY that goes by, these amazing cars go to the death yards and are crushed. Had I been older in 1996, I could have found any type w/ any combination of options I wanted. But alas, I wasn't even driving yet when these cars were fresh & new.
The 2002 G20t manual transmission, the car's final year of production, is the model I wanted the most. It has the best interior, upgraded styling, and certain things were tweaked for the better. The interior in my opinion is simple perfection:
 (Infiniti stock/promotion photo of the interior of a '02 Infiniti G20 Sport)
For the 2002 "Sport" model, Infiniti introduced a better looking front grille, completely changed the interior by re-doing the leather seats and inner door trim to look "less 90's" and added white face gauges. You can view the 2002 Infiniti G20 official press release by clicking
HERE. I couldn't find any 2002 Sport models for sale except for those with an automatic transmission here or there. I thought about purchasing one and then doing a manual transmission conversion, but the cost, time, and practicality just wasn't worth it. It would be easier just to swap over the upgraded parts to my earlier model. So I'm still looking for a 2002 Sport donor car to do so.
My 2000 Infiniti G20t modifications:
Motor:SR20VE motor swap
SR16VE N1 camshafts
Custom cold-air intakeeBay 4-2-1 header
G-Spec lightweight water pump pulley
JWT ECU (tuned for 91+ octane fuel, Nissan Maxima MAF) 333cc fuel injectors
Borla 2.5" cat-back exhaust
Walbro 255LPH fuel pump
MSD 8969 window switch (controls VVL activation)
Nismo 1.3 bar radiator cap
OBDLink MX Bluetooth scan tool
Transmission:
5-speed manual w/ viscous limited slip differential
Fidanza lightweight flywheel
OEM clutch
Suspension:
TEIN adjustable coilovers
Front strut tower brace
Rear strut tower brace
MOOG front sway bar bushings & end links
Brakes:
Fronts: Power Stop cross drilled/slotted rotors w/ Z26 carbon pads
Rears: Cross drilled/slotted rotors w/ OEM pads
Tires:
New 205/50/15 Nitto Neo Gen tires (good for the track)
Cosmetic:
JDM Primera headlights
JDM Primera front corner lights
JDM Primera clear side markers
JDM Primera white-face gauge cluster
JDM Primera grille/trunk badging
Sylvania Silver Star headlight bulbs
'02 Sport grille
'02 Sport inner door sills
AVS sunroof deflector
I
replaced all the broken parts when I first got the vehicle (it needed a
new wheel, all new struts, new brakes, tie rods, a new windshield etc.)
I took care of those things and now am starting to modify it more for
power. The very next performance modifications should definitely be the
N1 cams paired with Supertech valve springs - this setup can increase
power output in this motor a good 25-30 WHP - but they are are not
cheap. With the cams and springs upgrade, I would expect this motor to
make around 195-200WHP instead of the 175~ish it's probably making
now. And when weight is a factor, every extra HP you can free up makes a
difference - besides gutting the interior :) Other potential
modifications down the line are lightweight pulleys (crank & water
pump) - a better header design (4-1 designs make more power over
current/cheaper 4-2-1 design) - and upgraded throttle bodies.
JDM clear side-markers:
These are not a direct fit, you either need to rewire the new pigtails or modify the inner plastic to fit flush in US models. These give the G20 a much cleaner look than the murky orange colored ones. They can be purchased online for as little as $25: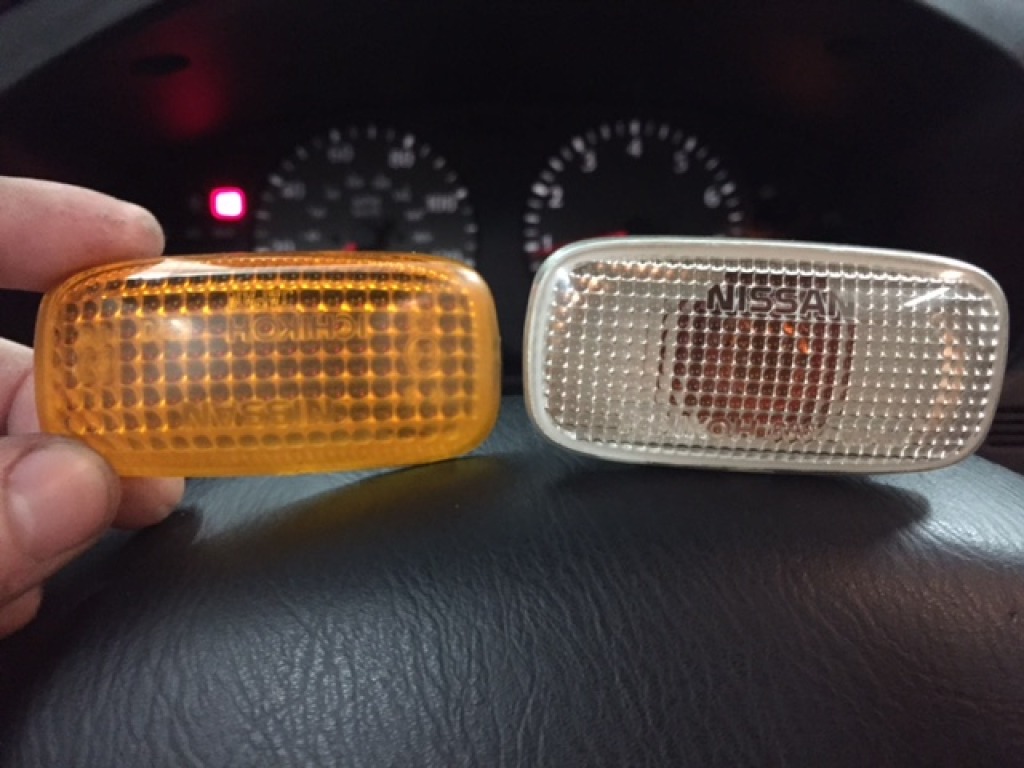
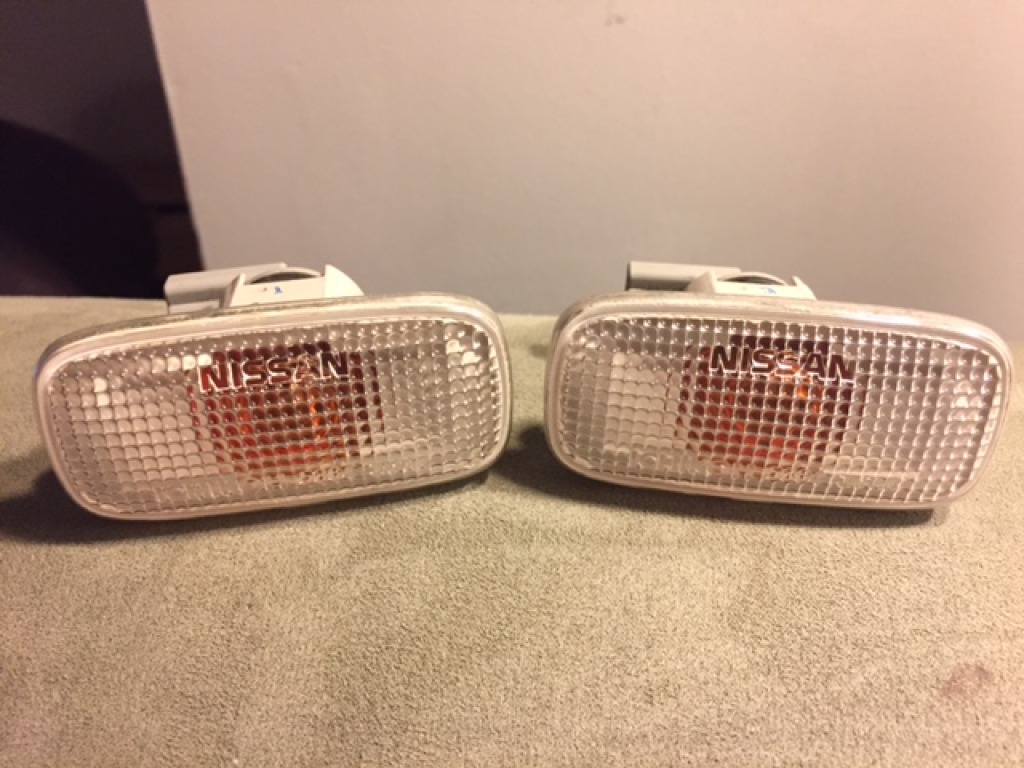
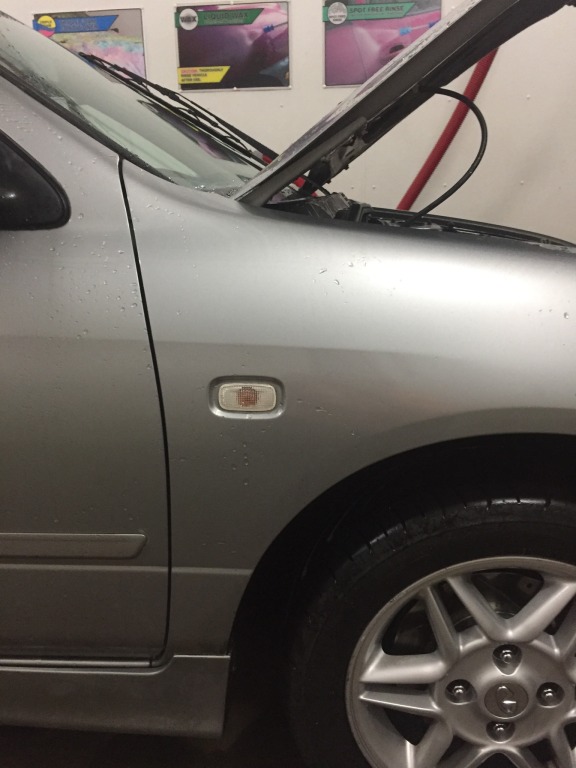
(Left to right: a comparison of the original side marker and clear marker, the new JDM clear markers, and one installed on the car)
The "Cold Weather Package" Modification:
The interior of my G20t is all black leather, which looks great - but is not always great in extreme temperatures. In the summer they can get too hot, in the winter they can be freezing cold. While we can't do much about the summer, we can do something about the winter. The '99-02 G20 had a factory option from Infiniti known as the "cold weather package" - which was really just heated front seats and heated side view mirrors. All G20's have the location where the switches are, but if you didn't get the "cold weather package" there are just plastic squares where the switches would have been.
This is another reason why the P11 G20 is so much heavier than the other SR20 powered cars- all of these options - but in the spirit of the "what the hell" effect in human psychology I decided to do it anyway. I see no reason to bother with heating the mirrors as I've never needed that in any vehicle before, so I'm just going to do the heated seats. For this you need three things:
1) The toggle switches
2) The wiring
3) The heating element
To get these items, rather than spend a fortune directly at the Infiniti dealer, just go to one of your local pull yards and look for any 1999~ish to 2005 Nissan or Infinitis with heated seats. The heated seat switches in the P11 G20 are actually the same in all Nissan & Infiniti models of similar years - in fact, the switches I procured in the photo below came from a 2002 Nissan Pathfinder! So for a few dollars at the pull yard, they were mine. Be sure to get as much of the wiring as possible:
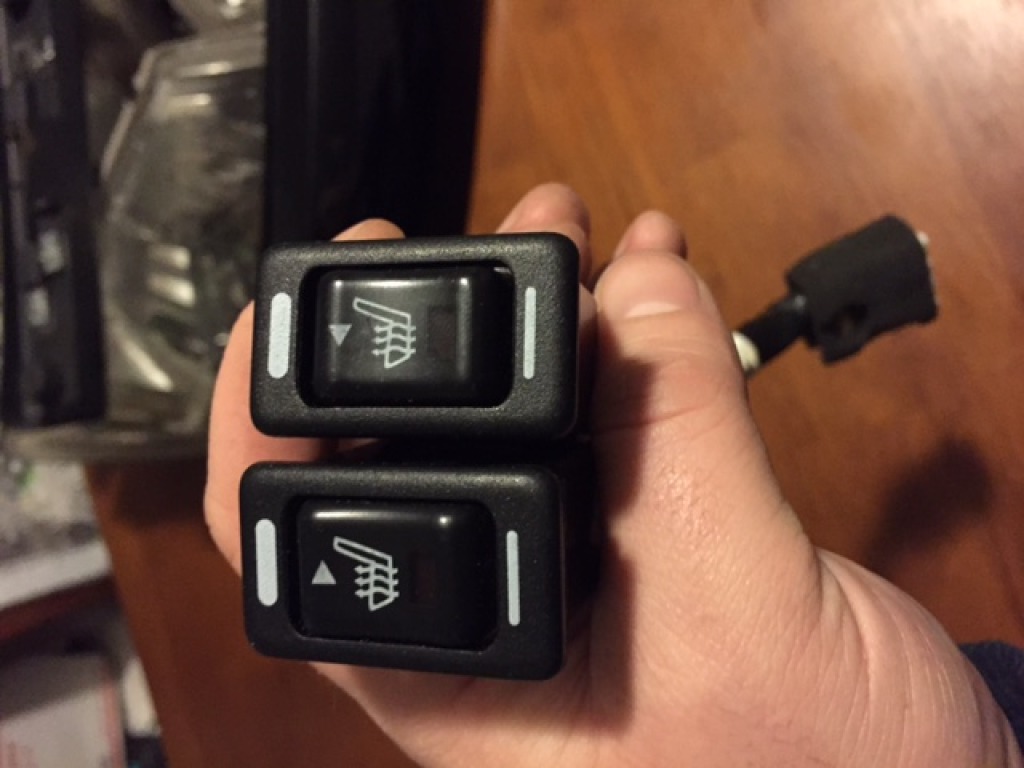
(Heated seat switches from a '02 Nissan Pathfinder, exactly the same as the P11 G20)
Now the harder part is locating the heated seat elements. They are harder to find as some of the larger Nissan/Infiniti SUV elements are too large for the smaller G20 seats. So your best bet is to find the heated seat element from another actual G20. I am still in the process of doing that, so more on that later. :)
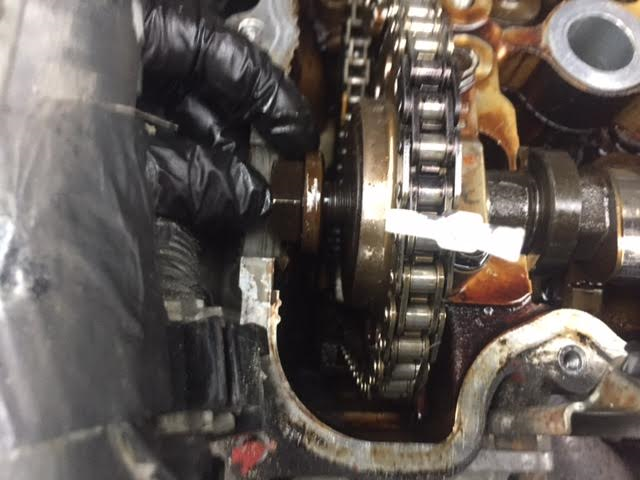
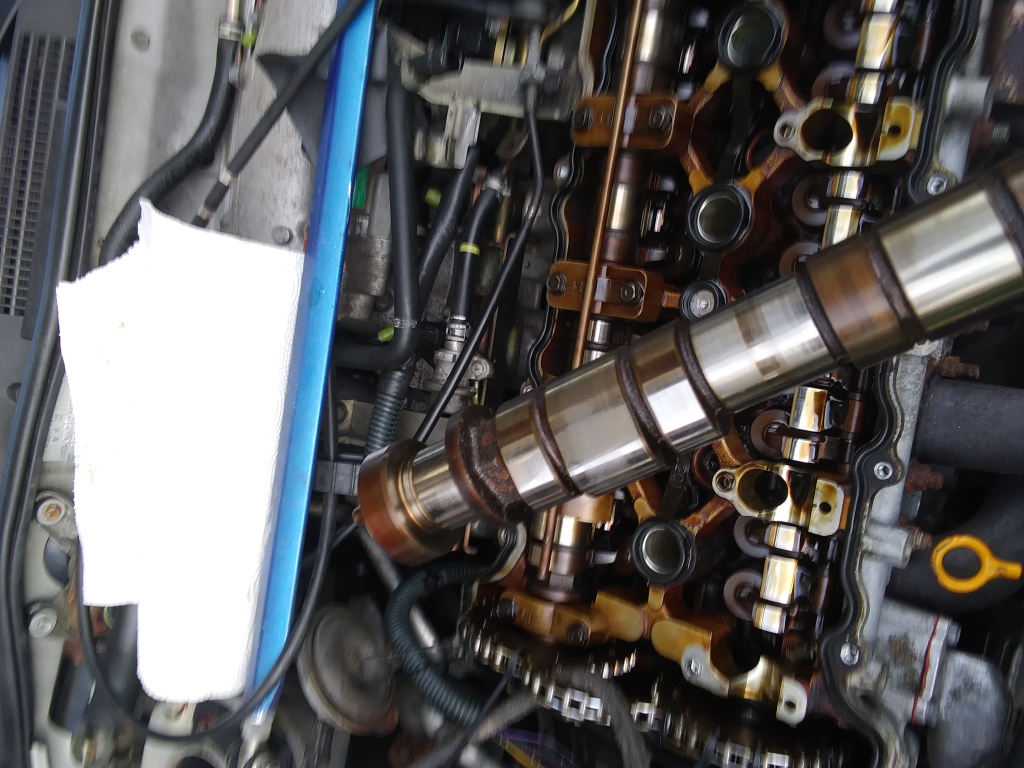
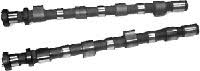
THE SR16VE N1 CAM INSTALLATION!!
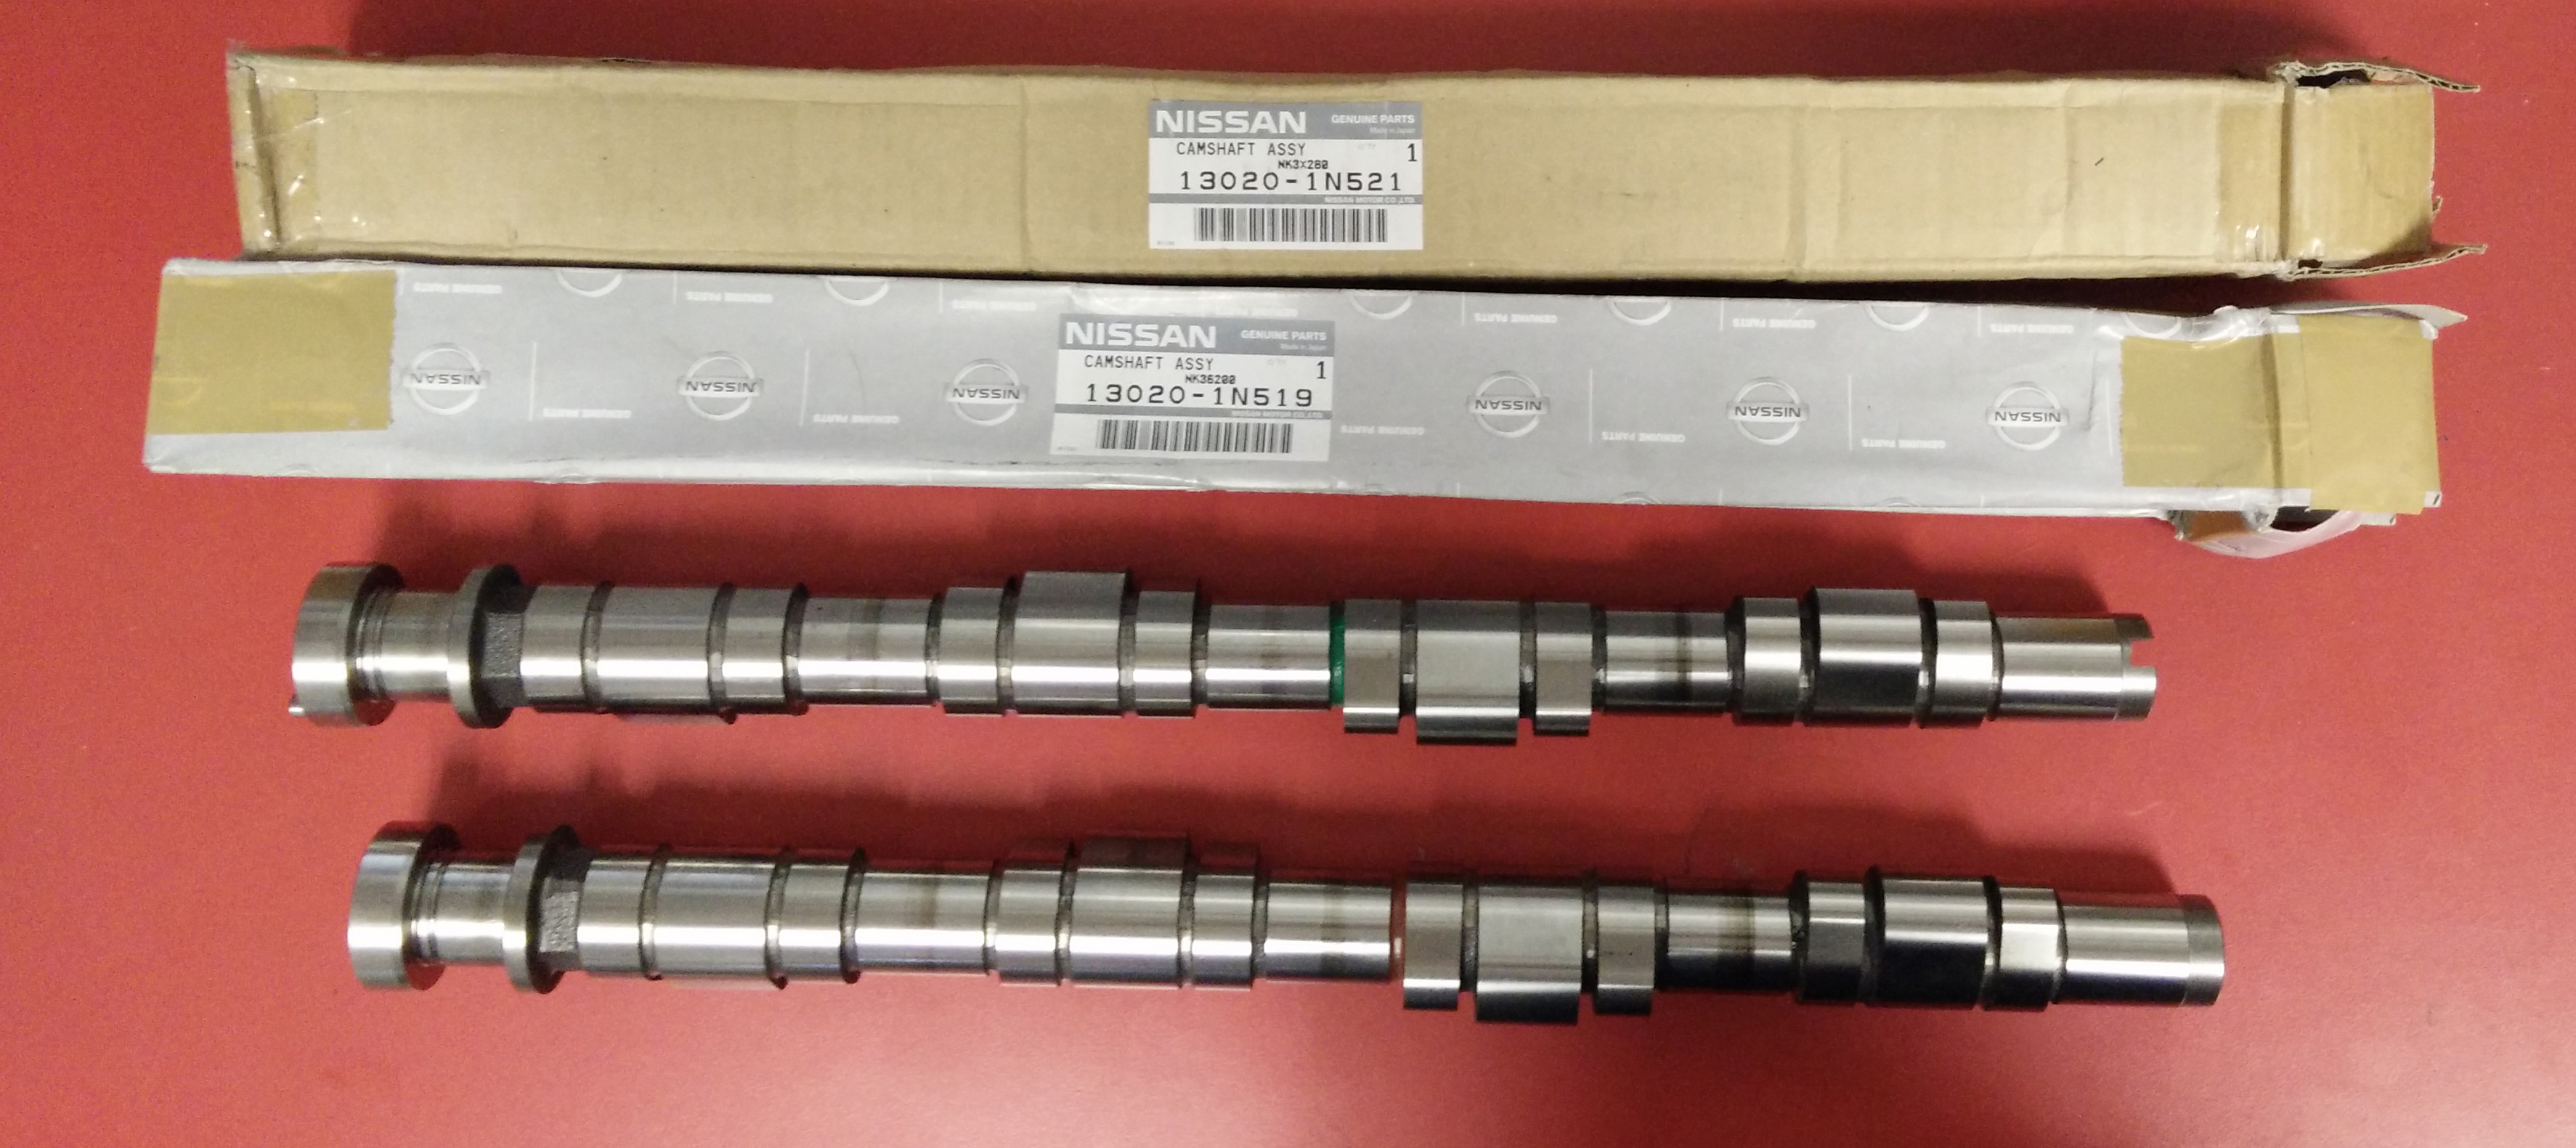
SOOOO.... the N1 camshafts (above) have been installed in the G20t!!
..with a couple minor hiccups as usual. Plenty of photos and detailed information to come. Overall, installing camshafts in the SR20VE motor was very similar to installing them in the SR20DE motor, except a few minor details (hint: it's a little bit more difficult). So far I can tell you guys that I am LOVING the extra power and bigger/fatter sound of the cams engaging. I am also experimenting with the MSD window switch by changing the RPM at which VVL engages at. At first it seemed 5200RPM was the best, but then it appeared as if 5600RPM, to as high as 5800RPM was even better. The only way to truly determine "the sweet spot" is to take the vehicle to a dyno, as every motor is different depending on other modifications.
I went on the SR20 Facebook forum and asked others SE-R owners who have installed N1 cams in their SR20VE motors what the optimal RPM is to set the VVL crossover was. I was shocked to receive responses of anywhere from 4600RPM to 6200RPM! So who knows. Will find out soon.
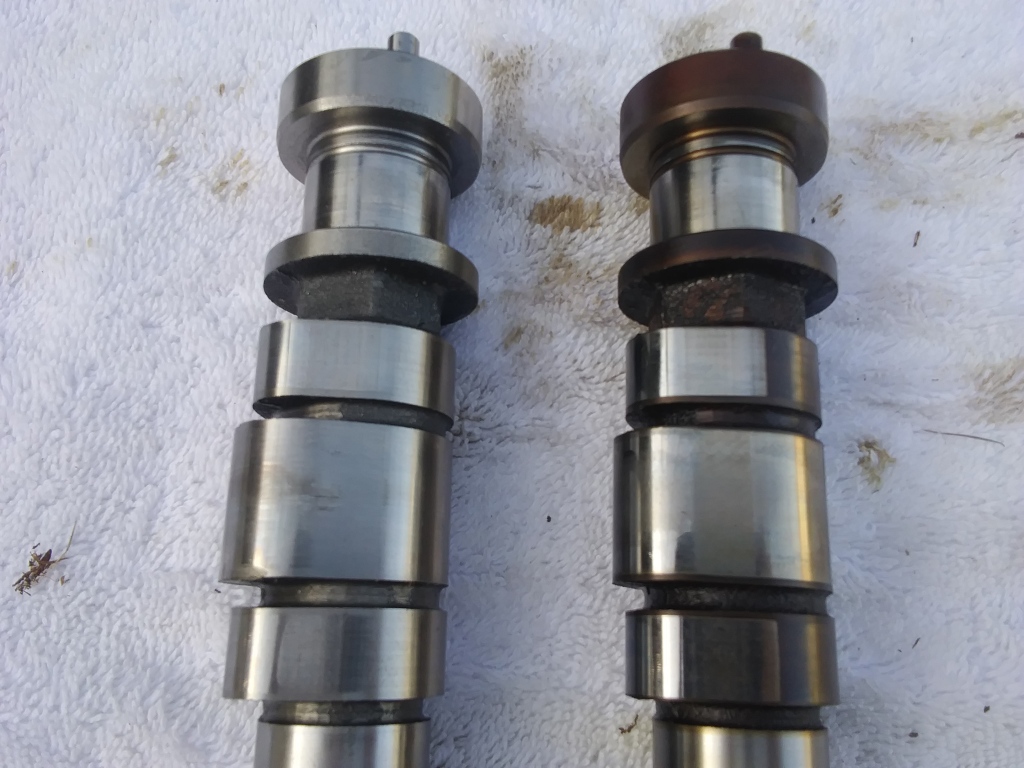
The N1 cam (left) vs the OEM cam (right). Notice how much larger the biggest lobes are on the left cam (even the smaller lobes are noticeably different).
The 1998 Nissan 200SX SE-R: Last of the TRUE SE-R's
Table of Contents from here and below:
A) Overview
B) Mitch Piper roll cage
C) Future goals
D) Hotshot Header install & notes
E) Semi-cold air intake
F) 1997 bumper conversion
G) Manzo front strut tower brace
H) F1 Motorsports rear strut tower brace
I) Replacing the clutch cable
J) JWT S3 camshafts tutorial & install
K) "eBay" header comparison
L) Stromung cat-back exhaust
M) NX2000 brake upgrade (AD22VF)
N) Replacing the rear brake pads
O) Stainless steel brake lines
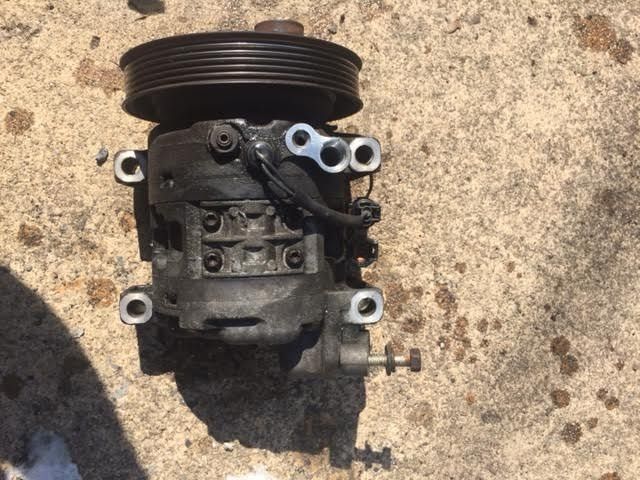
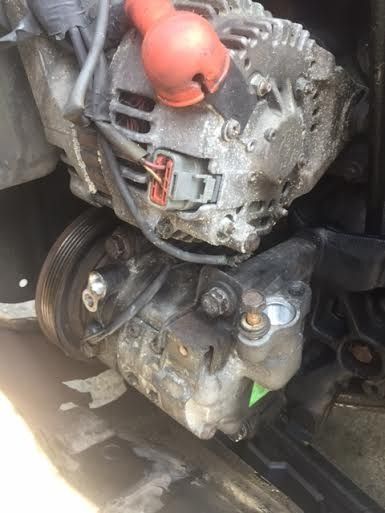
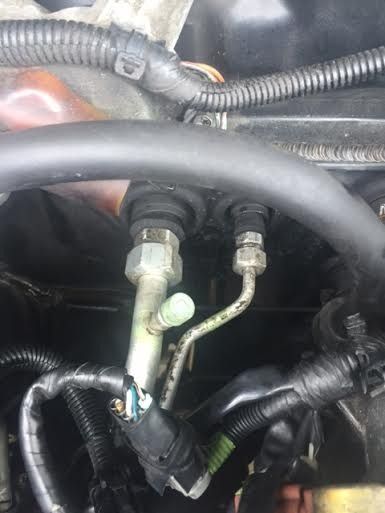
P) Re-installing A/C
Q) Installing a new clutch in the '98 200SX SE-R
R) ES suspension shifter bushing install & notes
S) Waxing the SE-R
T) The SR20VE motor & more
Jordan White's SR20VE/SR20DE Mini-SiteAfter a weekend of hanging out with my brother and riding around in his 1993 MR2 turbo in July, I decided that boost was the way to go. I sold the SR20VE motor, transmission and shell of my 1992 Sentra SE-R. I still dearly love the SR20VE but in terms of cost effectiveness and power, forced induction makes more sense. Staying naturally aspirated, I had hit a power "wall" with the SR20VE. That motor was an NA beast with almost every modification and there wasn't much more to do to extract additional power. The car, with moderate weight reduction, ran consistent low 13's in the 1/4 mile on regular street tires. I'm pretty confident with slicks it could have been in the 12's....but anyways, a midst many changes in my personal life in the late summer and fall of 2014, I decided to get a '98 200SX SE-R for my next project.
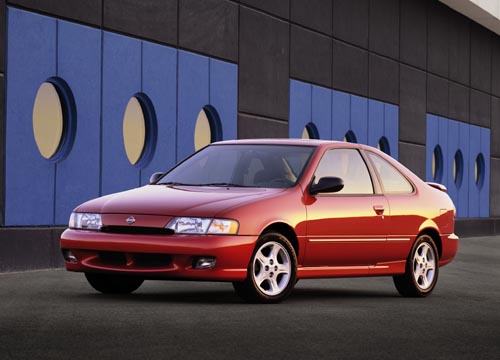
(Stock photo of a 1998 200SX SE-R from Nissan)
Nissan 200SX SE-R (B14 chassis) overview:
Debuting in 1995, the Nissan 200SX (B14 chassis code) came in two different trim levels during its run. The base SE model came with an economy based 1.6 liter 115HP 4-cylinder, known as the GA16DE, with rear drum brakes, smaller wheels and conservative styling. The second was the SE-R model, which included the infamous 2.0 liter 140HP 4-cylinder SR20DE, quite similar to the SR20 standard in the 1991-1994 Sentra SE-R except for some minor changes (the benefits and disadvantages of those changes are still hotly debated in the SE-R community to this day!)
The SE-R model came standard with a viscous limited slip differential transmission, a leather wrapped steering wheel, 4-wheel disc brakes, more aggressive styling and other upgrades. The 200SX became controversial due to the
state of California banning the sale of them within it's borders in 1997 due to
emissions concerns. Nissan responded the following year by putting even more
emissions related components on the vehicle; and perhaps to offset for extra
costs"deleted" the previous limited slip differential (LSD) equipped
transmission that had been standard on all USDM Sentra/200sx SE-R's since 1991.
Now, if you're going to race a FWD vehicle on the track, LSD is basically a
must. Luckily for owners of the 1998 models this is easily remedied by swapping
in the LSD transmission from a 2000-2001 Sentra SE (which also came with the
SR20 motor although in the B15 code chassis) as the B15 transmission is stronger. You can also swap in any 91-97 SR20 powered car 5-speed transmission for the LSD.

(Original Nissan magazine ad)
- Motor: As I eluded to above, Nissan claims the horsepower &
torque stayed the same for all 1991-1999 SR20DE powered vehicles, but it's clear to
most that the 200SX SE-R does not have the same power as the original Sentra SE-R, at
least from the factory. Many blame the newer intake manifold design of the post
1994~ish SR20DE motors and the less aggressive intake camshaft (in fact a
popular and cheap modification is finding a used intake camshaft from a
1991-1993 Sentra SE-R and installing in the 1995-1998 200SX SE-R motor). Some
say it's more like the Sentra SE-R should have been rated closer to 150HP. Who
knows. Both motors have their merits. Neither compares to the SR20VE motor
(190HP+) in stock form, but with the right modifications, or of course turbo
charging, the can be just as powerful as it's SR20VE cousin. Also, ECU
programming is less aggressive in the 1998 models than the 1995-1997 models as
well.
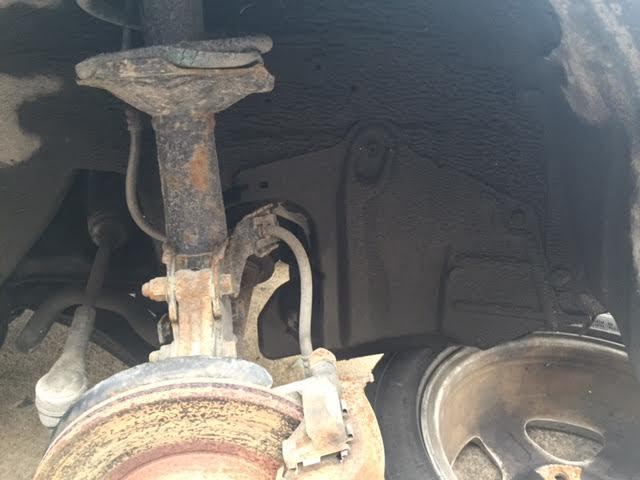
Suspension: A Homer Simpson "DOH!" is quite appropriate here for what Nissan changed in the suspension department from the B13 to the B14 chassis. While the
'91-'94 Sentra SE-R and the '95-'98 200SX SE-R share virtually the same front end suspension,
the rears are completely different. Instead of of an independent rear system like the B13, Nissan instead went with a freaking beam:
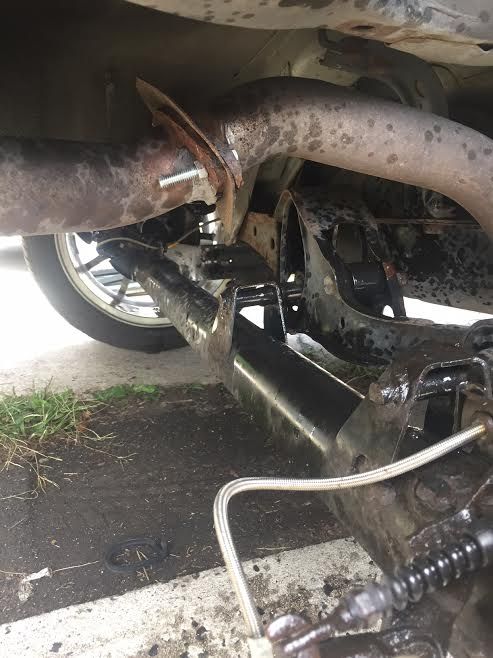
Ignore the WD40 grease spots all over the place, I was changing my brakes at the above photo was taken. So anyways, a beam linking both rear wheels is not ideal for high
performance & competitive driving. There are some methods the SE-R community
employs to improve this (having the "beam" slightly bent is one) however assuming
both vehicles are virtually identical in setups and tire selection the B13 SE-R
should out handle the B14 SE-R with equally skilled drivers. There's also a
significant lack of suspension travel which forces many to trim/cut the
bump-stops. If you install lowering springs in your B14 (and the B13 too
although it's not as bad) that decrease the chassis height by more than
around 1.6" inches you will actually experience worse handling than while riding on stock
suspension. If you see any Sentras or 200SXs driving around your town "slammed" or "stanced" - well, it may look sporty, but they will actually handle and perform worse! Especially in the
northern states with the potholes that develop from road salt and such.
Transmission: Besides LSD being omitted in the
1998 models the transmission is nearly identical, however there are some
benefits to the B14. The "5th gear popout" problem that plagued the
B13 SE-R (especially the '91-'92 models - it happened to me) was addressed by Nissan and eliminated by redesigning the 5th gear input shaft. There is some
evidence to suggest the B14 transmission/gearbox is a bit stronger than the B13
but this is also debatable.
Styling/Interior: This topic is of course very
subjective. There are many people who absolutely love the European-styling of
the B13 SE-R (similar to the BMW E36 M3) and there are those who prefer the more
modern looking B14 SE-R. Both are two door FWD "sporty" coupes and I feel both
look better or worse than the other dependent on the angle of the photo and the
condition. I have owned three B14's, a '97 200SX SE-R, a '98 Sentra SE (four
door version with the SR20DE motor) and a '99 Sentra SE-Limited. All B14 SE-Rs came standard with power windows,
power locks, cruise control, dual airbags, a CD player, and key-less
entry. Besides airbags which have an obvious safety merit, some in the SE-R community prefer
the simpler nature of the B13 SE-R, with it's roll up windows; some did
not even have cruise control, airbags only became available in the 1993+ model
year. Of course these factors were a sign of the times; in 1991 very few
vehicles except those on the higher end came equipped w/ power windows and
locks, but by 1996 all vehicles in the U.S. were required to be equipped w/
airbags in the front. All this equipment helped to make the B14 SE-R fairly
heavier than the B13 SE-R, and when you factor in a possibly weaker motor it's
easy to see why many prefer the B13 SE-R. Strangely, Nissan decided to make
both the speedometer and tachometer white in the '98 SE-R & '98-'99 Sentra
SE, but left the fuel and temperature gauges black like the previous years
models. No one really knows why.
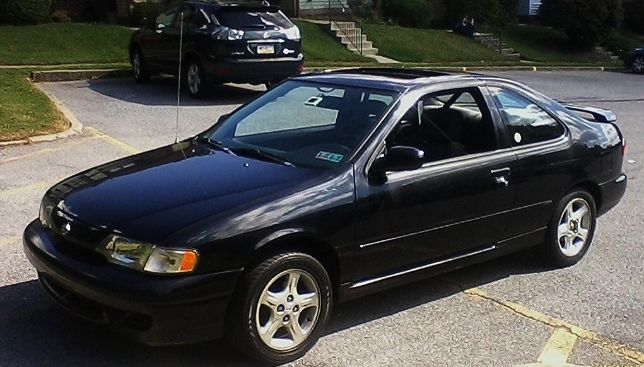
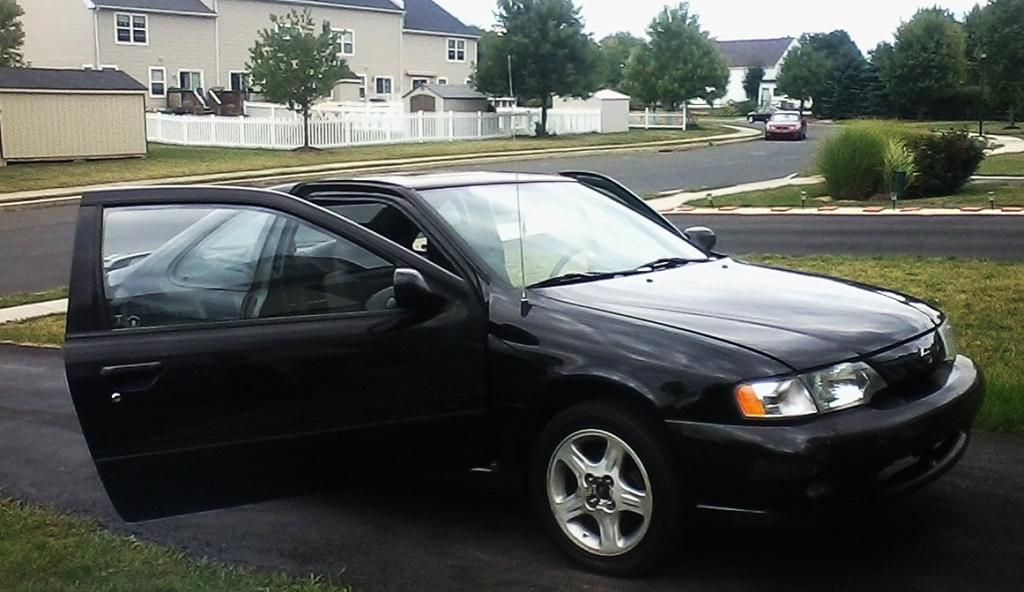
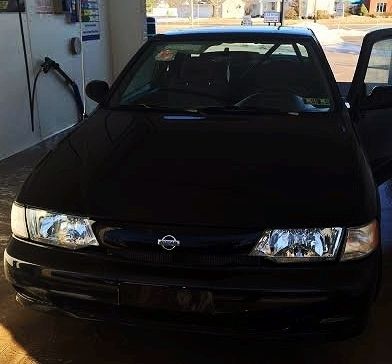
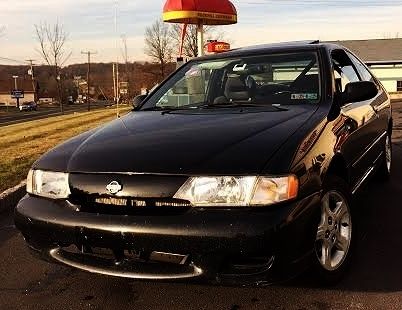
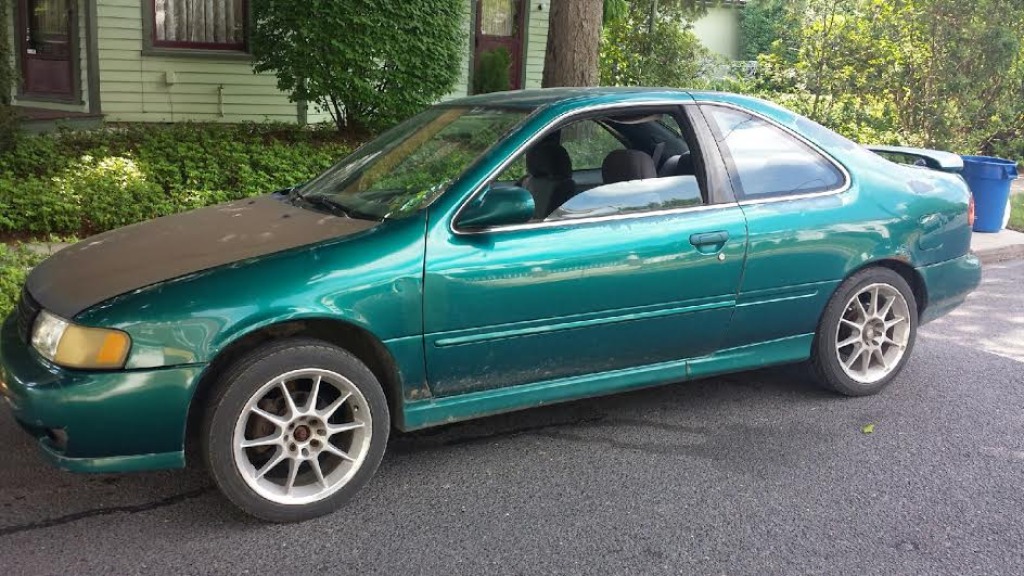
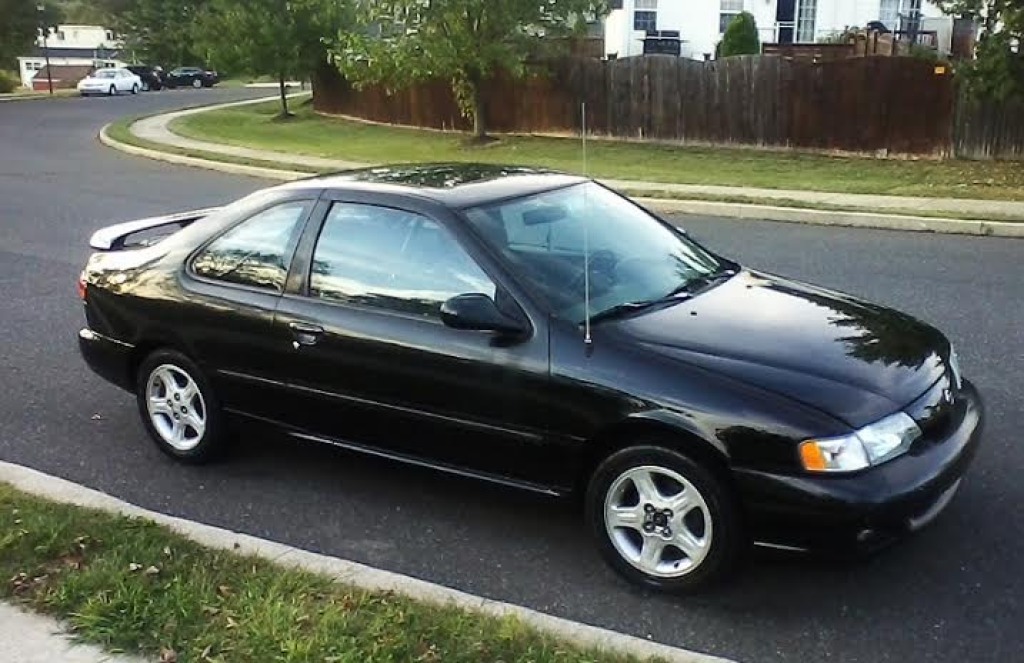
My 1998 200SX SE-R
In fall of 2014 after selling my 1992 Sentra SE-R, I picked up a near mint super-black 1998 Nissan 200SX SE-R (actual photos above) from a friend in Maryland. Thanks to Charles for driving us down! The car was in fantastic shape and has some modifications that address the issues I touched on above including parts that will be needed in the future to handle boost.

Current Modifications (as of December 2016):
Motor: JWT S3 camshafts, custom cold air intake, eBay 4-2-1 header, Stromung 2.5" cat-back exhaust, high flow catalytic converter, Infiniti G20 ECU, Walbro 255LPH fuel pump
Transmission/Driveline: 2001 B15 Sentra SE transmission & gearbox w/ LSD, Clutchmasters FX500 6-puck clutch & pressure plate, Fidanza lightweight flywheel, B&M short shifter, ES pro-thane shifter stabilizer bushing, Place Racing transmission motor mount
Suspension/Safety: MANZO front strut tower brace, F1 rear strut tower brace, Mitch Piper Motorsports custom 4-point rear roll cage
Brakes: Nissan NX2000 BABK (big ass brake kit) ceramic pads front & back, rear stainless steel brake lines
Wheels/Tires: 16" Konig wheels w/ directional & grippy 205/45/16 tires
Other: Block tapped for turbo, B13 Sentra SE-R front seats, Odyssey high-performance battery w/ Summit battery relocation kit, XScorpion distribution block, JVC CD/MP3 player w/ front & rear speakers & remote
The Mitch Pipe roll cage:
I have a custom rear roll cage installed by Mitch Piper Motorsports whom specialize in custom automotive safety components. If you are interested you can learn more about their roll cages HERE.
I will be up front about having a roll cage in a street car:
It's actually more dangerous to have a full (front & rear) roll cage in a street car than to not. Why? On the track you are wearing a helmet and in the event of a collision your head will be protected by the helmet if it hits the cage. In a street car or even daily driver you are not wearing a helmet, leaving your head susceptible to slamming into the bars in the event of an accident. The bar is made of steel, and why I only have the cage in the REAR. It's sort of a compromise between the helmet issue and not having a cage at all. The bars are no where near the driver or front passenger areas, however I am well protected in the event of being rear-ended, and semi-protected in a roll over.
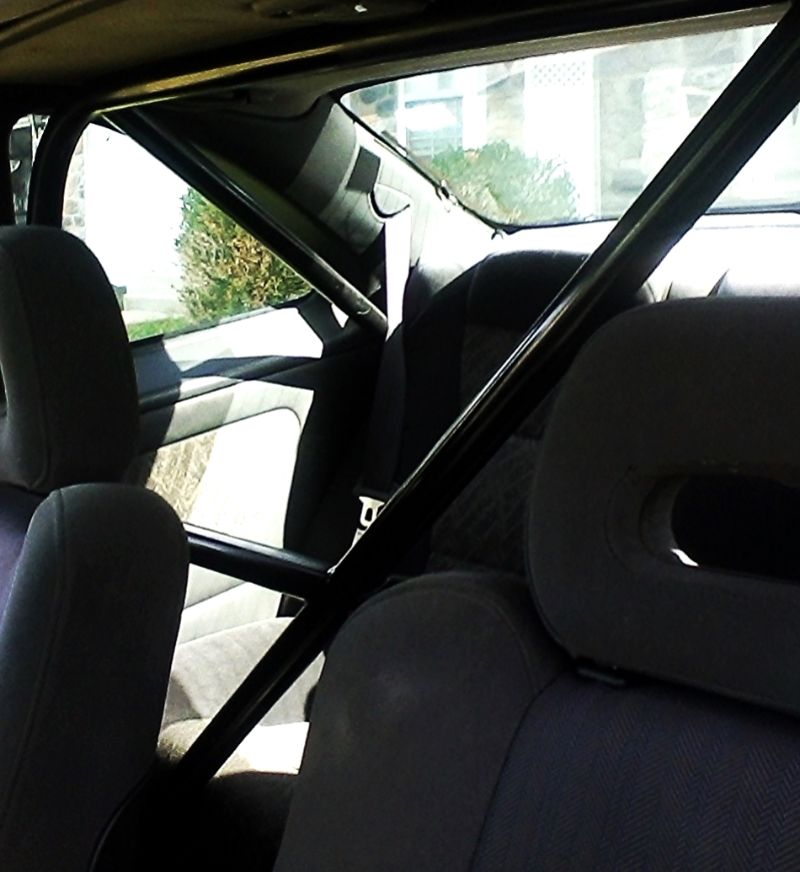
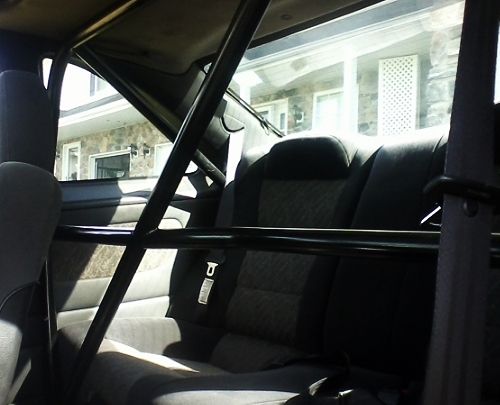

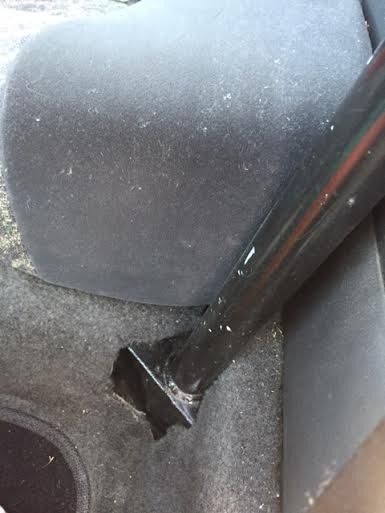
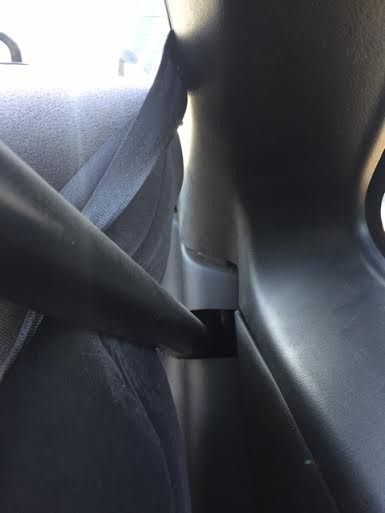
As these photos show, I have lost use of the backseats but the cage not only makes the vehicle safer in the event of a collision (assuming there are no passengers in the rear) but also increases structural rigidity. Quality roll cages are welded directly to the frame and act similar to a strut tower brace by reducing chassis flex during hard cornering.
These photos show two locations where the cage is welded to
the frame. There are a total of 4-contact points, hence this is a "4
point" cage. The photo on the left is the weld point behind the driver's seat while the right photo shows the other behind the rear seat. Notice just how much customization that went into this project. It is costly, but worth it. With this cage and aftermarket front and rear strut tower bars the vehicle handles surprisingly well for (at the moment) sitting on OEM factory springs and struts.
Pricing:
One reason many people never get a cage for their vehicles, even track only vehicles (except where required) is the cost. Below is the actual receipt from Mitch Piper for the tubing, materials, and labor for just the REAR 4-point cage for my car. Typically, a full 6-point cage for front and back is TWICE this cost:
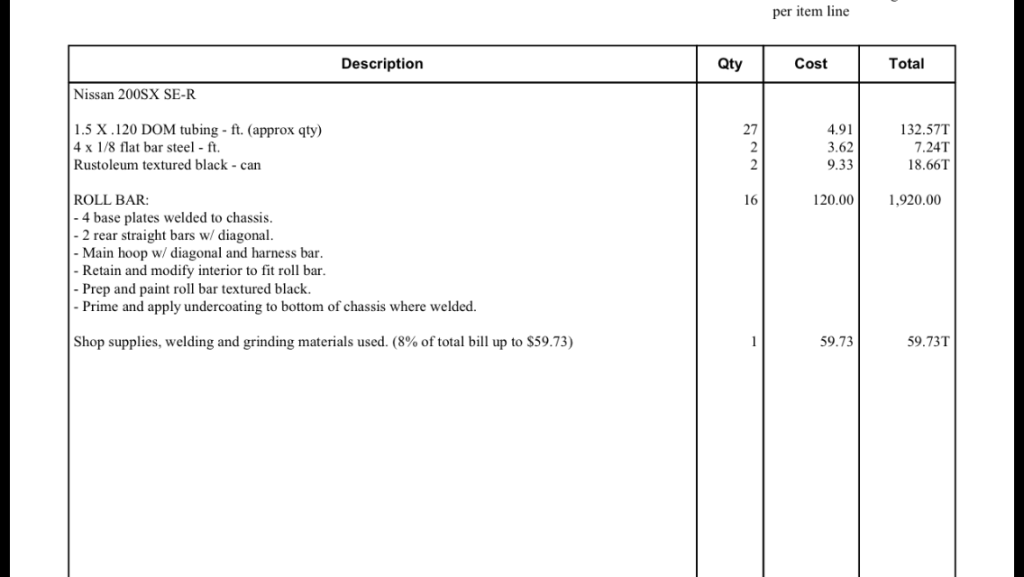
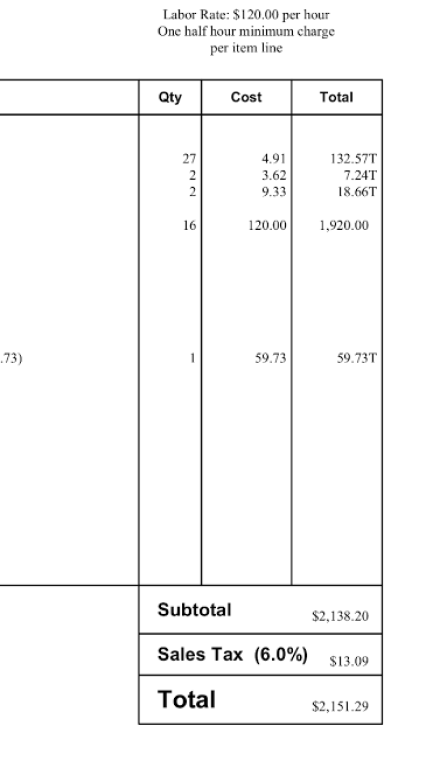
Total of $2,151.39 with tax which in some cases is more than the car is worth, especially when dealing with older vehicles.
1998 200SX SE-R
For the engine, braking, & suspension.
Modifications required: T28 turbo, exhaust manifold & down pipe, ECU tune, oil lines, outlet pipes, blow off valve, boost controller, front mount intercooler, couplers/clamps etc. The SR20DE has proven itself to be very capable in handling forced induction without internal modifications, typically up to about 350WHP. This will take some time but as I wrote above, I plan on going into uncharted territory for myself. It's a perfect candidate as all I really need is the turbo parts itself and an ECU retune. The B15 Sentra SE 5-speed transmission installed has been shown to handle up to 400WHP in it's stock form, where the original transmission typically has issues once you go higher than 200WHP. This major obstacle has already been taken care of, and it gets even better as the clutch is a Clutchmasters 6-puck unsprung disc setup (FX500). A Walbro 255LPH (liters per hour) fuel pump installed provides the extra fuel needed and there is ample space in the engine bay for all the extra turbo parts as the battery has been relocated to the trunk.
- Braking Goal: A setup that performs well and is suitable for about 80% street driving and 20% track events.
Modifications required: Braking is probably the most IMPORTANT aspect of any vehicle, let a lone a modified one. As the saying goes "speed doesn't kill: rapid deceleration does!" True! Luckily for the SE-R, improving the braking is as easy as swapping in the parts from more superior Nissans. The 98 SE-R comes with relatively small and weak brakes. A *proven* braking setup that holds up for street and occasional track use is swapping in the front brakes from the 1991-1993 NX2000. This includes the calipers, mounting brackets, rotors, and some grippy pads of your choice. The rear brakes in the '98 SE-R are even more pathetic, and a popular options is swapping in the rear setup from a 1995-1999 Nissan Maxima. That will give the relatively light '98 SE-R some SERIOUS braking power. Also, some stainless steel brake lines wouldn't hurt! We'll see.
Modifications required: Other than sticky tires, the main choice is which aftermarket coilover setup to go with. There are many choices (Tein, Koni, Ground Control, K-Sport,etc). A coilover setup is ideal due to the adjustability factor and quality. Dampening usually can be adjusted by simply turning a knob on the top of the mount, allowing you to "dial in" stiffer settings for racing conditions and then soften them for more comfortable daily driving. The height of the chassis can also be adjusted. As noted the B14 chassis suffers from minimal suspension travel therefore it's imperative the vehicle is not lowered more than 1.6" or handling can actually suffer. I have already owned a 1997 200SX SE-R with Tein 16-way adjustable coilovers and other suspension modifications and it handled FANTASTIC, especially with sticky Kuhmo tires. I already have a Manzo front strut tower bar and a F1 rear strut tower bar, and along with the rear roll cage assists in firming up and limiting chassis flex during cornering. Other types of braces such as control arm braces and fender braces are available and further tighten up the chassis (see photos below). The B14 SE-R comes equipped with front & rear sway bays however they are thin. Many options are available such as the popular Progress sway bars, Intrax (see photo below), Nismo, and Suspension techniques. I have never really messed with sway bars in my SR20 powered vehicles as I felt the stock units were adequate. If you want a well handling vehicle with a soft ride, one option is to leave the OEM struts and springs on the vehicle and install front and rear strut tower braces, front fender braces, front & rear thicker swaybars, a 4-point brace (see photo) and of course, sticky performance oriented tires. This will get the job done much better than stock, however you'll find it won't get you all the way there. So as of now we'll be shooting for Ground Control adjustable coilovers, front and rear strut tower bars (any brand will do), and Progress front and rear sway bars. If I find the handling still needs to be improved I may opt to add more of the items we discussed.


(From left to right: a B14 SE-R w/ passenger fender removed to show a "Stephan's" fender brace installed; Intrax sway bar kit; Whiteline 4-point brace)
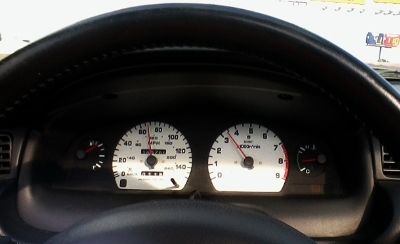
(No one really knows why Nissan added white-faces to the speedometer & tachometer of the '98 200SX SE-R and '98-99 Sentra SE yet left the fuel & temp gauges black. Also Nissan swapped in a different front end fascia for this model year which included a solid piece grille and more modern-looking crystal headlamps)
So, why do I call it this the "last of the SE-R's"?
Although there have been other Nissan models given the "SE-R" badge after the B14 chassis was retired, there's one major difference: the lack of the SR20DE motor. The '02 + Sentra SE-R came with the QR25DE motor (see more info down below) - and the '05-06 Altima SE-R had the VQ35DE motor, a large and powerful 3.5 liter V6. While these motors have their merits (especially the VQ35 which put down an impressive 275HP from the factory) they don't compare pound for pound with the original SR20. Now some 25+ years later, the SR20 is still competitive against the high horsepower Honda, Acura & Toyota motors of TODAY. My '92 VE swapped SE-R with lots of work pretty much took out anything on the road that was naturally aspirated.
Hotshot Header:
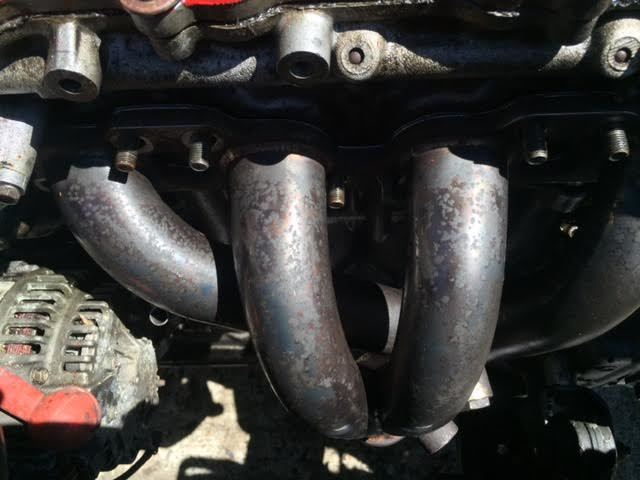
Those of you who have been modifying SR20 motors for a long time may have done a double take when you saw the word "Hotshot" - the reason being, from 1997-2004~ish, the Hotshot company developed and sold the best header for the 91-94 Sentra SE-R/95-98 200SX SE-R. I myself even had a few of them back then. Then around 2004 some foreign companies from China and Korea ripped of Hotshot's design and created their own headers with cheaper labor and materials. They undersold Hotshot on eBay and Amazon for 1/4 of the price. Since both headers made around the same power, most people just bought the cheap ones. Hotshot, a supporter of the SR20DE enthusiast community, went out of business. It is a depressing example of outsourcing cheap labor and materials to undercut the original, especially since these companies completely stole Hotshot's design. Hotshot's header was more expensive because of better materials and that they spent nearly a year dyno testing to give us the best product possible that made the most power. Hotshot eventually did file suits against these companies but I am unsure of the result. Anyways, although my plan for the car includes forced induction, a friend was selling the now-extinct 4-2-1 header for a few dollars and I picked it up. It may not be the prettiest thing as it's probably a decade old and it has some issues and rust here and there, but these have been dyno proven to increase peak WHP by 10-14HP on an SR20DE especially when used in conjunction with other modifications. Of course, this header is NOT compatible with a turbo exhaust manifold but I decided to slap it on the other day at a friend's garage for the heck of it. Installation is not difficult; the hardest part is dealing with rusted and/or breaking bolts at the catalytic converter to install the down pipe and fitting the primary onto the engine block with various things in the way (radiator fans, wires, oil dipstick etc.) You can definitely feel a some extra power higher in the rev range.
(The Hotshot header primaries. Notice the fitting for the 02 sensor on the bottom right. It may not be pretty but it gets the job done)
Semi-cold air intake:
Having an small section of extra 45 degree 3" intake piping laying around, I decided to add it to my current warm intake setup. In my opinion this makes it a "semi" cold air intake. It does certainly add some power and a cool sound, but doesn't sit in lower driver-side fender well so there isn't the dreaded potential hydro-lock issues. It may be the best of both worlds (although a TRUE cold air intake has been shown to make as much as 4-5 more peak HP on the dynos) - couple photos:

Notice the air filter is situated further from the engine bay, AND the extra piping length adds a bit of resonance. The sound is clearly noticeably and my "butt dyno" says about 2-3 peak HP.
The 1995-1997 200SX bumper conversion:
The '98 SE-R bumper is known as the "fish mouth" look because of the resemblance to, well, a fish. Some '98-99 SE-R owners actually go out of their way to swap in the '95-97 bumper because they like it better. Since styling is always subjective, see what you think:
MANZO front strut tower brace: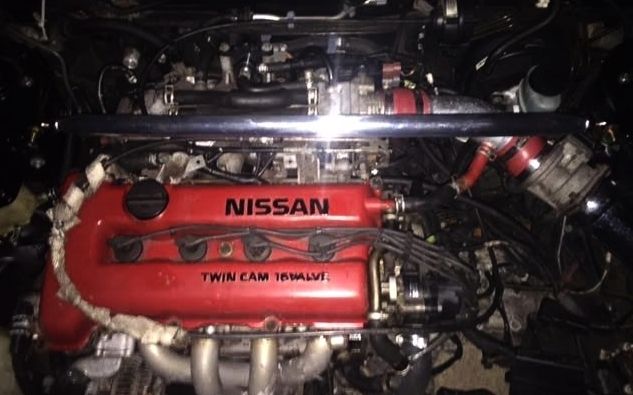
I picked up this up on cheap on eBay. A strut tower brace is beneficial by inhibiting chassis flex during cornering. It also shines and looks nice in the engine bay :) Installation is simple but here is a brief description. You need to:
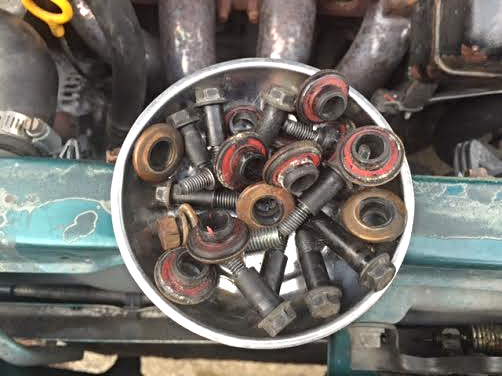
1) Loosen and remove the 6 strut tower nuts (3 on each side which are usually 13 or 14mm)
2) Place the mounting ends of the brace on the bolts on each side. Tighten the nuts back down in an even pattern.
3) Most strut braces can be lengthened or shortened by turning the large in-line nuts on either side for a proper fit. You can also tilt the bar forward so it does not make contact with the any of the emissions equipment up top (especially in '98-'99 SR20DE motors, prior '91-97 motors did not have this issue).
4) Once you have the bar positioned as desired, tighten up everything and go for a ride! You will feel more firmness especially on faster turns. The strut tower brace is a great and cheap modification, and paired with a rear strut brace will make the B14 SE-R handle MUCH better. The braces typically cost around $30 each on eBay, so it's a very inexpensive but fantastic modification!
The chrome plated strut brace really shines in the sun:
 F1 Motorsports rear strut tower brace:
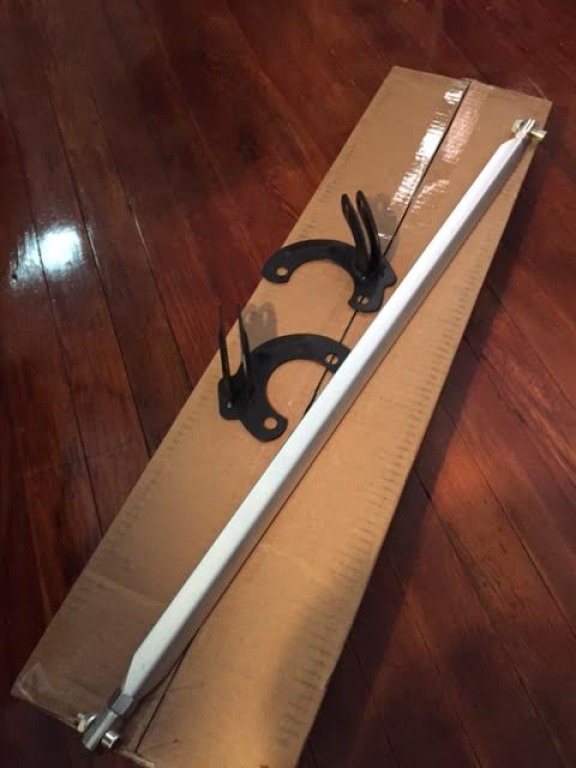
(The rear bar comes in three pieces; you must attach both end links to the strut towers while placing the bar in place to get a proper fit)
In addition to the front bar most usually get a rear brace, however they are a bit harder to come by (especially for the B13 SE-R chassis). The bar bolts onto the strut towers as it does in the front. You need to remove the two bolts on each side, put it on and tighten it down. On the B14 SE-R you can simply cut two small holes in the trunk carpeting so the bar passes through for a cleaner look (although I haven't yet). Here is the new rear brace installed:
Driving impressions: having both front and rear strut tower braces along with roll cage allows the car to rotate quite well around corners, even with the OEM struts and springs. More suspension mods to come!
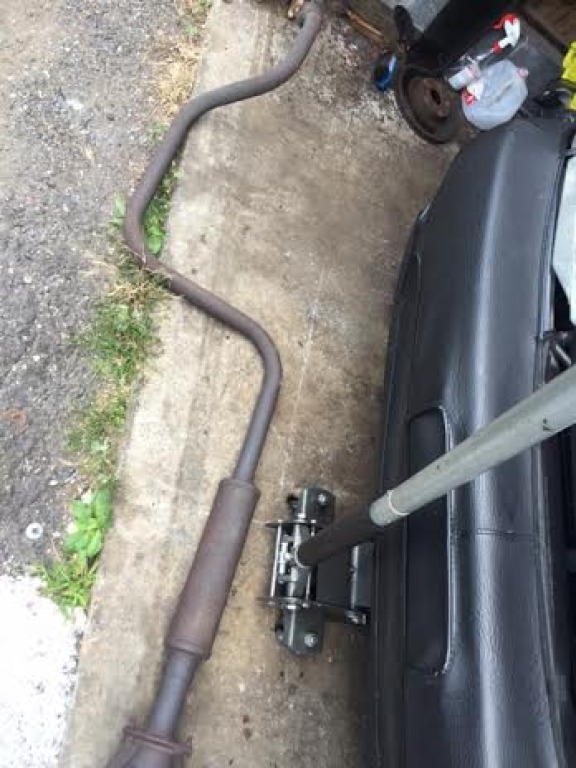
Replacing the Clutch Cable:
It finally happened: at 196,000 miles my clutch cable SNAPPED in my '98 SE-R while I was pulling into a convenience store. The clutch cable in all 1991-1998 SR20DE motors with manual transmissions (obviously) is NOTORIOUSLY known to break. It's one of the weak spots in these vehicles (Nissan would later rectify the situation by switching to a more reliable, hydraulic setup in the 2000-2001 Sentra SE).
This was actually the THIRD clutch cable to break on me! It happened once in my '98 Sentra SE, again in my '92 Sentra SE-R, and now the '98 SE-R, all three while I was driving somewhere, leaving me STRANDED.
Luckily, knowing how lousy these clutch cables are and also getting a feeling the current cable was on it's last legs, I had been carrying a spare clutch cable in the trunk. Since I also carry my tools with me I was able to replace the cable with the assistance of a friend in the parking lot. I am VERY thankful to the Lord above the cable did not snap at a stop light in heavy traffic!
So what's the problem?
Over time (and as the miles rack up) the area where the cable bends at an angle and thus attaches to the pedal begins to wear and eventually just snaps (in above photo the pedal side is at the bottom). Rarely does the cable break in the engine bay or at the clutch arm on the transmission shaft.
WARNING SIGNS: your cable may be in the danger zone when it begins to "creak" or "groan" whenever the clutch is depressed, and/or it takes greater physical effort to depress the pedal. If you are experiencing either of these issues, or if you have the original cable still w/ high miles (as some have been known to break without warning) **YOU MAY BE IN THE DANGER ZONE** - Once the cable snaps the pedal sticks to the floor, you cannot shift, and you will be left STRANDED, so your best bet is to be prepared and keep a spare cable in the trunk! RockAuto.com sells new cables ranging from $8 to $36 depending on the brand & quality. IT IS WELL WORTH IT TO GET A SPARE, at the very least, for the peace of mind.
(My actual clutch cable that snapped; notice it's on the pedal side)
Installing a new clutch cable:
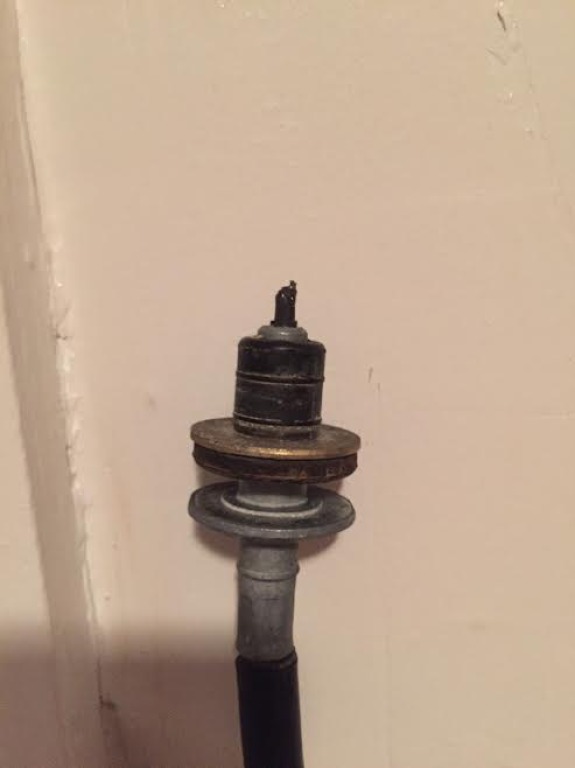
First you need to remove the broken cable and pull it out, and do the same inside the car down at the clutch pedal. You will need open ended 10mm & 12mm wrenches and probably a socket set. On the transmission side, loosen the 10mm nut holding it and then loosen & spin the adjustment "wheel" to remove it from the clutch arm, as shown below, it will come apart allowing you to pull it out from back by the firewall (there may be two 10 or 12mm bolts holding the mid-section of the cable near the driver's side of the firewall, depending on your model).


(Above left: the cable still attached, above right: the cable removed)
The harder part is threading the new cable through the firewall & attaching the pedal end of the cable inside the cabin, mostly because it's a tight space and dark. You'll probably need to slide the driver's seat fully towards the rear and use a flashlight. Lay down under the dash to find the point on the pedal where the small, rectangular end of the new cable attaches. While it's not rocket science, it can be a real pain if you can't see what you're doing:
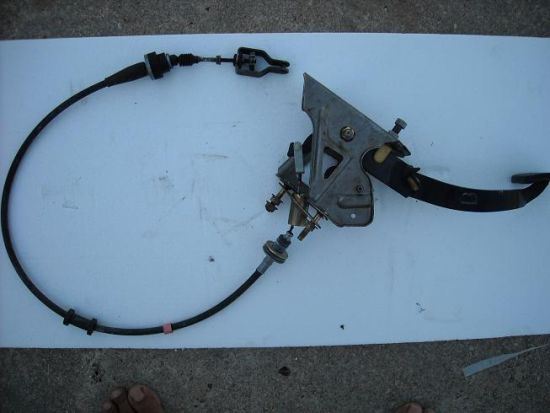
The photo above is a cross sectional of the clutch pedal assembly & cable removed from the car. You can see where the new cable attaches to the pedal.
FALL 2015 - 200SX SE-R parts car
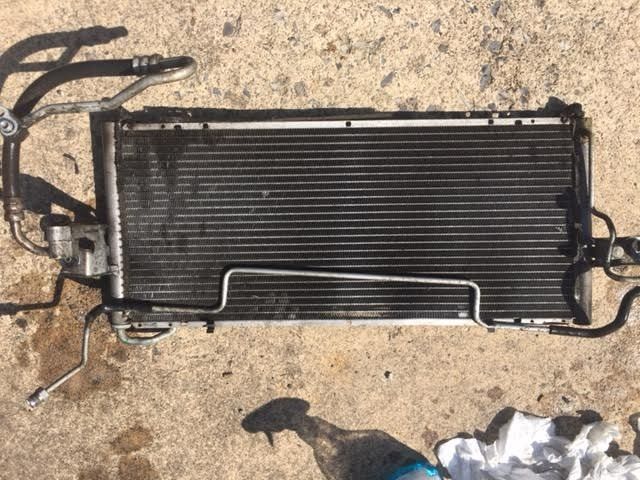
In the fall of 2015 I picked up another SR20 powered vehicle from a friend, not in the best physical shape but mechanically it was sound. It was a teal colored 1997 200SX SE-R, lightly modified and ran good except the clear-coat on the original paint was peeling and it was rusting badly. I pulled many good parts off of it including the complete A/C system, full exhaust, bigger camshafts (see below), a B&M short shifter, and more. Unfortunately, the rust was really bad.
I realized the car was just taking up space and I had no intentions of trying to get it road worthy due to the rust, so in the summer of 2016, after removing many of those goodies to install in my 98 SE-R, I let her go. Here are pics of her being towed away by her new owner (an avid SE-R road course racer who is going to use for parts). The rust was just too much to overcome unfortunately, even though the motor and transmission ran strong. Almost 210,000 miles all original!
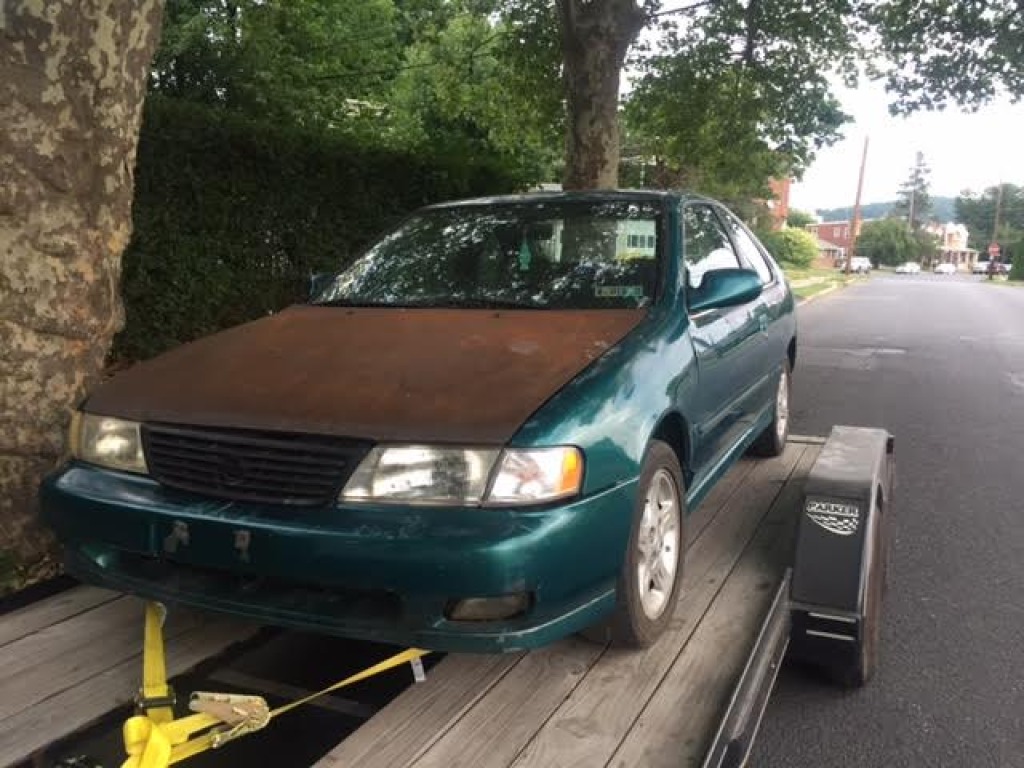
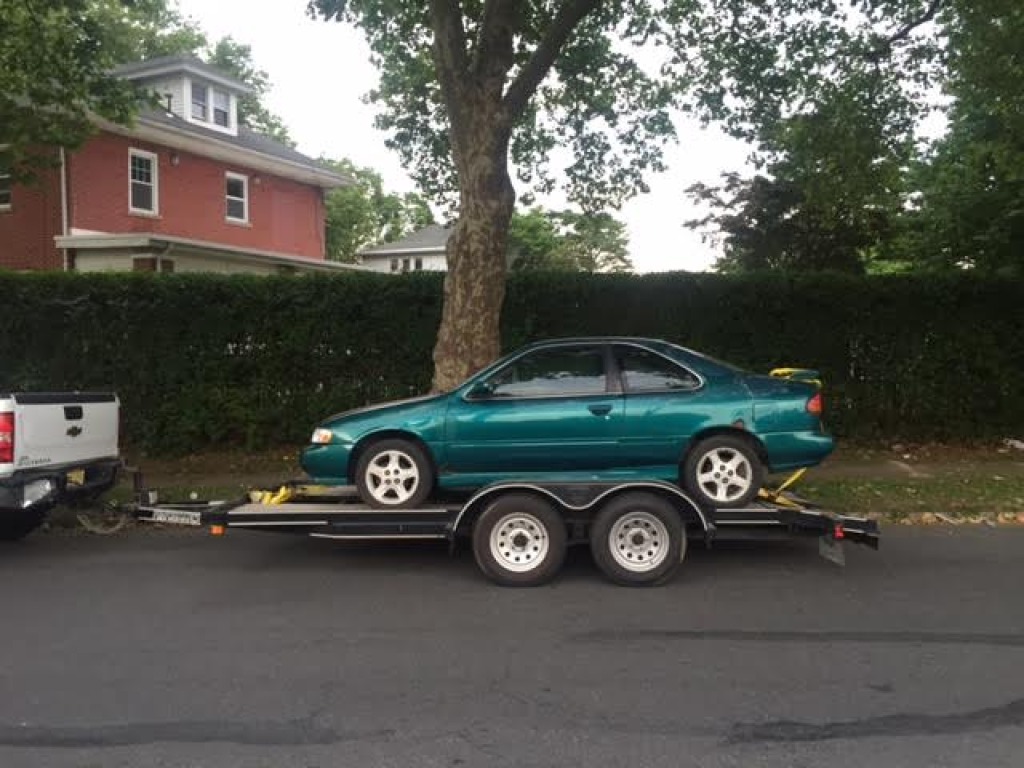 I only drove it only ONCE: the drive home immediately after I purchased it. Poor little car. RIP.
Jim Wolf Technology S3 camshafts:A long time ago, circa 1997-2001, there was 1 single modification for the SR20DE motor that was consistently making an extra 14WHP on the dyno. Those were the JWT "S3" camshafts. Here's a short article about them from the June 2000 issue of Sport Compact Car:

The chart above shows how the JWT S3 cams are a great modification for the SR20DE motor, N/A or turbo, and this is just the horsepower and torque gains over the much more aggressive 1991 cams that came in the original SR20DE motor. The gains on a 1994 and newer SR20DE motor are nearly double this! Below we will describe the removal of the OEM cams and installation of the JWT S3 cams in full detail in my 1998 SE-R. I also first purchased these NGK Iridium spark plugs to swap in during the cam installation:
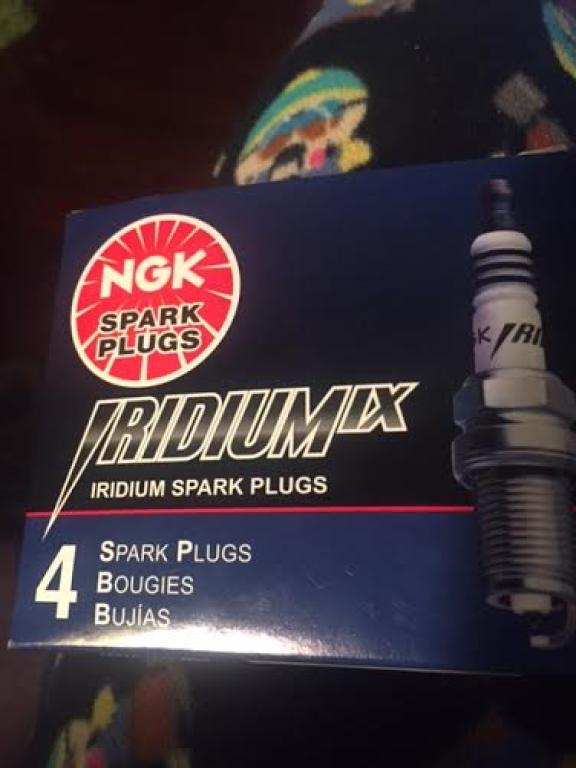

NGK Iridium BKR6EIX-11 are probably the best spark plugs for the SR20DE engine. Now onto the actual cams....
THE JORDAN WHITE SR20DE CAM SWAP PROCEDURE:
Some of this information may be redundant for those of you who are quite experienced with these motors, and truth be told, this was actually my 6th cam swap in a SR20, but I decided to photograph and document it anyway. There are some write ups on the internet on how to do this, but I found they skip steps or don't mention very important things etc. So this write up is aimed towards those who are new to the SR20DE motor and/or who are learning how to work on and upgrade their own cars. My way is my way and you may have a better way, but of course I must post this DISCLAIMER that I'm not responsible if you try any of these methods and something goes wrong. It is very easy to ruin an SR20 motor if you're not careful during a cam swap. Here's some things I've seen during cam swaps that have ruined or nearly ruined SR20 motors:
1) The motor not being at TDC (top dead center) before beginning
2) Skipping a tooth on the timing chain down at the crank; screwing up the cam timing
3) Dropping a bolt, washer, socket, etc. down into the motor
4) Trying to use a "wedge" to block the timing chain tensioner instead of removing it (more on that later)
5) Not removing or replacing the cam bearing caps in the proper way
6) Generally goofing off and not paying attention, not checking and re-checking your work
That being said, while not being especially "difficult" - a cam swap in the SR20 motor is not to be taken lightly. It's a time consuming and involved process. You are basically doing heart surgery on your motor and must exercise caution and pay full attention. Eliminate distractions the best you can and if possible, have a friend at least somewhat familiar with working on cars help you out. DON'T RUSH. Allow yourself at least twice the amount of time to complete the job. If you're working outside and it starts to get dark, STOP. Don't try to beat the sunlight. Avoid drinking too many beers as it will dull your senses (I know for some of us that's part of the fun) - but trust me, you don't want to mess anything up. While many things can go wrong, if you do it right, the results are quite rewarding :)
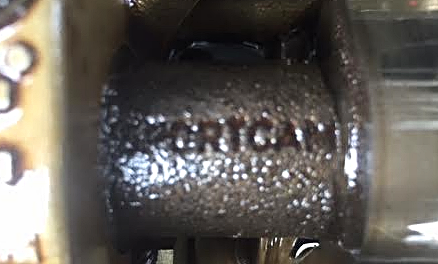
"SPORTCAM" imprinted on the JWT S3 intake cam
TOOLS & THINGS YOU WILL NEED: A jack, jack stands, wheel chocks, socket wrenches, extensions of various lengths, small swivel, pliers, 10mm, 12mm, 14mm, 16mm, 24mm, 27mm sockets. Breaker bar, torque wrench (although you can get by without one). A large 1" open ended wrench, 24mm open ended wrench, long& thin10mm open ended wrench. Flat head screwdriver, standard spark plug removal socket, at least 1 quart of fresh oil, oil filter wrench, zip ties, clean towels, RTV gasket maker sealant, a long magnet extension (just in case). Thin plastic disposable gloves, timing light gun, magnetic tray, a black or blue Sharpie marker. There are also several optional things you can do:
OPTION #1: New valve cover gasket set from Nissan parts department. It can't hurt to get it (about $34 from the parts department) however I've always been able to re-use my old gaskets; it really depends on the condition of your old one, and you won't find out until your remove the valve cover. Order at least a week in advance.
OPTION #2: Upgraded/improved timing chain tensioner & gasket. The timing chain tensioner is a simple and small device with a lock and pin mechanism that enters the block near the oil filter and places the necessary tension on the timing chain, and thus the camshafts, which ultimately drives the motor. Sometime around 1997-1998 Nissan introduced an improved design you can purchase but will cost you anywhere from $60-$100. Again, this is optional. Assuming your old tensioner was in working order, it will come out and go back in fine, and continue to function properly. However if want the better tensioner and don't mind spending the extra cash you may as well get it since you will be removing it anyway. HERE is a (ridiculously) detailed description of the process, and you can get the new improved tensioner w/ new gasket HERE from Greg at G-Spec.com.
OPTION #3: 4 fresh quarts of your favorite (preferably synthetic) oil and a filter. It's always a good idea to do an oil change when doing a cam swap. You will leak oil when removing the oil filter and timing chain tensioner anyway, but it's up to you.
OPTION #4: A set of new spark plugs. In my method you will need to remove the spark plug from the #1 cylinder anyway. With the valve cover off it's much easier to access the plugs. Since they're right there, why not? You can get a set of 4 NGK copper BKR6E's for less than $14 a set at AutoZone. Since my spark plugs have probably not been changed in many years, I got the more expensive, NGK iridium plugs, BKR6EIX-11's. They are about twice the price but "last" twice as long.
HERE'S HOW TO DO IT STEP BY STEP:
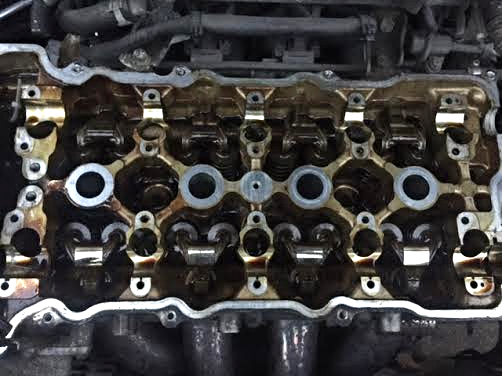
(A dirty SR20DE motor in my 1997 SE-R, about to be opened up)
2) Use pliers to open the clamps on the various hoses and
pull them away from the valve cover. There's clamps in the
hose leading to the intake, another to the canister up front and at the
PCV valve on the top left. Remove the spark plug wires from the cylinders
leave them connected to the distributor. Pull the throttle cable back
towards the firewall and get it out of the way.
3) (Note: the following step applies to the "lowport" 1994+ SR20DE motor. The 1991-1993 motor has different valve cover bolts with acorn nuts instead). Get your wrench and a 10mm socket with an extension of comfortable length for you and start breaking the valve cover bolts loose. They should break fairly easily. Break them loose one by one, going around the cover at random from side to side. Be careful not to drop any (if you lose one you can't just go to Sears Hardware and get a new one). There is washer/grommet that needs to be removed after the bolt slides out, usually with needle nose pliers. Sometimes they come up easily, sometimes you need the pliers. Get a big magnetic tray to put these all in. ALL of the valve cover bolts are identical EXCEPT the center bolt in the middle of the cover between the #2 and #3 cylinders. That bolt is longer and different so make note of it. Take your time and be patient. You will need to remove some of them by hand after they're loosened. Once you get them all you should have something like this in your tray:
4) Now before removing the cover, double check that you've removed all of the bolts and their respective washer/grommets. Some of the bolts are difficult to see and/or access because of things in the way, so either use a swivel or temporarily remove the obstructions.
5) The valve cover should pull off fairly easily and reveal the internals of the motor. Mind the gaskets and make sure you keep them in a safe place if you are not replacing them with new ones. Place the valve cover, the little hoses and the gaskets in a safe place. FROM NOW ON YOU NEED TO BE EXTRA CAREFUL handling your tools and bolt over the engine bay. The effects of a random socket falling down into the motor could be devastating. My motor above had 209,000 miles at the time the photo was taken but was well taken care of (I.E. - regular oil changes). Depending on how well your SR20DE was maintained, it may look better or worse. I was quite pleased with mine.
6) Place the white towel (lint free) over the exposed engine for now to prevent foreign objects from falling into it (you never know!) Get your breaker bar out to loosen the four lug nuts on the front passenger side wheel, then ack up the car on that side and completely remove the wheel.
BE CAREFUL.
Your car is sharp and heavy. You are soft and squishy. Use quality jack stands and wheel chocks, and NEVER get under a vehicle supported by only a scissor jack.
7) Once you've removed the wheel you will see the plastic splash shield. Hopefully yours isn't as filthy as mine was :) The shield needs to be temporarily removed to access the crank pulley. There are three 10mm bolts you need to remove to bend and pull it out of the way.
Now you will see this:
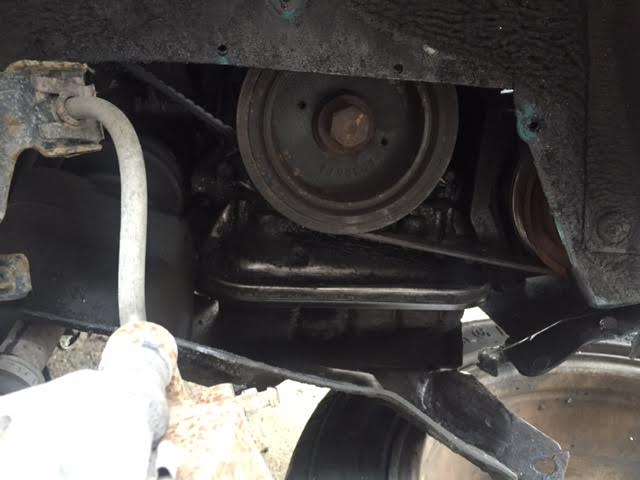
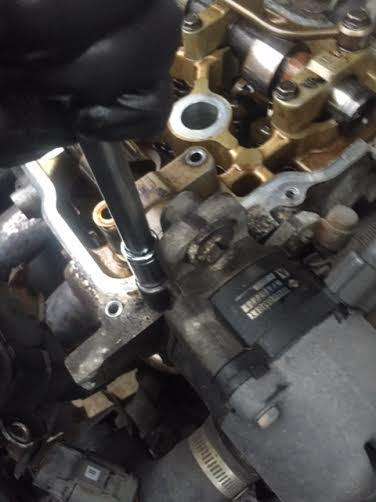
8) You are looking at the crank pulley oil pan (just below the belts). The center bolt on the crank pulley is what we're after here. We need to manually rotate the motor with our breaker bar and 27mm socket (CLOCKWISE) to get the motor to TDC (top dead center).
THIS STEP IS ABSOLUTELY CRUCIAL AND PERHAPS THE MOST IMPORTANT OF ALL. If you don't set the motor to TDC and attempt to remove the cams you will damage the valves and possibly worse. There is no room for error so pay close attention:
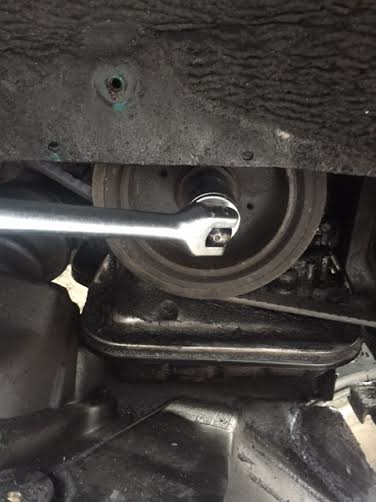
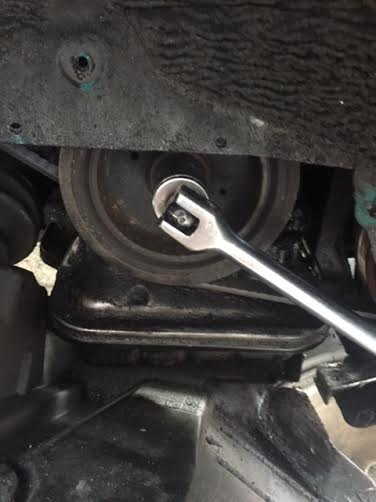
9) Place the breaker bar and 27mm socket on the crank pulley bolt (as I did above) and leave it there a moment. Remember to have to the transmission in neutral. It's not that difficult to rotate the crank but if your bar is extra long you will have to repeatedly readjust your position because you'll run out of room and hit the fenders/strut.
Before we move onto the next step, let's talk a little bit about top dead center (which ill be referred to as TDC from here on out) as it relates to the SR20DE motor. What is TDC?
If you want to know more,
THIS THREAD from the SR20-Forum is worth a quick read on TDC and camshaft timing. The official definition of TDC is the
point where a piston is just about to change from an upward to a downward stroke.
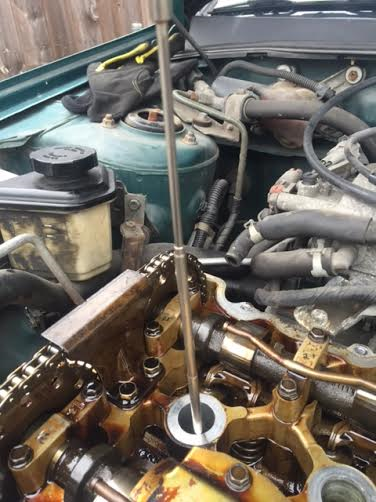
10) It's crucial you get the motor to TDC. To do so and to be
100 percent sure, do the following
: remove the spark plug from cylinder #1 using your spark plug removal socket, and place a long, thin screwdriver, or long magnet thingy (like I did) in the cylinder. Use something that is long enough that you can still grab it, obviously. See photo:
Here the spark plug in the #1 cylinder has been removed and a long "magnet thingy" has been inserted in. Why do we do this? Will get to that in a second, but first let me show you how TDC looks on the crank pulley:

THIS IS PROBABLY THE MOST IMPORTANT PART OF THE PROCEDURE:
TDC on the SR20DE is indicated by the pointer being on the SECOND MARK from the LEFT on the crank pulley as well as two other factors: the cam lobes closest to the timing chain (on your left if you're standing in front of the car looking down at the motor) are pointing AWAY f
rom the center of the motor and the cam sprocket dowel pins on the intake & exhaust cams being at 10 and 12 o'clock, respectively. That means on the intake cam (the cam closer to the firewall) the dowel pin should be at 10 o'clock and the dowel pin should be at 12 o'clock.
So why did we place something long in cylinder #1? This is because as you rotate the crank the screwdriver/magnet thingy/whatever will be pushed up and fall down as it opens and closes. TDC can be achieved when the screwdriver is at it's highest point. For TDC in the SR20DE, you must make sure these four things all occur at the
same time:- The pointer on the crank pulley is pointing to the 2nd mark the from the left
- The camshaft lobes closest to the timing chain are pointing away from the center of the motor
- The screwdriver or whatever you used to put in the #1 spark plug cylinder is at it's highest point
- The intake cam dowel pin shows 10 o'clock; the exhaust cam dowel pin shows 12 o'clockALL of these must be present or you are not at TDC. Don't fret though. Rotate the crank pulley clockwise at least another full cycle until all of these are achieved, then we're ready for the next steps.
SIDE NOTE: Some SR20DE's have this yellow mark on the timing chain. This is a picture of a different motor than the rest of the photographs, from my 98 SE-R. Notice the yellow mark on the intake side. This photo was taken at true TDC:
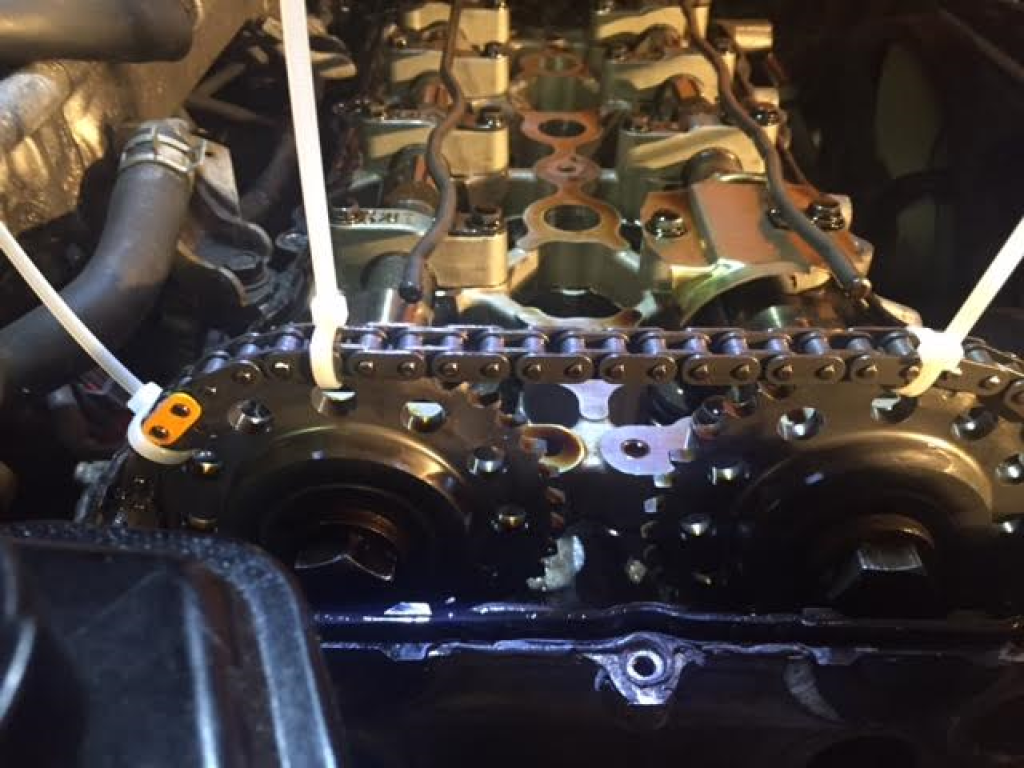
This mark is NOT present on all SR20DE's. So don't worry if you don't see it.
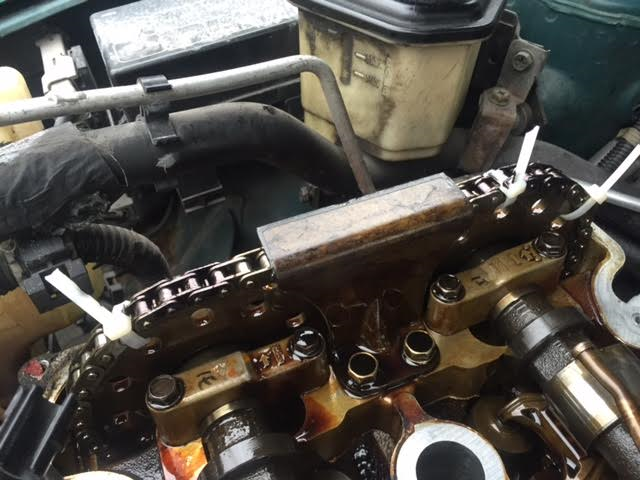
11) Zip tie the timing chain to the sprockets in at least 4 places, I recommend at least 2 on each side. This ensures the cam timing will not get thrown off:
12) Remove the timing chain tensioner. Notice I said "remove" - not block. There are many instructions out there regarding the timing chain tensioner where you put a "wedge" in place to "block" it from putting tension on the chain.
I HIGHLY RECOMMEND REMOVING THE TIMING CHAIN TENSIONER AND NOT JUST "BLOCKING" IT.
I've seen many problems come from the "block" method, too long to get into here, so just trust me on this one.
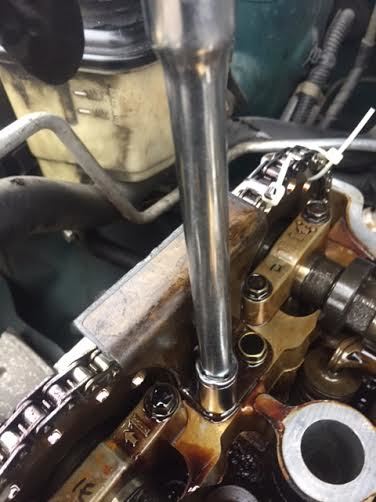
To remove the timing chain tensioner:
a) First remove the oil filter, and put a little paper towel or rag under it as it will leak oil a bit. Luckily the SR20 oil filter is in a location where it can be removed when oil is still in the pan. You will now see this:
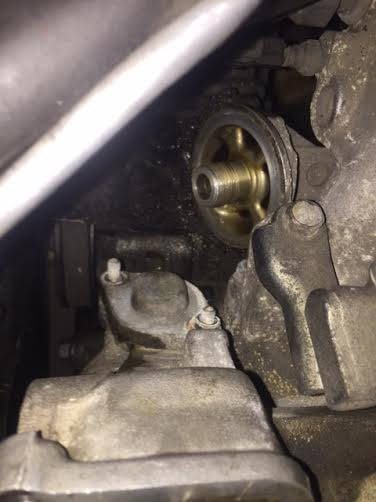
b) See those two extending bolts? That's the timing chain tensioner still installed. Get your wrench and attach a 10mm socket to the nuts (they had already been removed in this photo) and do your best to remove them. You may need to use extensions, a swivel, or even a long open ended 10mm wrench. I'll be honest, they're not the easiest couple of bolts to access. There are also 2 little washers under each bolt so make sure you get them out too. Keep your little rag stuffed in and around the oil filter shaft so nothing falls in there.
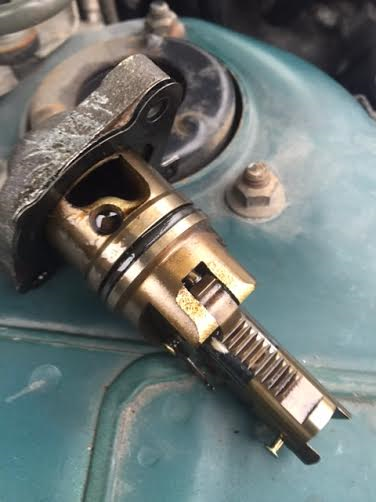
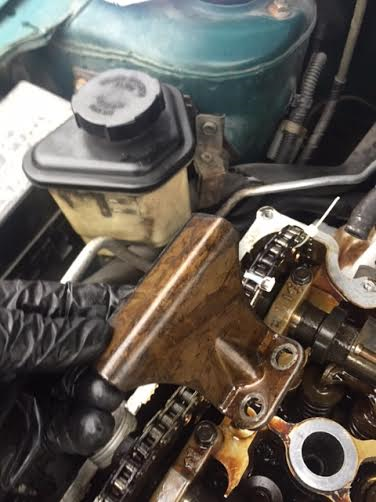
(NOTE: depending on how well your tensioner is stuck in the block, it may either pop right out when the second nut is removed, OR it may take some "convincing." Be ready and aware of the second nut flying off once it's loosened as the tensioner may pop out with some force. If your SR20 has a lot of miles like mine did, it probably will stay stuck there even when the bolts have been removed. To free it, get a long flat head screwdriver and place the edge between the tensioner and the block and gently tap the end of the screwdriver with a rubber mallet or similar tool. It will eventually pop free. This is the timing chain tensioner removed:
Don't lose it the little gasket!
This is the tensioner in it's unlocked position. You will eventually need to compress it and get the hook to attach to the pin before you reinstall it, but for now just set it aside in a safe location, preferably in a plastic cup filled with fresh motor oil.
13) Now the timing chain should have a little more slack in it, so let's start removing what's holding the camshafts in place! First, remove the timing chain guide. It is held on by two 12mm nuts. Use your wrench and an extension. REMEMBER to be careful and extra vigilant not to drop any tools or bolts down into the motor. Photos:
The timing chain guide still attached on the far left.
Loosening the 12mm bolts
The bolts/washers removed and the guide free, and what it looks like when it's gone.
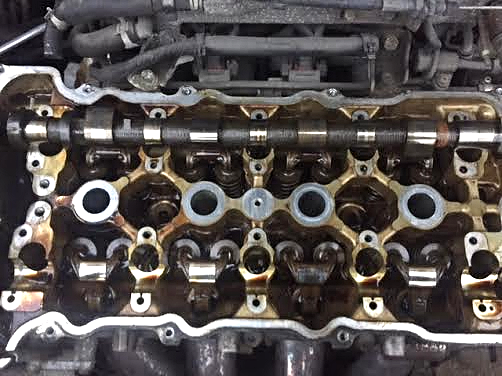
Take note of the first lobes on both intake and exhaust cams facing away from the center of the motor, which is 1 of the indications you are at TDC :)
Set the timing chain guide and the hardware in safe place free from any dirt or debris it could pick up since it will be oily.
**CONTROVERSY: There is debate among the SR20 community about the timing chain guide being necessary at all. Nissan put the guide in all SR20DE motors from 1991-1997, however in 1998 they completely removed it. The belief is that the guide causes "start up clatter" which sounds like a bunch of nails in a glass jar shaken up for a second or two (especially when the motor is started up on cold mornings). There is also evidence that the guide physically damages the timing chain over time. Whether or not you want to reinstall the guide is completely your choice. Personally, if the motor came with it, I'd put it back in, but you can do your own research on this topic, just Google "SR20DE timing chain guide." Whether or not you put it back or not, just remember that Nissan got rid of it voluntarily in 1998.**
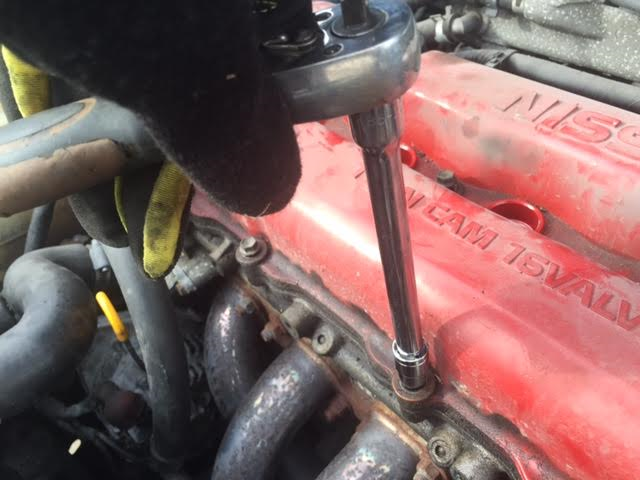
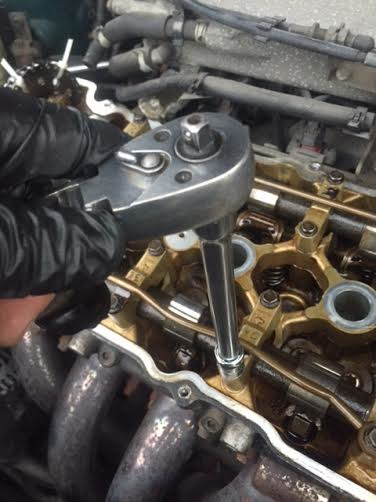
14) Next we want to physically break the camshafts loose from the cam sprockets. You want to break them LOOSE but not actually remove the bolts yet. Depending on your particular motor, this could take a lot of strength. Several years ago on a different SE-R mine were on so tight that to break them free it took a friend standing on his hands, using his legs to push on the breaker bar while I held each cam in place with the wrench! If you're one of those super strong guys I wouldn't worry much, but if not you may want to ask a friend or significant other to help out for a moment.
Attach the 24mm socket to your breaker bar and place it on a main cam bolt. Take your 1" open ended wrench and place it on the first cam hex (it's the little slot before the first lobe) see the photo below:
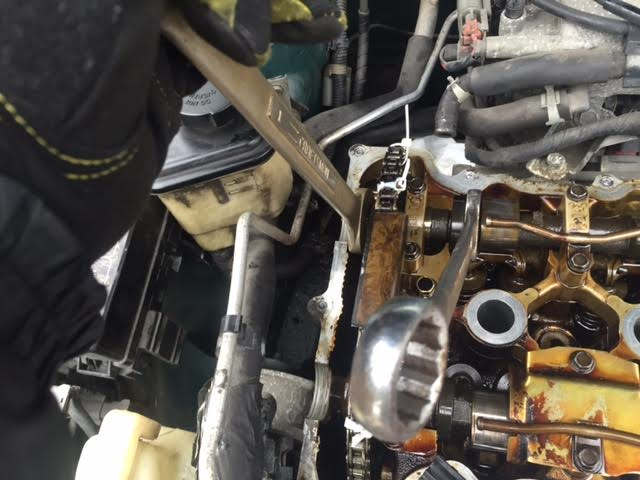
In this photo I actually used a second 1" open ended wrench on the main cam bolt, you can use whichever you wish. You use your right hand to hold the cam in place, and your left to break the bolt loose (make sure you are turning it in the correct direction to loosen!) You must hold the cam in place with the 1" open ended wrench or you will likely rotate the cam, plus you DON'T want to use the motor or timing chain for resistance. Once you break the bolts loose you can stop for now.
Now we can remove the distributor. Again, this is my method that I have found works the best. Some would have chosen to remove the distributor earlier, I like to before I begin to remove the cams. The distributor is held on by two 14mm bolts on it's top and bottom "ears." Removing the distributor also leads you to remove your first cam bearing cap. This one is different as it is held down by two 12mm bolts:
Since the distributor only effects the exhaust cam I'd advise you start with that cam first.
DO 1 CAM AT A TIME. You don't want to mix up which cam bearing caps go where, and you can concentrate on each one a little better.
16) Start breaking loose the cam bearing caps using your wrench, extension and 10mm socket. Break them loose but don't remove. The bolts should take a moderate amount of force with a average wrench. I recommend using an extension as it's easier and gives you a bit of leverage too. Break each bolt free in an "X" like pattern, almost randomly but from separate sides of the cam. Example: loosen one in the middle, then one all the way on the left, then on your right, etc. and keep doing this.
You want to loosen the cam slowly from all over and NOT from one end to the other: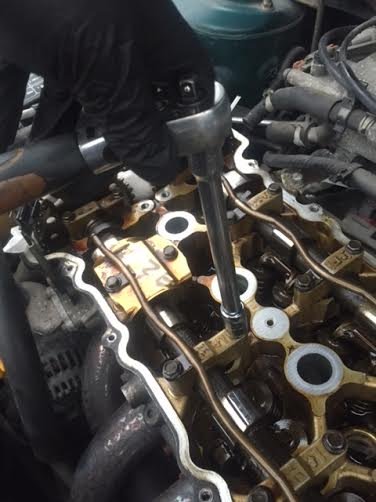
Removing or replacing the cam bearing caps is probably the most time consuming part of the whole process. The bolts are much longer then they appear but are not all the same length. Once all the bolts have been broken loose, continue to move around the cam and loosen them more and more until they come free. Remember to loosen each one a few turns at a time when they're still on tight. Keep everything in order and remember exactly which cap goes where, and where the oil squirters were located.
I recommend:
a) Before you remove each cap, get your sharpie and mark it's location. For example, for the cap closest to the timing chain on the exhaust cam, you would write "1E" - meaning 1 for the first cap and "E" for exhaust. For the 4th intake
cam cap write "4I" for fourth cap from the left, and "I" for the intake cam. You get the picture. It would look something like this:
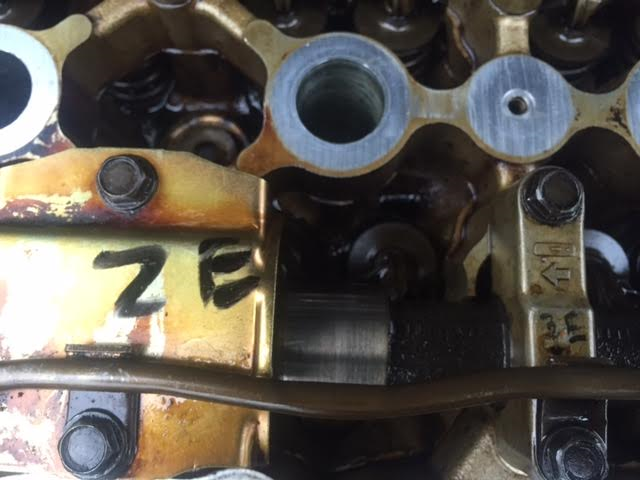
On the oil baffle on the left (which covers the 2nd exhaust cam bearing cap) I wrote "2E" and you can also see I wrote "3E" on the cap to it's right. A very simple thing to do, but a very good idea.
b) Lay out the cam bearing caps in their proper order (and eventually the cams) on a clean towel or piece of cardboard somewhere safe, like this:

Clearly this photo was taken at the end of my cam removal process. I laid everything out as if I was looking down at the motor from my angle, identical to what I was actually doing. The exhaust cam is on the bottom with it's caps, baffle, and oil squirter in the correct order, and the intake cam on the top laid out the same. I suggest having a designated spot to spread this all out away from your work area, and try to keep the appropriate, matching bolts still inside the caps to minimize confusion (as I also did in the photo).
17) Now let's fully remove the cam sprocket bolts. Do 1 at a time, and after you've gotten them loose enough, turn them by hand like this:
Once the cam bolts are out the sprockets will come right off the cam dowel pins but remain attached to the timing chain because of your zip ties. Get another zip tie or something similar to hold the chain up as you want to keep it from falling down into the motor. Dropping it or
letting it fall can occasionally
cause the timing chain to
come off down at the crankshaft in which case your cam timing
would be off and a pain to correct. This is known as "skipping a
tooth on the crank" and it not something you want to deal with, so be careful:
In this photo I actually used an old spark plug wire and a paper towel (it was what I had handy) to hold the chain and sprockets up. Use whatever as long as it works.
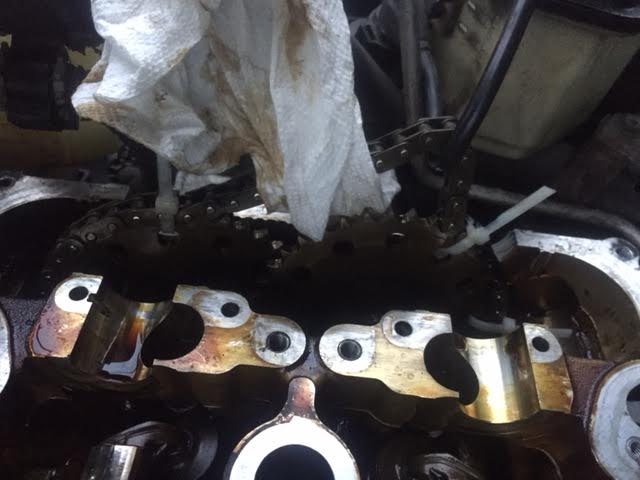
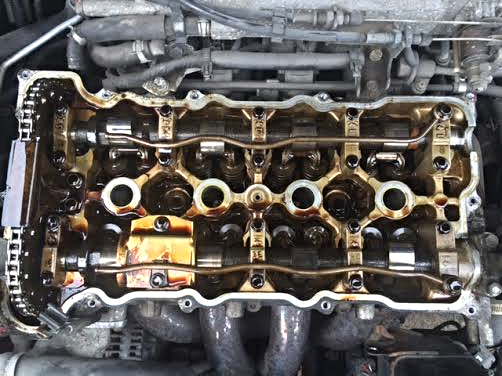
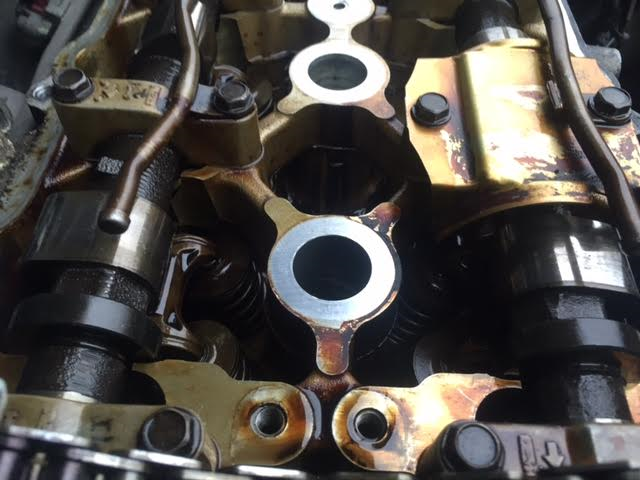
18) Now remove the cams from the motor. Sometimes one of the cams will already be loose and come right out, sometimes one will seem "stuck." Don't worry, this is normal. If one seems stuck GENTLY tap on the ends of the cam with a wrench (something dull that won't cause scratches). The cam will pop out. Once the cams are removed there's nothing holding the rocker arms down so pay close attention that none have been disturbed from their perches. If it does happen it's no big deal, simply re-position it by hand like the others are. Your motor will now look like this:
If you purchased new spark plugs now would be a good time to install them. If not, just re-install the one you removed from cylinder #1.
19) Get out your quart of fresh oil and pour a generous amount down onto the rocker arms and everywhere the new cams will be sitting, just avoid the spark plug wells. You can stuff small paper towels down in there to soak any oil that gets near it.
20) Now it's time to basically do everything we just did to remove the cams,
just kind of backwards. Again, I suggest doing 1 cam at a time. Oil up each of your new JWT cams and position them. The easiest way to tell which cam goes where is that the exhaust cam has the slot for the distributor on the end. Place the cam with the first lobe pointing away from the center of the motor and with the dowel pin inside the cam sprocket slot. It should slide in easily. Here is a photo of the JWT intake cam positioned in place:
 IMPORTANT:
 It's common for the cam on the driver's side of the motor to be "sticking up" once put in place. Be careful if this happens. I actually broke 2 cam-bearing cap bolts on the driver's side of the engine and had to find replacements. The best way to avoid this, if it happens, is to tighten down the cam bearing caps in what I call a "wave." Start by
slightly tightening the bolts on the left side (passenger side of car) and move your way down towards the driver's side of the cam. Tighten in an X pattern. Keep doing this as it will put less pressure on the bolts (which are surprisingly weak) and pull the cam close to it's seated position. Once the cam is seated firmly on both the passenger side, middle, and driver's side, you may start using your torque wrench to tighten them all (again in an X pattern) to the proper specifications.
21) Make sure no rocker arms (and thus, shims) were disturbed from their position and begin to replace the cam bearing caps, one at a time. Hopefully you marked and placed them in proper order after they were removed so it should be fairly easy. TIP: the arrows on each cap always point towards the LEFT or timing chain side of the motor. Tighten each bolt gently by hand until all are in their proper positions then slowly tighten them with your wrench in the same "X" pattern and go from each side of the cam to the other. Left, right, middle. Right, middle, left. You get the picture. Never tighten it down fully in one place before the others are. If you have a torque wrench, once all the bolts are quite tight, tighten them down to about 7.0 ft-lbs each. For the exhaust cam, the two 12mm bolts at the distributor should be tightened to about 16 ft-lbs. MAKE SURE THE ROTOR ON THE DISTRIBUTOR FITS IN WITH THE CAM SLOT!! You may need a second person to position and push the distributor into the proper location while you tighten the bolts. If you don't have a torque wrench, tighten all the bolts to the same amount to the best of your ability. Recall how much effort it took to originally loosen them and try to get them to that point. It may take some trial and error of tightening one and loosening it to get the "feel." My point is: it's always best to have a torque wrench!
IMPORTANT NOTE: If you have already advanced your ignition timing by moving the distributor, disregard the "JWT SR20 camshaft install" instructions which are found at: http://jimwolftechnology.com/wolfpdf/caminstallinstforsr20.pdf - if you look at that page, you'll see that JWT says that your distributor is only in the proper position if it's in the center. This is not true if you have previously advanced your ignition timing (like many SR20 enthusiasts do to gain a few free HP). To make it simple: the distributor should be replaced in the same position it was before you started the cam install.
UPDATE: So according to Jim Wolf Technology (who developed these SR20 camshafts) - the S3 cams make the most power when ignition timing is set at 15 degrees, while mine was about 20 degrees here. Taking their word for it, I decided to retard the timing to about 15 degrees, and I *think* I picked up a little more high end power. So remember, put the distributor back in the same timing position it was before you removed it, then if you so choose, reset the timing at a later time once everything is all back together and your car is running properly with the new cams.
22) Tighten the sprocket bolts in by hand. Make sure each sprocket is mated correctly to the cam with the dowel pins and then start to make the bolts tighter. Use your 1" open ended wrench again on the first cam hex to hold each cam in place, and another 1" open ended wrench on the sprocket bolt to slowly tighten it. Once the cam is seated well get out the breaker bar and 24mm socket and tighten them with that. If you have a torque wrench that goes up high enough, tighten each of them to 110 ft-lbs. Again if you don't have one, just tighten them really really well (again recall how much effort it took to loosen them originally).
23) Carefully remove any zip ties you placed on the sprockets and chain, and replace the timing chain tensioner. This can be a tedious procedure if your hands are big, or if you don't have enough light. My suggestion: get plenty of light shining down there and be patient. First, you must compress it and attach the little arm to the pin. This can be done by placing it on a hard surface (the ground) and pushing down with one hand, then using your other hand to get the arm to latch to the pin. You need to manually press in the actuator with either your finger or a flat head screwdriver to allow it to compress. When replacing it, make sure it is oriented correctly with the gasket and be very careful not to drop the little washers anywhere. Keep your paper towel or rag jammed in oil filter hole. Take your time and use your swivels and/or temporarily remove hoses that get in the way if needed. The tensioner should now be snug.
24) Replace the oil filter. Coat it with a layer of oil and tighten about as much as you can by hand (as usual).
25) Get your breaker bar and the 27mm socket and rotate the crank clockwise about 1/4 of a turn to fully engage the timing chain tensioner. If you have a friend helping you out, this would be a good time to watch that both the intake & exhaust cams rotate smoothly. ONCE AGAIN, double check your work. Make sure no rocker arms were disturbed, all arrows on the cam bearing caps point towards the PASSENGER side of the car, and all bolts are snug.
26) Get your RTV grey sealant out and dab some in the area of the "half moons" of the valve cover gasket. Make sure the spark plug gasket is still lodged up in the valve cover (it often is when you remove the cover - if not, put it back in). Carefully place the valve cover back on the block, making sure the gasket remains in place. Now replace bolts and washers. There is 1 long valve cover bolt that goes in the center between the 2nd and 3rd spark plug wells (FYI). Tighten them from left to right and middle, slowly and evenly. Never tighten one all the way. Keep tightening randomly all over the valve cover until it is properly seated. If you have a torque wrench, all the valve cover bolts should be torqued down to about 7.0 ft-lbs. Don't over tighten them as they WILL break.
27) Replace all hoses that lead to the valve cover you had removed, use pliers on the clamps. Replace the spark plug wires in the proper order.
28) Double check everything (no loose tools in the engine bay, all wires and hoses are connected, etc.) Reconnect the battery!
29) Start up the motor. DON'T WORRY! If you did everything correct it may still run a little funny but will smooth out. The motor will "lope" at little, this is normal with a bigger cam for the SR20. If the cams are brand new you should keep the motor under 4000RPM for 20-30 miles of driving to make sure they are properly "broken in" and keep it under WOT for a couple days or regular driving.
30) You're done! Now go get em!! If you have any questions e-mail me at Jordan@jordanwhitemusic.com
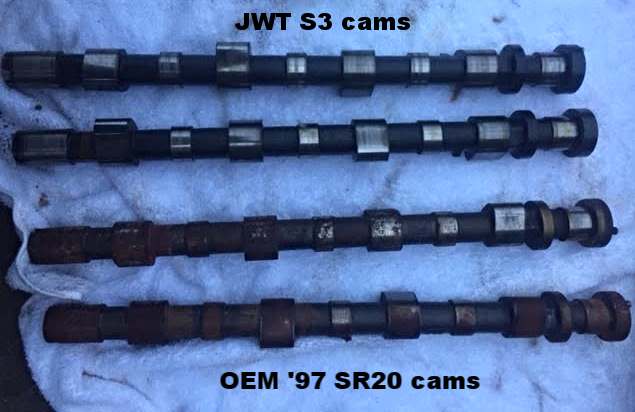
Here is a comparison photo of the JWT S3 cams with some pretty nasty looking OEM cams from a 1997 200SX SE-R with over 200,000 miles on it. As you can tell the OEM need a good cleaning. The JWT S3 cams have probably 10,000 miles on them and thus look quite good. Very minimal cleaning will be needed and no scorches or burrs were detected.
Swapping to an "eBay brand" header
Getting it cheap, I decided to install one of the 4-2-1 "eBay" exhaust headers on my car. Depending on the brand they go for anywhere from $100-$200 shipped, brand new! Back in the day the Hotshot header went for as much as $400. Then companies stole their design and offered a product nearly as good for 1/3 of the price. Since Hotshot has been out of business for many years, I decided to give the "eBay" header a shot. Here is a side by side comparison of both headers, and as you will see, the biggest difference is the diameter of the secondary piping:
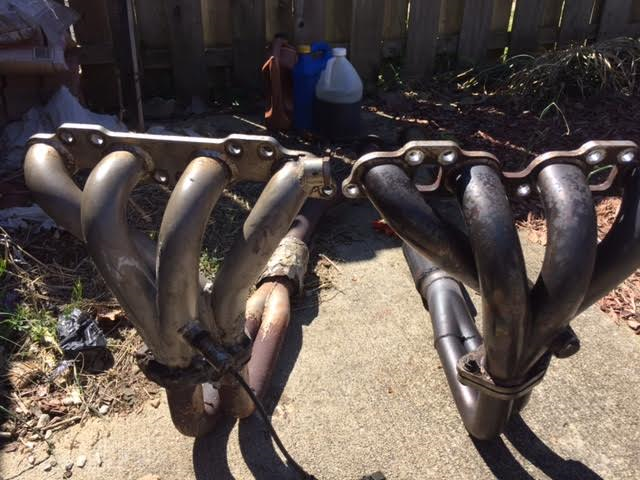
The original $400 Hotshot header on the left, the $120 eBay header on the right.
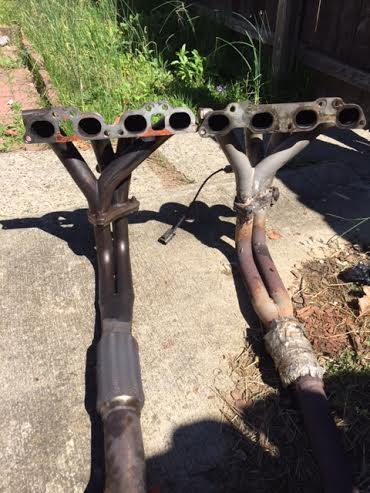
Rear view. At first glance, they appear similar, but:
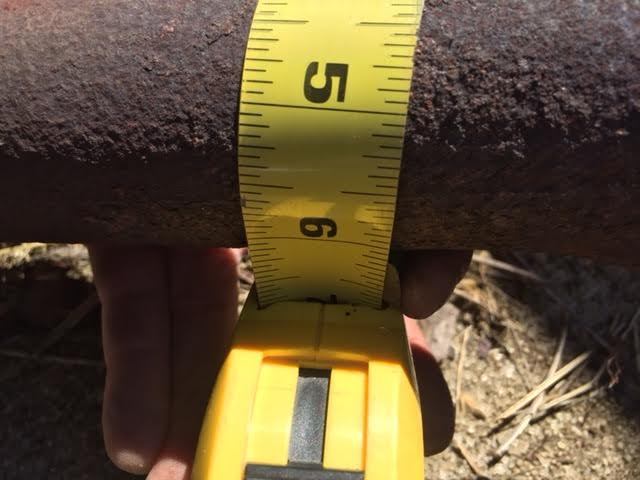
The Hotshot header secondary diameter. Note how the coating has long since burned away.
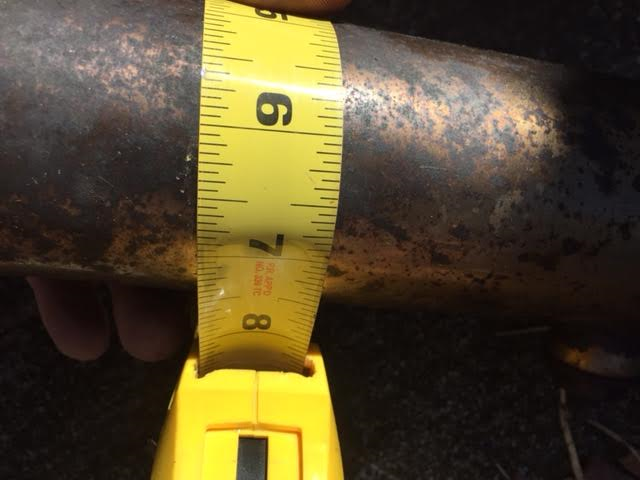
The "eBay" header secondary. Relative to the Hotshot it's much bigger which helps to increase exhaust scavenging, so it appears for vehicles with more modifications the eBay header is the way to go. I did notice a little extra pull up in the higher RPM range.
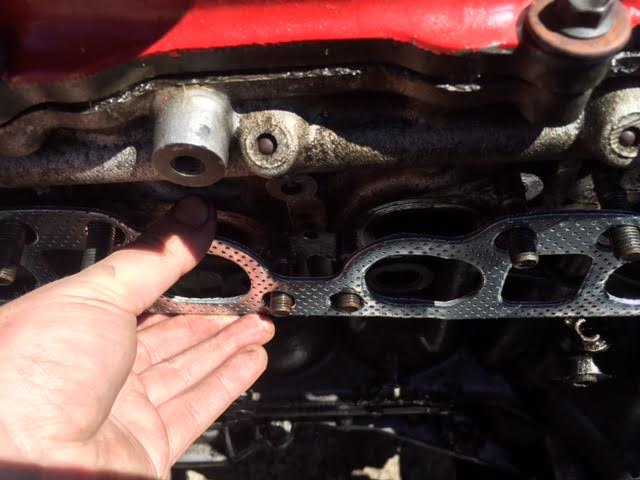
Installation is straight forward. You should always use a new gasket too.
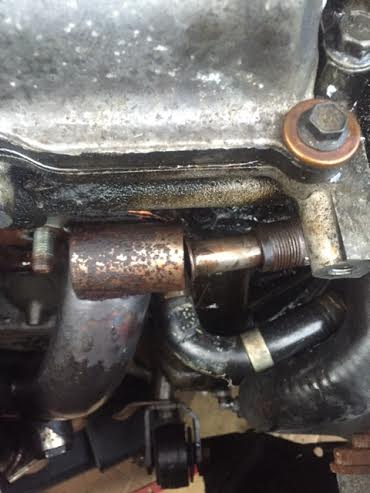
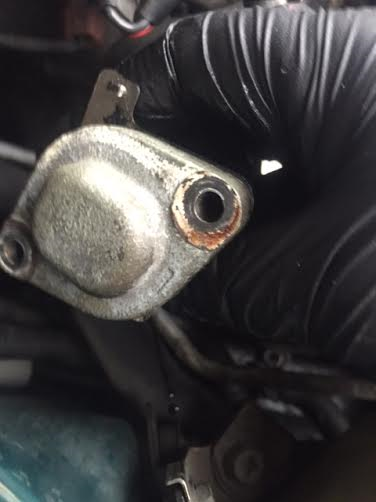
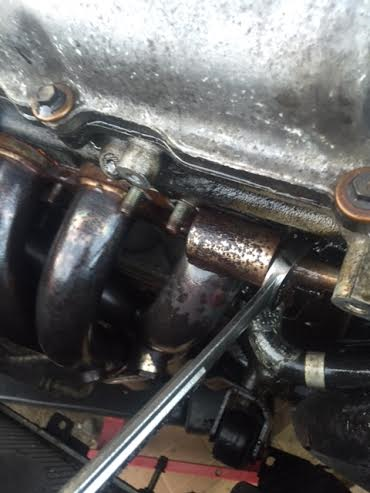 On the EGR issue
: If you install an aftermarket exhaust header on the SR20DE, there is the issue of what to do with the EGR system (exhaust gas re-circulation) which is a tube that connects to the top right of the header primary. It was put in by Nissan solely for emissions reasons; while it doesn't do much in general it will throw a check engine light if it's not properly connected or removed. Most aftermarket SR20DE headers have a bung opening for the original EGR tubing that can also be blocked off with a small plug taper (available from Nissan for about $10). The issue is, the EGR pipe is quite difficult to remove if it's rusted. Many SE-R enthusiasts completely remove the EGR system and install a block off plate and put a resistor in the wiring harness to fool the ECU. Above left is a photo of the EGR pipe before being screwed into the eBay header bung, while the second photo I'm using a 24mm open ended wrench to get it in.
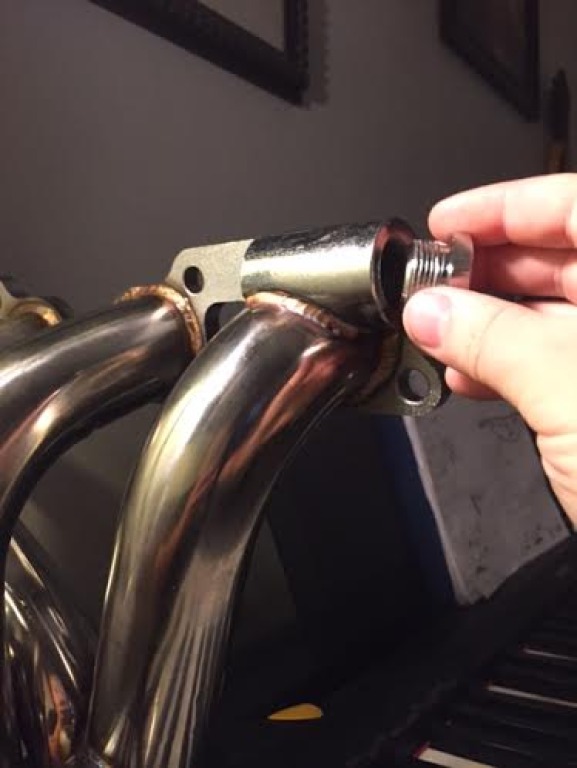 Left:
Left: eBay header installed.
Right: holding a plug taper used to block off the EGR piping if you have removed it.
Update: In June 2016 while installing a Stromung exhaust (more on that just below) - we noticed that the flex area of the downpipe was beginning to fail and leaking. I ordered a brand new eBay header
(side note: it's amazing you can get these now for as low as $100 shipped!) and installed the new flex pipe, which really cut down on the exhaust noise. Here are some photos of them side by side. Luckily they are identical and the new flex pipe matched right up with the primary that was already on the block:
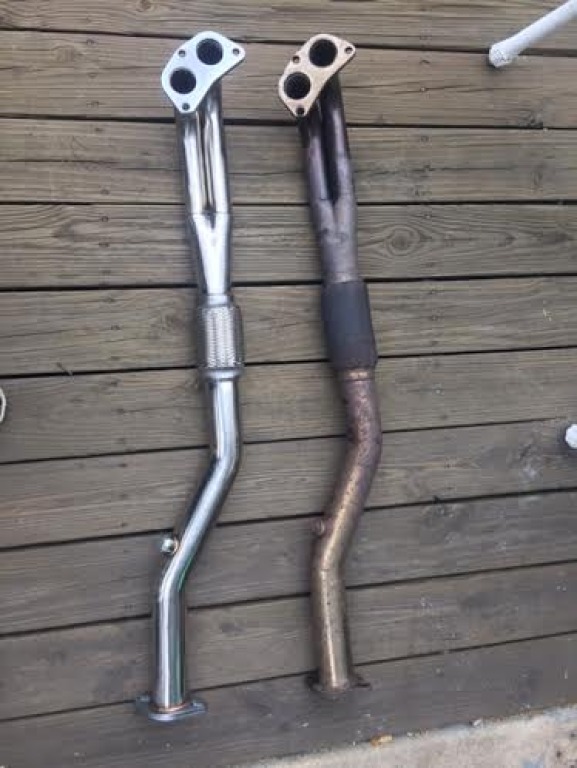
Notice the pretty chrome finish on the new piece? Once the old one looked like that as well. That's what happens :(
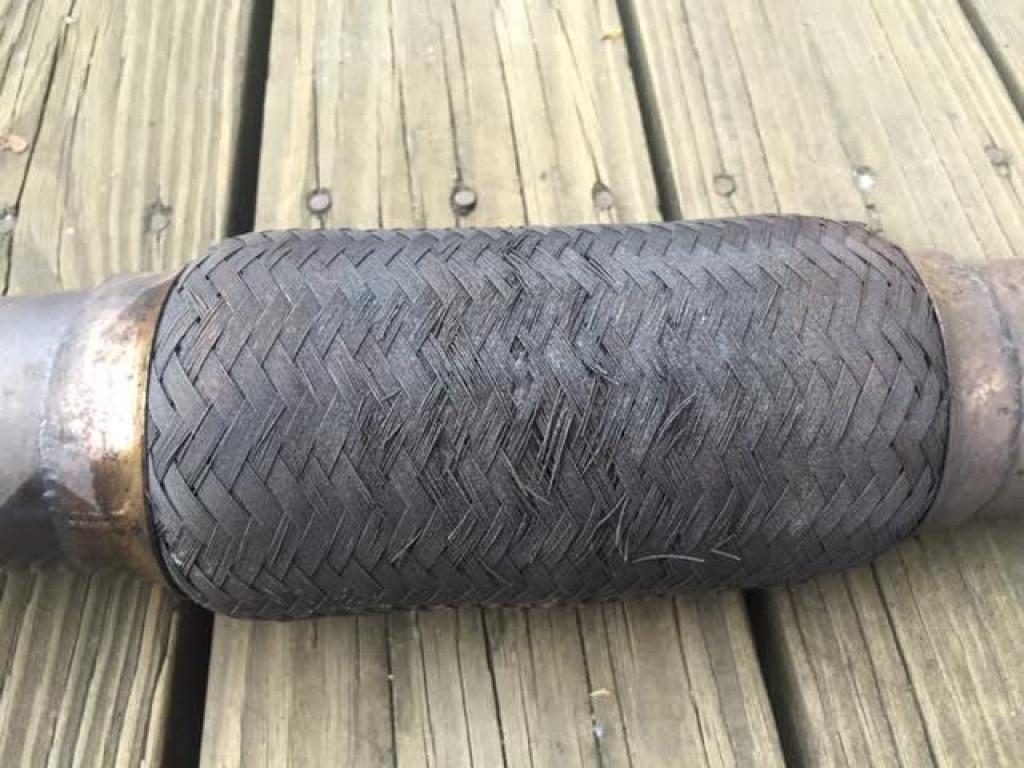
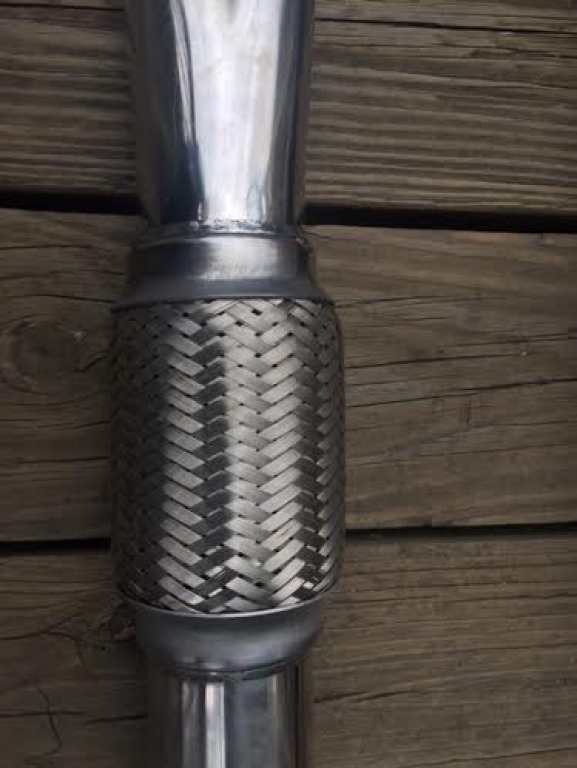
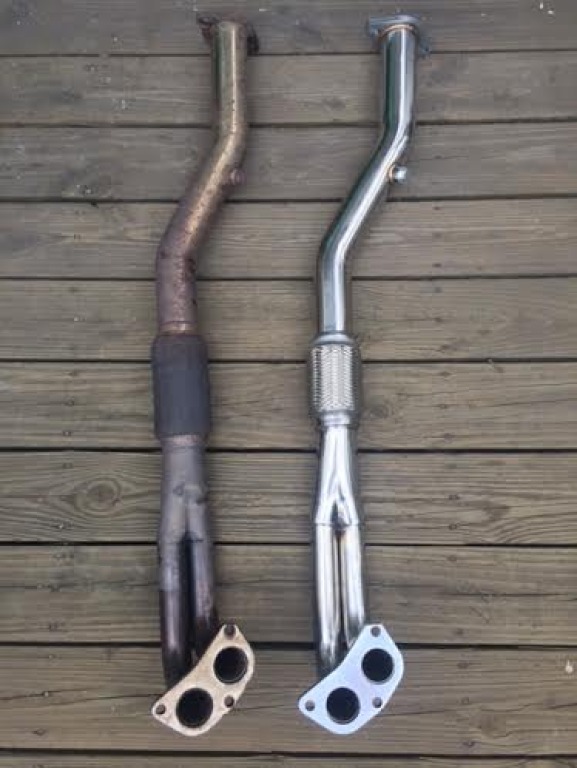
The failing flex area of the old downpipe (left) and the brand new one for comparison (right). I'd rather have a downpipe with no flex area at all, but those are typically reserved for the expensive 4-1 header designs and increase vibration in the chassis.
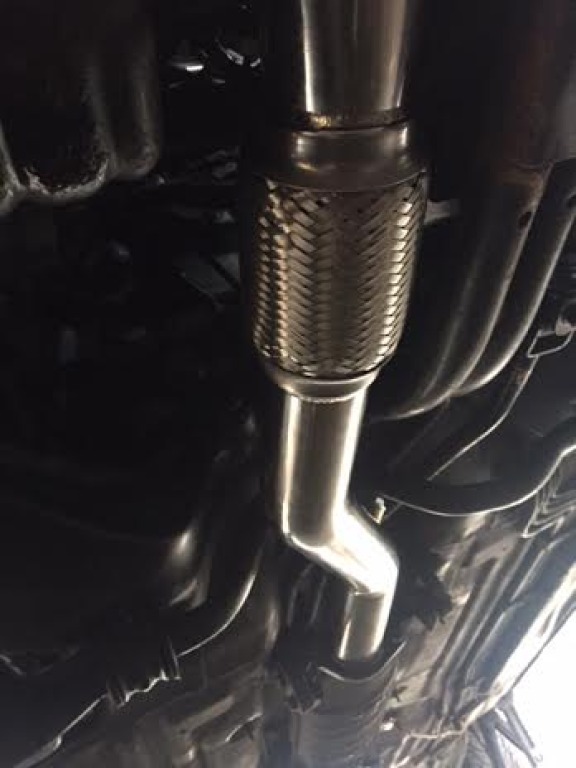
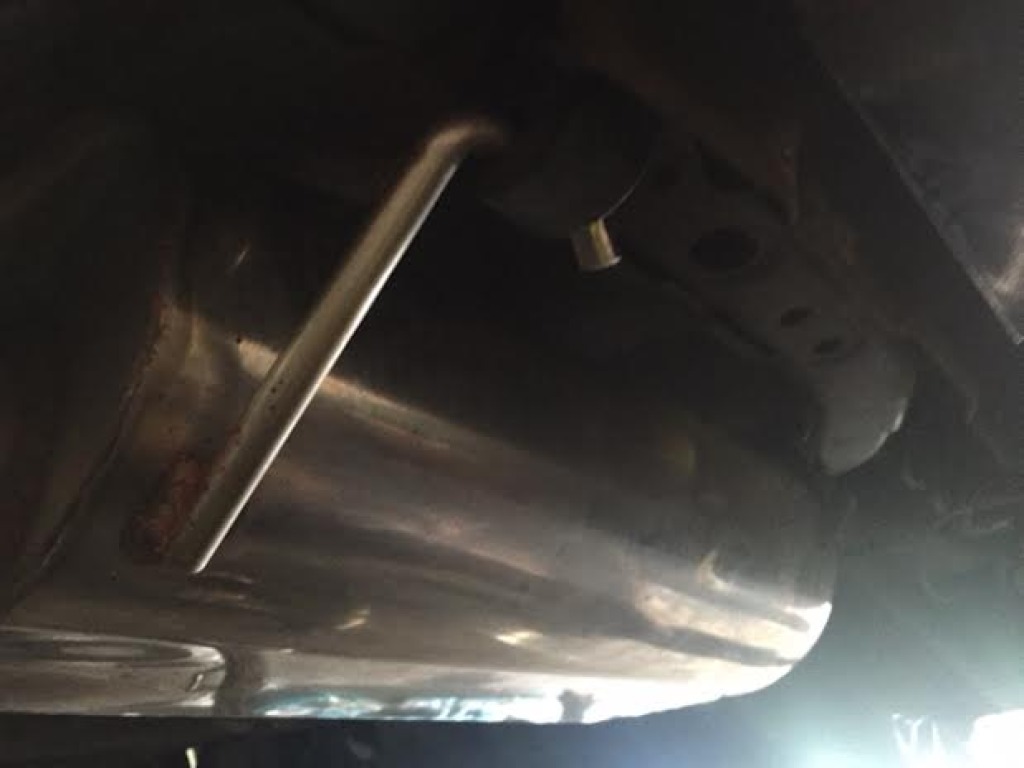
 From below the car, the new flex pipe installed (left) and it's flawless connection to the older primary (right). Hopefully this flex section lasts a long time.
The Stromung 2.5" cat-back exhaust:
July 2016: Despite the bolt-on modifications on my '98 SE-R, I was still was using the OEM Nissan exhaust. This is a problem as the OEM tubing at some spots closes down to less than 1 1/2" in diameter. While exhaust systems don't do much to increase power on otherwise unmodified SE-R's, once you get into items like cams, the OEM exhaust system can really hold the motor back. A good quote I once read about modifying engines is "you can only eat as much as you can shit." Anyways, the Stromung system is a high quality aftermarket exhaust that includes 2.5" in diameter mandrel bent tubing with a resonator ending with a high quality, stainless steel straight-thru design muffler. It appears from
their website that they no longer produce this for the B14 SE-R, however when brand new this system went for $500-$600. Quite pricey! This one was about 8 years old and being a high quality piece has held up well.
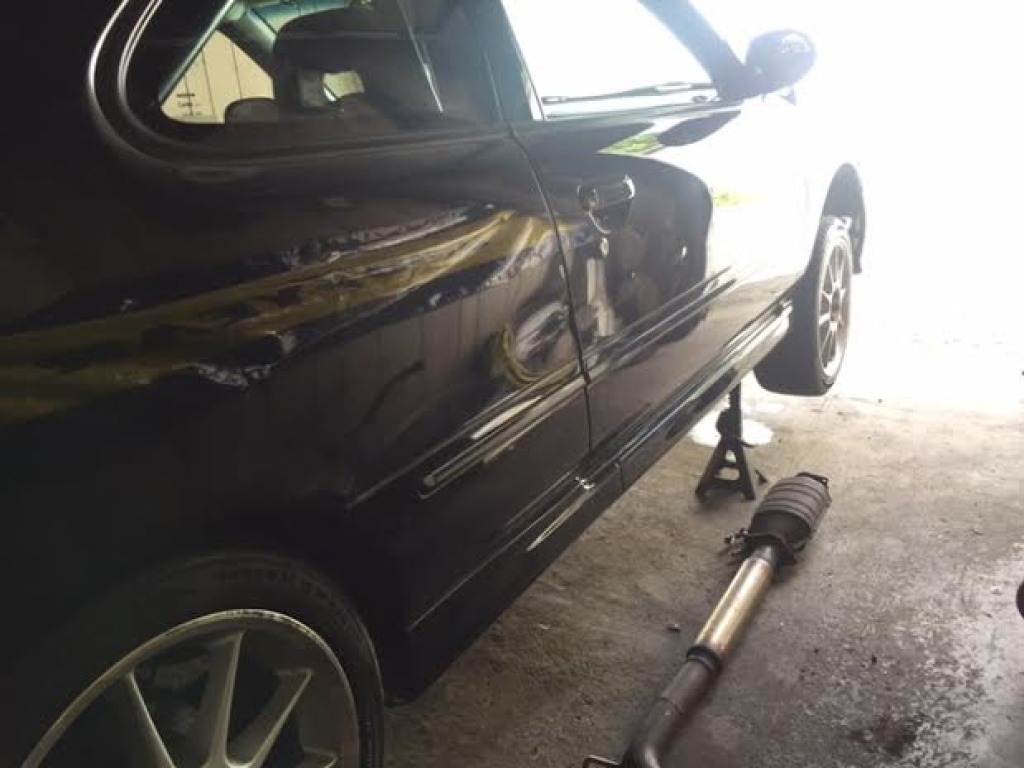
Left: the Stromung exhaust on the garage floor attached to the catalytic converter, waiting to be bolted under the car.
Right: the OEM exhaust tubing and resonator removed. Note the minute diameter of the piping, which surely holds back some power on modified SE-Rs. I also installed brand new gaskets at the front and rear of the catalytic converter since the old ones were falling apart anyway. You should always replace the gaskets and you can get new ones direct from Nissan or Autozone for around $8-$10 bucks but they may have to order them.
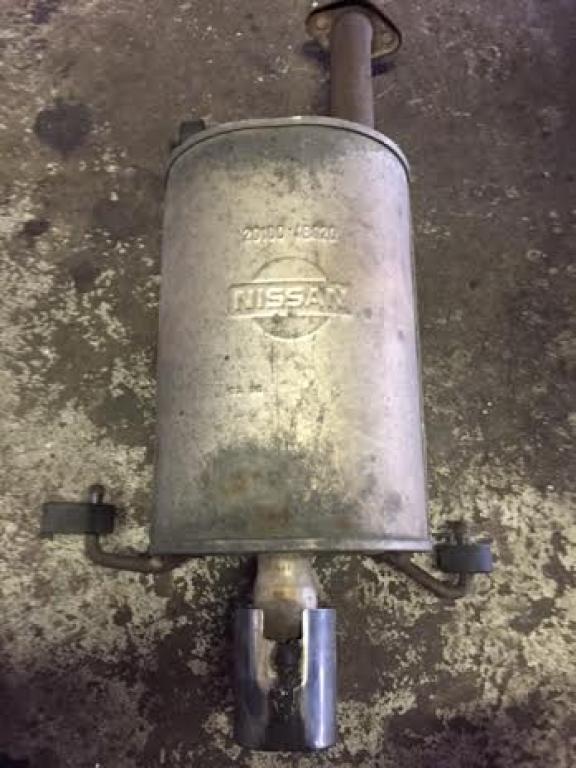
Left: the Stromung muffler wisely utilizes the OEM exhaust hanger locations, making it possible to install in your driveway without needing a welder. It is heavier than the OEM system and may hang lower so be a little more careful driving over speed bumps.
Right: amazingly this is the ORIGINAL Nissan muffler that came on the car back in 1998 (notice Nissan logo in the center). It has seen over 180,000 miles and has also has held up remarkably well.
Driving Impressions:
The Stromung exhaust note is quiet compared to other setups I have heard on SR20s, probably because the muffler is a quality design and there is a longer than usual resonator located directly after the cat. On a scale from 1-10, with 1 being a quiet OEM system and 10 being the loudest system you've ever heard, I'd put the Stromung at about a 4. It does not drone on the highway (the worst aspect of aftermarket exhausts IMO) and it's overall mellowness doesn't attract unwanted attention. As far as power increases I noticed a difference IMMEDIATELY above 6000 RPM. This makes sense as the motor is working it's hardest to push out as much exhaust gas as possible as the RPM increase towards redline. I didn't notice a loss of low end torque (due to the long standing debate among car enthusiasts relating to back pressure). From my knowledge of exhaust system gains on similarly modified SE-Rs, I would guess top end power increased by around 8WHP, and most likely increased power by 1-4WHP most everywhere in the power band. If my SE-R was completely stock and I bolted this exhaust up it may only gain a 2-3WHP at best. My point is this: bolt-on/breather modifications on the SR20 (and most engines) work in harmony together. One modification helps another one free more power as they work together. Camshafts may make 10WHP on a vehicle with an OEM exhaust, but put a free-flowing system on and those cams may make 14WHP or more. :-) So there's a good excuse to go get more goodies for your ride. :)
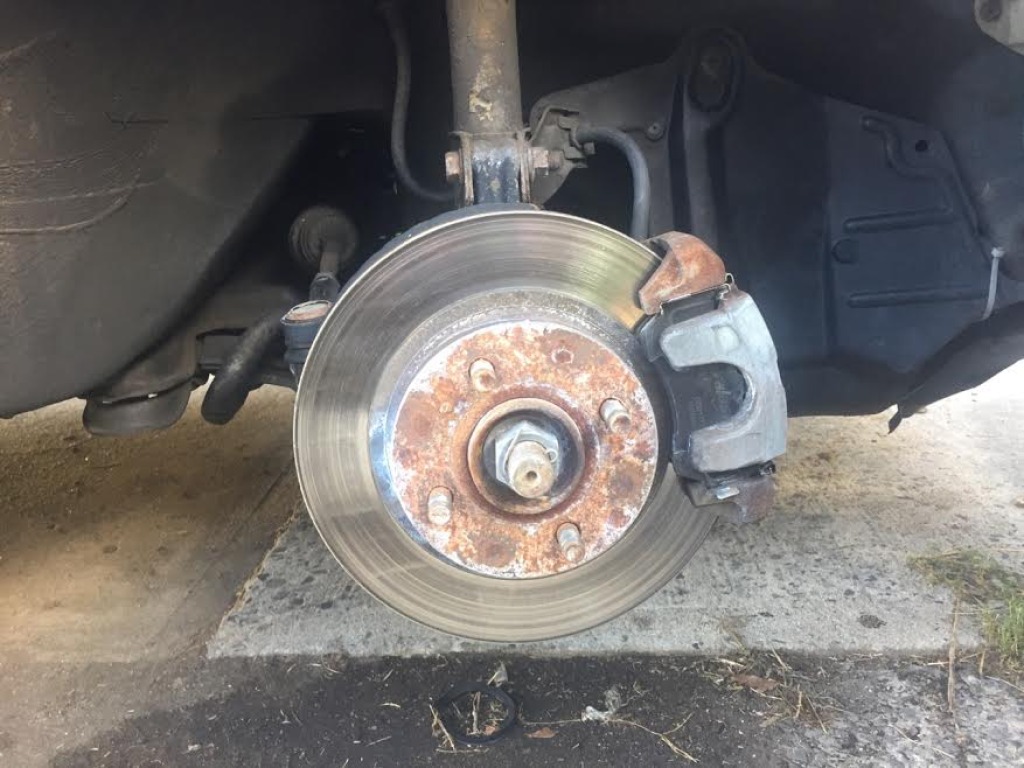
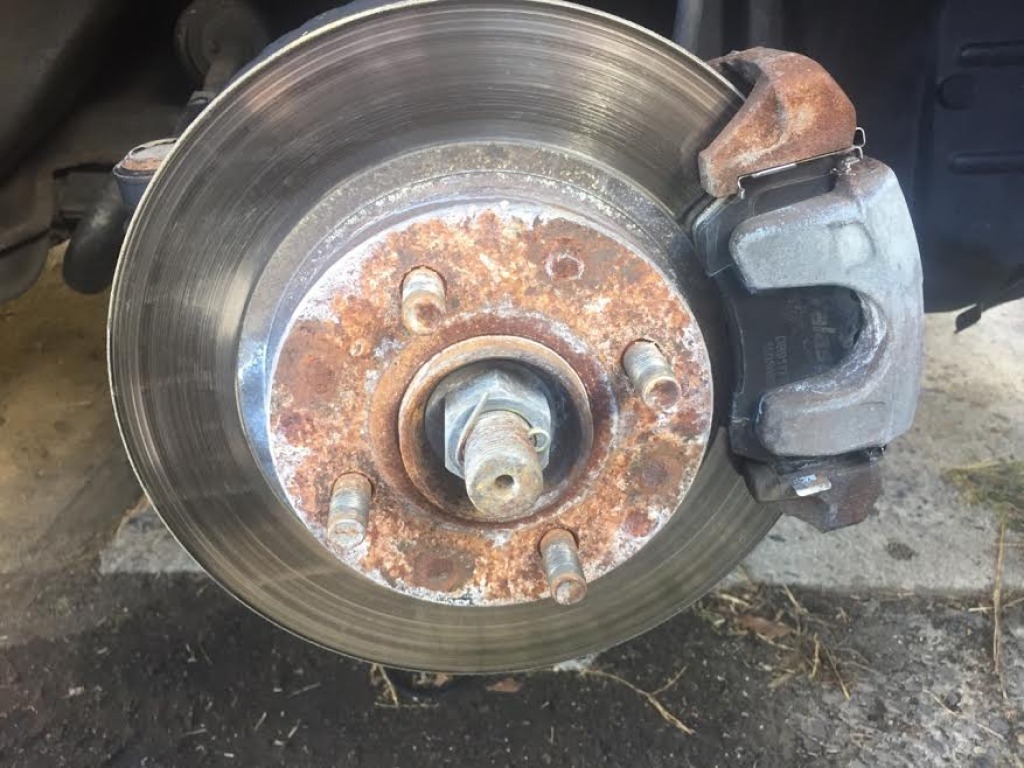
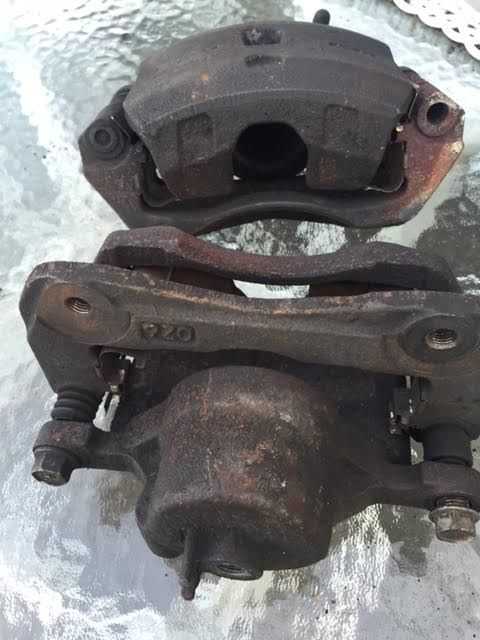
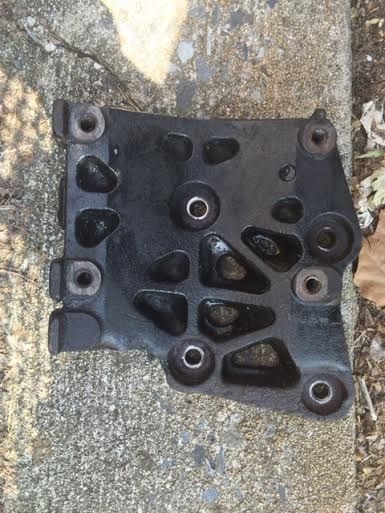
The NX2000 brake upgrade (BABK = big-ass brake kit) AD22VF conversion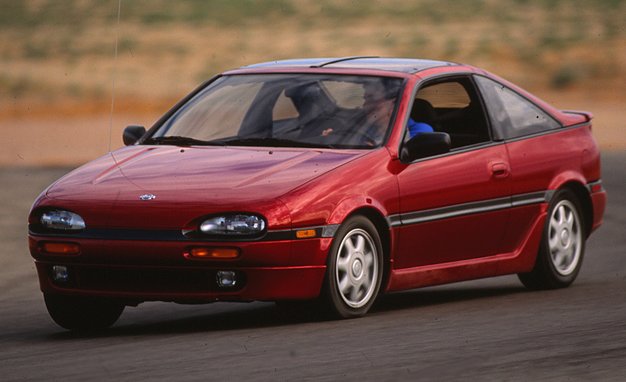 (The 1991 Nissan NX2000 - one of the most underrated cars ever. I have been looking for one for years but they are very rare. I gave up.)
The 1991-1993 NX2000 was the "sportiest" SR20DE powered vehicle available in the United States by far. Let me explin While short lived, it came with a stiffer suspension, a lower ride height, wider wheels, better slalom numbers than the B13 Sentra SE-R, and most importantly, big ass brakes! The NX2000 brakes are so good in fact, that one of the most popular modifications on the B13 Sentra SE-R & B14 200SX SE-R is to simply get the front OEM brakes from one and slap them on. The NX2000 had a much larger caliper and used a much thicker & larger rotor, which makes us wonder why Nissan didn't include this setup on the other SR20DE powered vehicles too! The stock brakes on the 91-94 Sentra SE-R and 95-98 200SX SE-R are coded as "AD18VF" while the NX2000 breaks are "AD22VF".
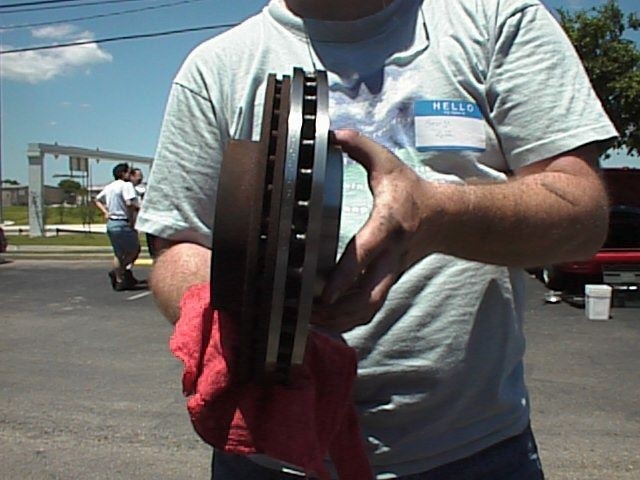
Above is a photo I found online of an SR20 enthusiast showing the difference between the two rotors. On the left is the B13 SE-R rotor, on the right is the NX2000 rotor. After some consideration I decided to go with vented rotors and did not bother with the cross drilled or slotted designs. As you probably know if you've read this far, cross drilled rotors, while looking great, can actually hinder braking performance by decreasing surface area and are prone to cracking under high stress. The issue with slotted rotors is that they can really eat up the brake pads. While I love the look of a big cross drilled rotor behind a shiny wheel, I went with practicality this time.

The OEM brakes on the 98 SE-R surely leave something to be desired. It was a sign of the times though, to keep overall costs lower by doing the bare minimum. Now a days, even entry level cars such as the Toyota Yaris or Honda Fit have larger front brakes up front. They may have drums in the rear, but still....
The sad and worn out OEM front brakes on the '98 SE-R, consisting of small, thin rotors and a tiny caliper piston. GOODBYE!! Something HAD to be done (as these rotors are wearing thing anyway) so in the summer of 2016, my friend Ray Kawski (a long time SR20 guru) had a set of NX2000 calipers and brackets he didn't need so he gave them to me, because Ray is awesome like that. :) I then ordered brand new rotors and brake pads (see below)
.
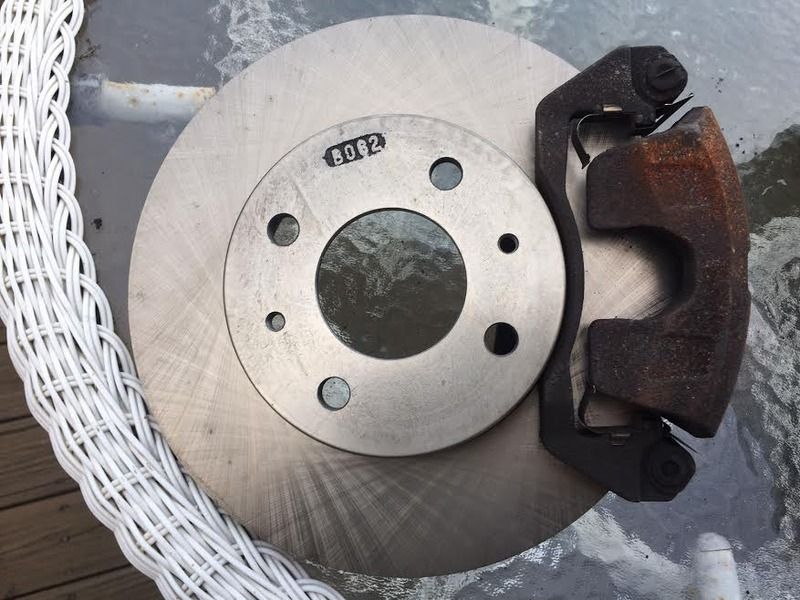
The NX caliper placed on the new NX rotor. Notice they are just vented, no cross drilling or slotting on these. Although that looks cool, it actually is debatable if doing so hurts or helps braking performance.
The AD22VF calipers
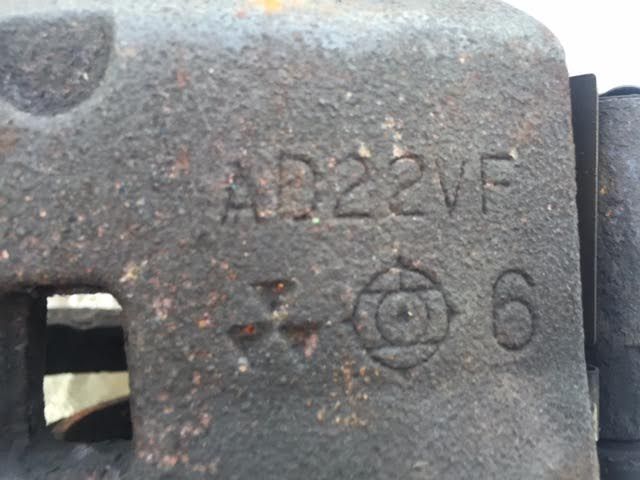
Notice the "AD22VF" part code inscribed on the caliper. These brakes are larger and stronger than the stock AD18VFs - in fact it's nearly a running joke in the SE-R community.
Choosing the right brake pad:
On the advice of Greg Vogel @
G-Spec.com - we went with Stoptech "sport" brake pads, a type which are suitable for both the street and occasional track events:

.
Much more on these later!
A quick note on replacing rear brake pads:IT'S A HUGE PAIN IN THE ASS - for one reason: because the rear calipers are not like the front calipers. For the front you just need a C-clamp to push the piston back into the caliper to fit them over the new brake pads. To push the pistons in on the rear they must be rotated clockwise by hand. Here is photo of one of the rear calipers before the "fun" began:
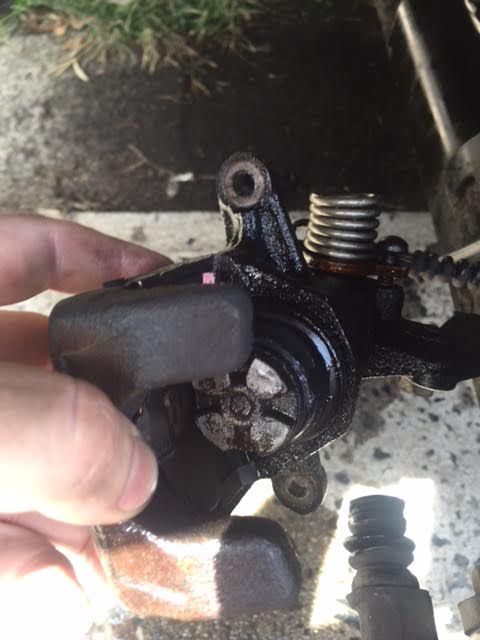
The pistons must be rotated clockwise to retract them. Some people on the internet suggested using needle nose pliers or vice grips to do this, but if your SE-R is anything like mine was you'd basically need to be Superman. You need to get yourself a special tool. Autozone will let you rent this kit for $60, and you receive your money back when you return it:
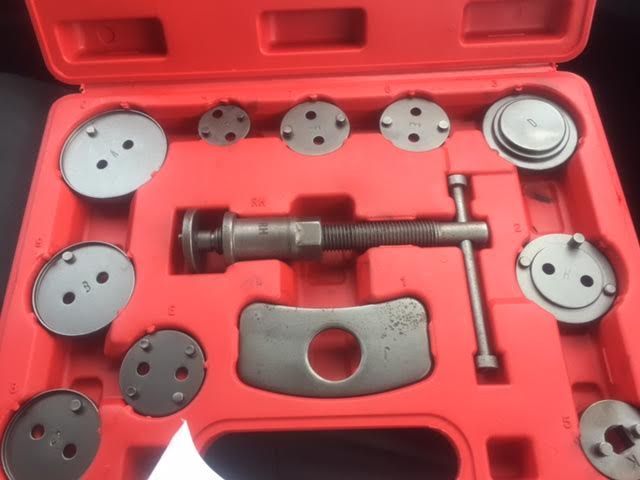
To depress the pistons you use the center tool and attach one of the many extensions on the end, then place it on the piston and catch the grooves. It takes a good deal of strength to do this; it's time consuming, frustrating, difficult and it hurts.
A lot. My hands and fingers were in some serious pain as each piston took nearly an HOUR to rotate back in. And yes, the emergency brake was off. Nissan makes a much better tool that is specifically used for the SE-R rear caliper pistons, but I didn't feel like waiting several days to order it so I rented this generic kit.
Here's a suggestion: DO NOT make the same mistake I did. After hours spent doing this (when it only takes a whole two minutes to remove the wheel and pull the caliper off loosening a couple 12mm bolts) I will never replace rear brake pads again!! Retracting those pistons was such a headache that next time I'd honestly rather go to Midas and spend the $59.95 or whatever.
Stainless steel brake line installation:

(A typical stainless steel brake line kit w/ hardware)
The OEM brake lines on most cars (including the SE-R) are made of cheap rubber, simply to transfer brake fluid from the master cylinder to the calipers. The cheap rubber keeps overall production costs down. The problem is this: rubber reacts to heat by changing form, and thus, if you are driving competitively and really getting on the brakes, the pedal can become mushy, and worst case scenario, you get brake fade (when you push on the brake pedal but it has little or no effect on vehicle speed). Brake fluid can get VERY HOT, almost near boiling, on hot track days. Stainless steel lines are similar to OEM hoses in
function, but the steel composite of the lines reduce expansion from the heat as normal rubber would, and also gives a little more protection from any possible roadway debris.
On the track, the LAST thing you want is a busted brake line as there are only 2 possible outcomes: your day is over, or you crash.
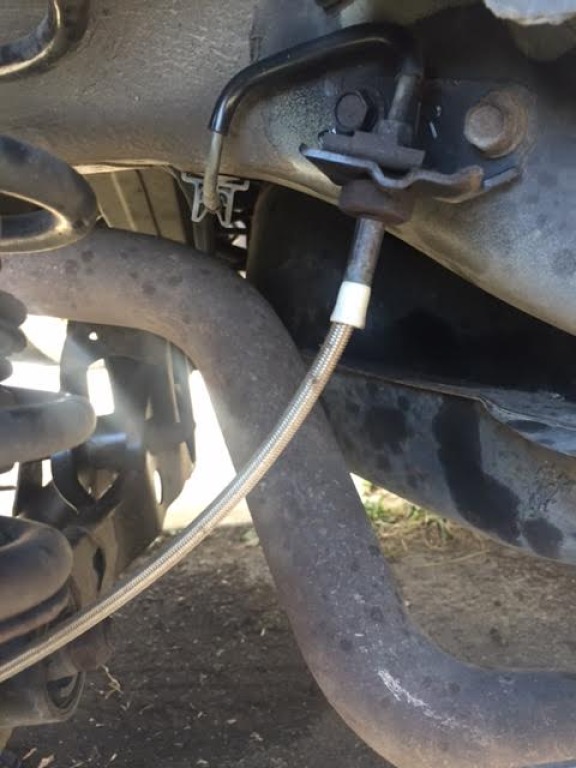
(The new stainless steel line just in front of the 2.5" exhaust piping)
So while I was installing the new rear brake pads I also installed a set of SS brake lines. Basically, you just follow the route of the OEM rubber lines and hook them up. Installation is straightforward.
Driving impression: Honestly I didn't notice much of a difference with just the rear SS lines, because, well, they are just in the rear. However I suspect when I install the SS lines in the front (as the front brakes do about 80% of the braking) there will be quite a difference in pedal feel.
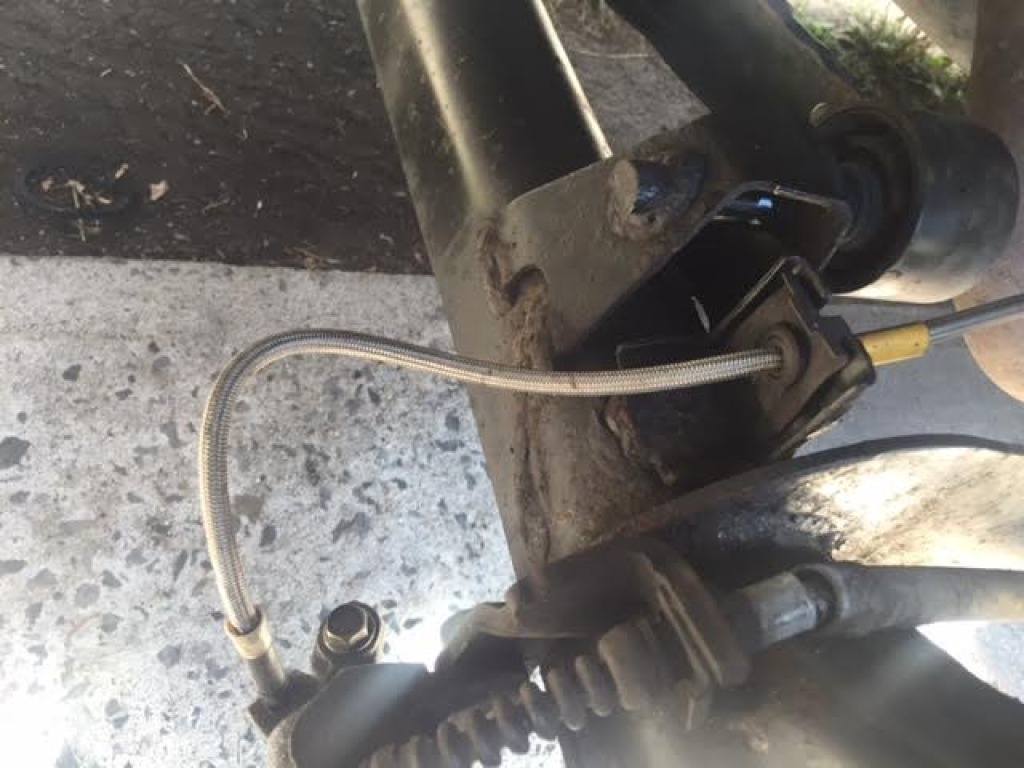
Another shot of the stainless steel brake line - passenger rear. Notice how the line goes right through the stock mounting points.
Re-Installing A/C in the '98 SE-R
Since the summers in the North-East have seemingly been getting hotter and hotter each year, and the fact that my 98 SE-R is BLACK, I simply could not bare the thought of another summer with dozens of 90+ degree days without air conditioning. Therefore in May 2016 I decided to remove the working A/C system, which includes the compressor, condenser, hot & cold lines, and drier from my second rusting 97 SE-R and install them in my 98 SE-R. This was about a FOUR HOUR job and not the easiest of things to do; had to remove the entire A/C system from the 97 SE-R, and then basically do everything in reverse to install it in the 98 SE-R.
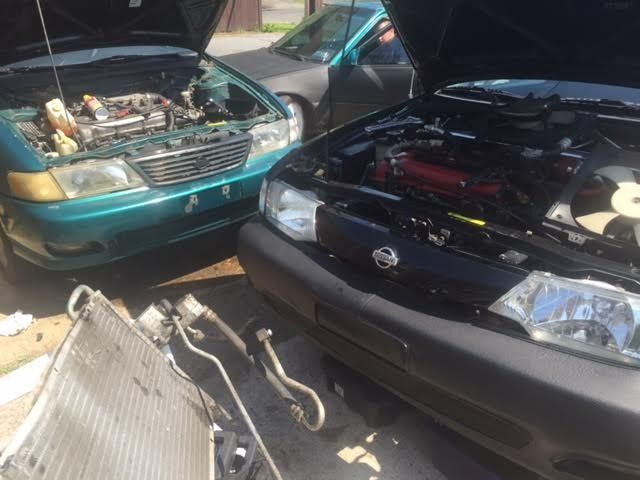
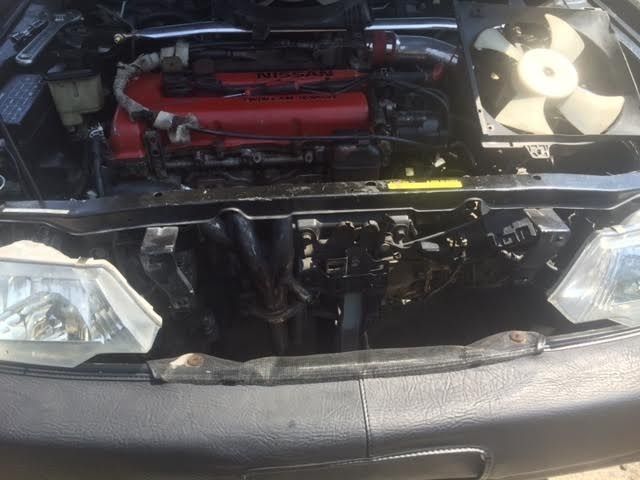
The 97 SE-R (left) donor parts car, and removing the grill and radiator in the 98 SE-R to make room for the A/C condenser!
From left to right: the A/C compressor (original), mounting bracket, and drier/receiver. These are of course major components of the A/C system.
Left: the 209k mile A/C condenser, in pretty good shape for it's age and use!
Right: the same condenser installed in the 98 SE-R. You must remove the radiator and both coolant fans (get a bucket or something to collect the coolant in) in order to have enough clearance to install.
Left: the A/C compressor re-installed in the 98 SE-R. You don't even have to remove the alternator (just above) to get at it, which is a major plus. Center and right: the A/C hot & cold lines, re-installed in the 98 SE-R. After using one of those $24 bottles/gauges of refrigerant from Autozone, I now have cold air flowing through my vents! It was 80 degrees F the day of the install so it was a great day to test it out. The A/C blew nice and cold the entire day. No more dreading driving my car in the horrendous heat!!
UPDATE: Taking the advice of my friends at
www.SR20-Forum.com - about two weeks after the original installation I took the car to my friend's shop where the A/C lines were officially "evacuated" and/or "vacuumed" with the proper pumps. This is the proper way to install an A/C system (once it's opened up) and removes the previous refrigerant while easing built up pressure within the system and hot & cold lines. Once the lines were completely evacuated, we once again refilled the system via the service port cap with another bottle of refrigerant from Autozone. THIS TIME, the A/C blows even colder than before, I'd say about 30 percent colder. So even better, and the fact it was done properly eases my mind a little more.
Installing a new clutch in a 1998 200SX SE-R:
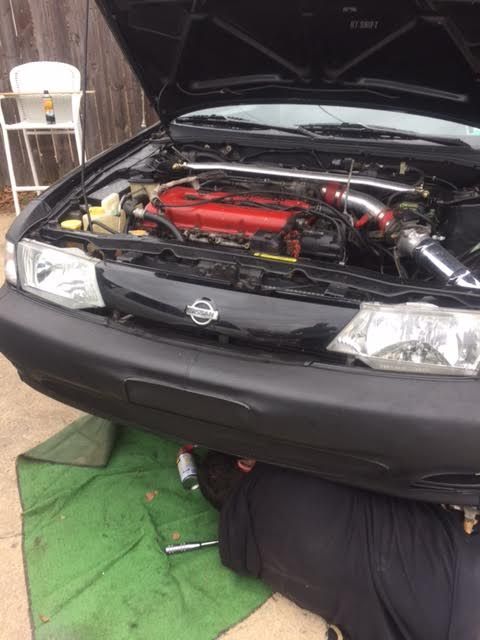

(My '98 SE-R & the 5-speed gear box removed)
After 44,000 miles my Clutchmasters FX500 clutch began to fail in my '98 SE-R. Basically, it began to "slip." In manual transmission vehicles, the clutch "slips" when you put it in gear, let off the clutch and step on the throttle and the car does not move forward while the tachometer and engine rev higher. The reason this happens is because the clutch disc has continually worn out and lost its ability to be "grabbed" by its accompanying pressure plate. Some clutches begin to slip slowly (as mine did) - depending on the gear you were in or the incline of the road, while some clutches are fine for a long while and then die completely out of no where.
Before I go into the step by step process - as far as difficulty goes, this is fairly involved and should NOT be attempted by those who are not at least somewhat mechanically inclined. You also need the proper tools which can be costly. If changing your engine oil is a 1 on a scale of 1-10 (with 10 being most the difficult) - a clutch job is around a 7. It can be a 4-6 hour job even with a friend or two doing helping. Once you do it the first time, it gets easier later as you know what to look for. HOWEVER, A WORD OF CAUTION - do NOT attempt to do this if you have never done complex mechanical jobs on vehicles. There is a reason professional shops can charge $700.00+ just in labor to do this procedure. It is an involved and possibly physically dangerous process as transmissions & gearboxes weigh over 100lbs and need to come down out of the engine bay. So if you are new at this I suggest having a mechanically inclined friend come assist you. Buy him lunch & have the fridge stocked with beer to show your appreciation. :)
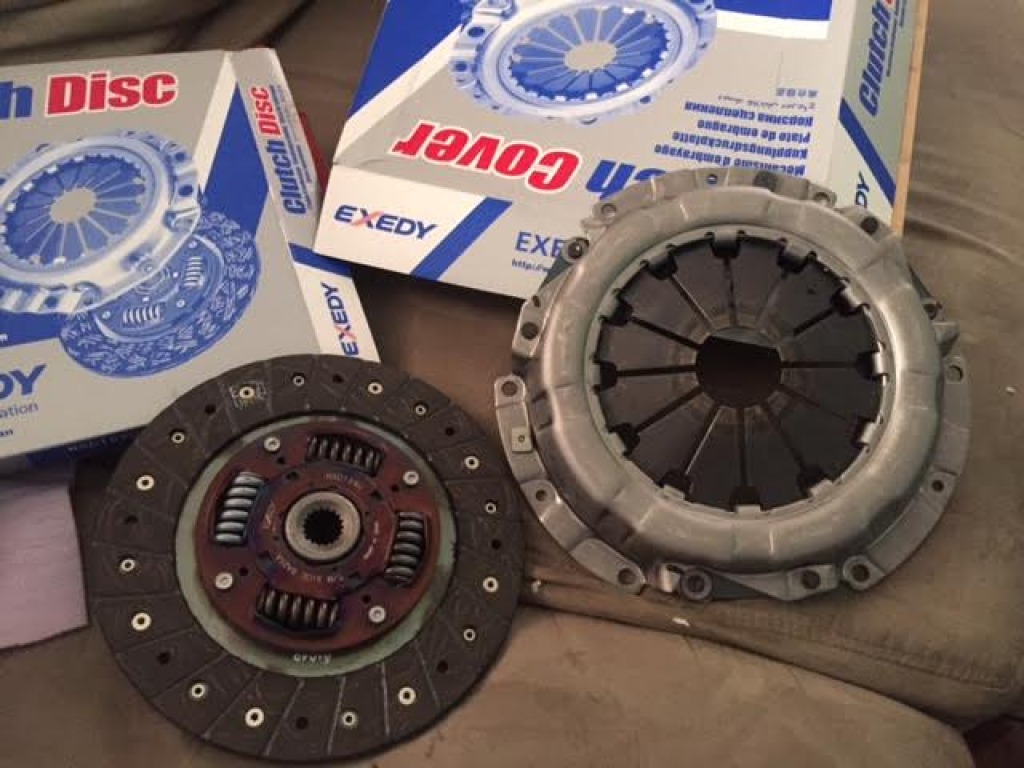
(Brand new Exedy "stage 2" clutch kit - disc on the left, pressure plate on the right)
Tools/items needed: jack, jack stands, wheel chocks, your new clutch kit (which should include the pressure plate, clutch disc, and alignment tool) a *deep* 32mm socket (for removing the axle nuts from both front wheels), a torque wrench (in ft-lbs), breaker bar, various socket wrenches w/ deep 12, 14, an 17mm sockets, socket extensions, open ended wrenches from 10mm-22mm, socket swivels, a pry bar, hammer or mallet, some WD-40 or PB Blaster, a fresh gallon (4 quarts) of 75w-90 gear oil (synthetic is best but costly, you can get the regular cheap kind), drain pan, funnel with a long neck, large zip ties, some lubricating grease, and anti-seize compound.

(A typical transmission jack)
Optional items: A transmission jack (for lowering and replacing the gearbox onto the transmission as it weighs over 100lbs. This is a great idea unless you have friends who can help you re-align the gearbox onto the transmission). A new clutch cable (since you have to disconnect it at the transmission anyway), a torch (to help loosen seized bolts) and finally, a new set of transmission mounts if you have the soft OEM ones! Since you will be removing the front transmission mount and also playing around with the rear one, it's a convenient time to do this. Polyurethane mounts make a world of difference in the way your vehicle shifts and drives and makes it feel more solid. It will however increase interior vibrations, so this depends on your priorities.
HOW TO DO IT:
1) Park on a level surface. Disconnect and remove the battery so you have more room. Loosen all the lug nuts on both front wheels, remove the exterior cotter pins and break both axle nuts loose with your 32mm deep socket. You will need a large breaker bar to provide adequate torque to break them loose.
2) Put the gear shift in neutral and pull the e-brake up as high as it can go. Jack up the car and place two sturdy, trusted jack stands on each side. You want the car as high off the ground as it can safely go as it makes this job much easier. Put chocks behind the rear wheels and make sure they are snug.
3) Remove both front wheels and axle nuts. Use your 22mm open ended wrench to break the castle nut on the bottom of the control arms on each side. You may want to hit it with PB blaster/WD-40 and let soak for awhile as these are tough to break loose. Here is a photo of this nut, still holding the control arm below it.
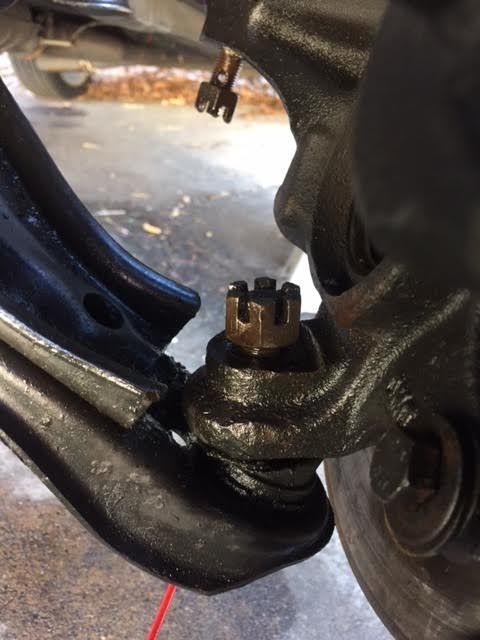
4) Loosen and remove the 2 strut bolts on each side They are 17mm. This will allow you to bend the hubs slightly away from the car which will allow you to pull the axles free from inside their hubs. Photos:
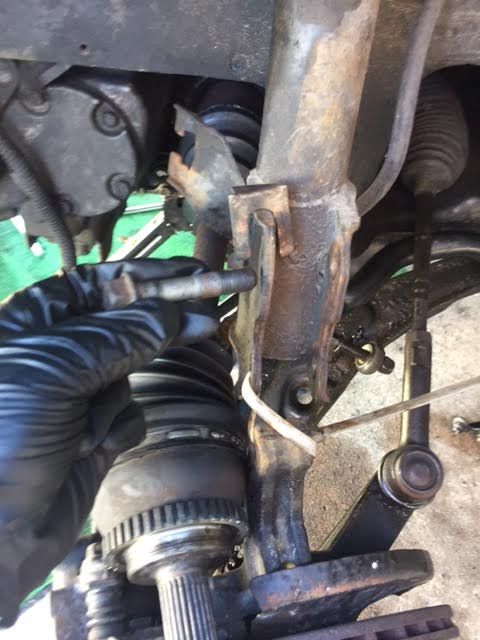
NOTE: It is NOT necessary to remove the castle nut on the knuckles, tie rod nuts, or sway bar. With some maneuvering you can pull the axle free from inside the hub.
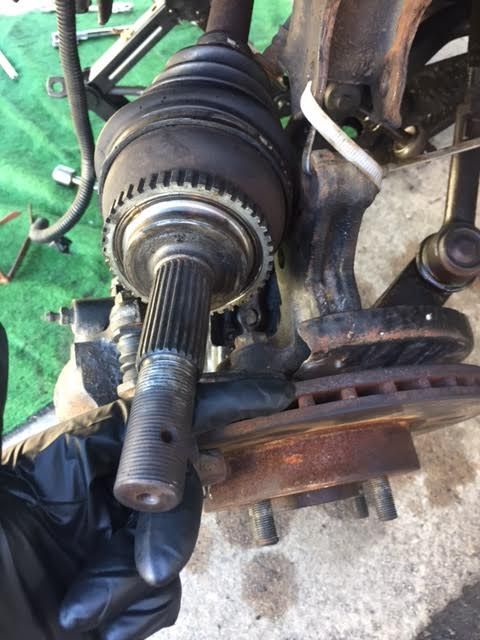
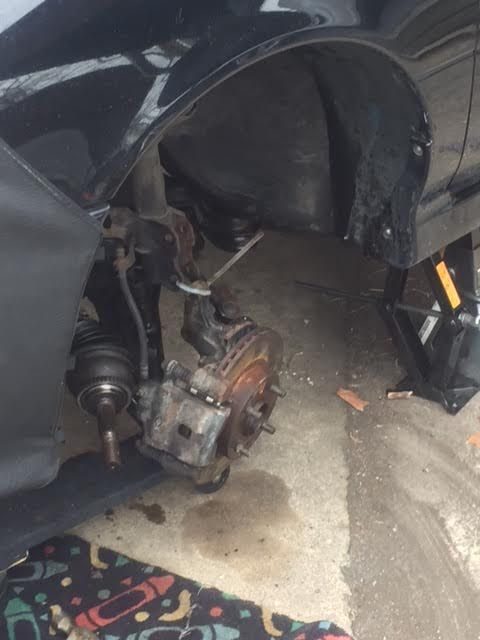 Use a couple of strong, thick zip ties to allow both axles to dangle safely.
5) Next, drain the gear oil into your pan. The drain release plug is located on the driver's side of the gear box just below the axle, and uses a 3/8" ratchet to open. I am pointing at it with my finger in this photo: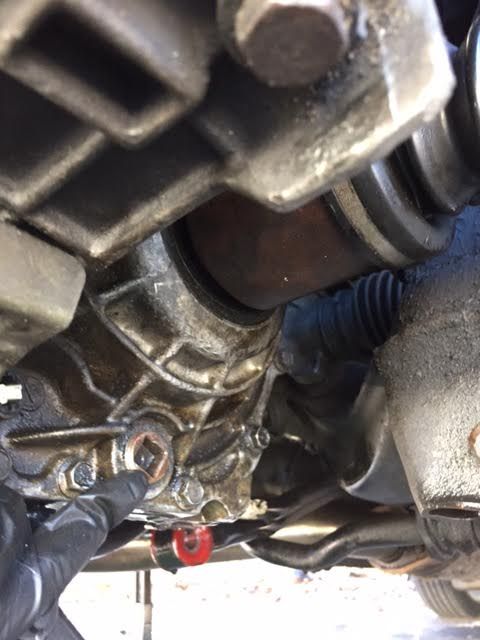
The oil can take up to 20 minutes to drain completely , so now is a good time to take a break. The old oil may have a foul odor.. don't worry, it's normal. The reason we need to drain the gear oil NOW is because if you don't, it will spill all over the place when you remove the axle from inside the passenger side of the transmission.
6) Replace the drain plug tightly (we fill the gear oil from another location).
7) Next, get under the car and disconnect the shift linkage from it's bracket. You also need to disconnect the shifter stabilizer bar. It has a small bracket with a few 10mm bolts. You don't need to do anything else (don't disconnect it below the actual shifter). The bracket we want is located towards the driver's side and is held on bya small 10mm nut. It looks like this once disconnected:
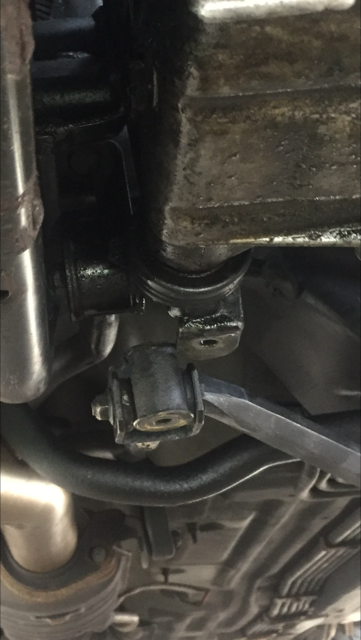
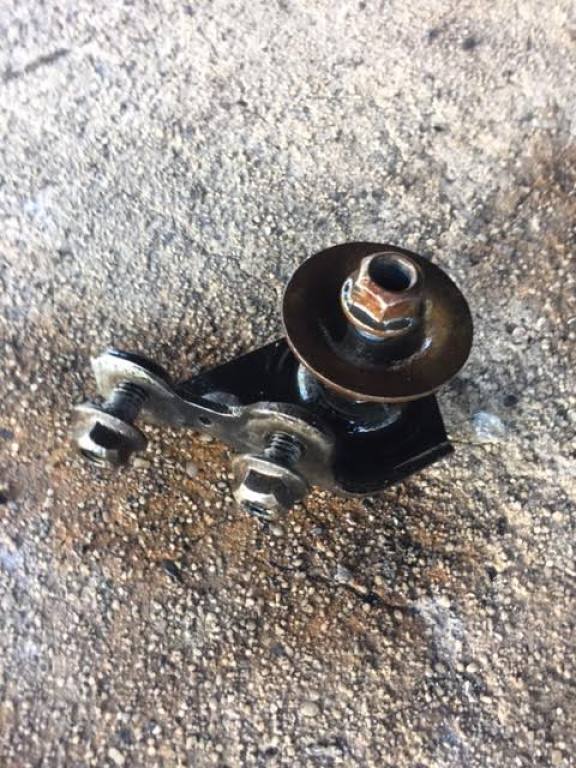
The picture on the left is from the front of the car looking back. Pull the linkage out of the way so it doesn't get caught on the gear box later when you drop it down. This is after the bolts have been removed. The picture on the right is the shifter stabilizer bracket removed. Keep this apart and together in a safe place because it's easy to get lost with all your tools and parts out. You may need to use an open ended wrench to get at the bolts.
 (The starter, disconnected but still bolted in)8)
 Remove the starter - it needs to be removed as it's bolted to the transmission &
gear box. The starter has a rotating gear inside that physically rotates the flywheel - thus "starting" the motor when
you turn the key. Removing this yourself is a bit more difficult and
easier with a second person as you need to disconnect the wiring from
underneath the car as there is 1 wiring harness and a positive &
negative wire held on by some 10mm nuts & washers. To physically
remove the starter itself you need to access the two 14mm long bolts
from standing up top under the intake manifold, behind the motor.
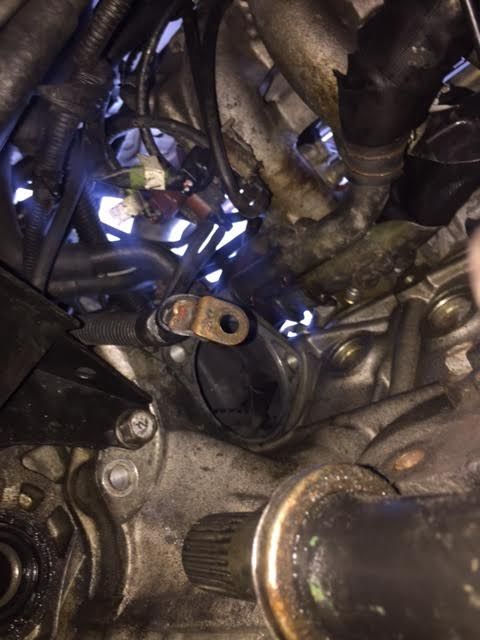
 (The location of the removed starter, taken from underneath passenger side of the car. Notice the positive terminal connection hanging)
Once the starter is disconnected from up top and electrically from below, you can completely remove it like I did here, or let it rest somewhere in the back. I recommend removing completely so it's out of the way & doesn't fall and hit you as you'll be working in that same area soon. There is an electrical connection holding it in once the bolts have been removed.
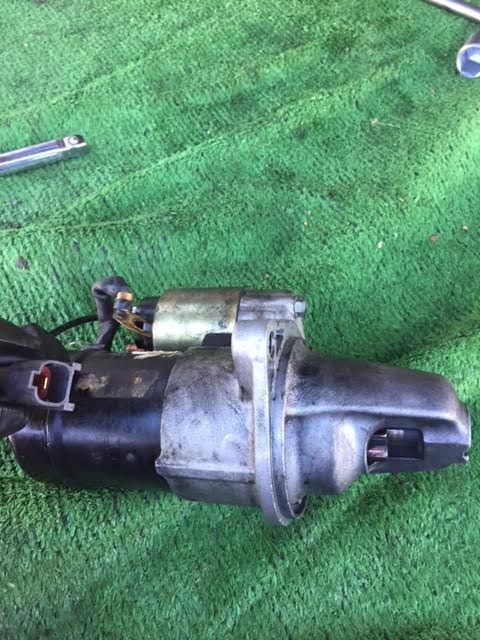
(The starter completely removed from the car)9) Now we need to remove the three 12mm passenger side axle "carrier" bolts. The carrier is what holds the axle in place inside the passenger side of the transmission. After these bolts are removed, the passenger axle will pull free from it's position. You can use zip ties to hold it up over the hub. NOTE: the driver's side axle does NOT need to be removed, but it can be if you wish.

The axle carrier is on the bottom right in this photo. You can see one of the 12mm bolts holding it in. All need to be removed and you can pull the axle free from the transmission side.
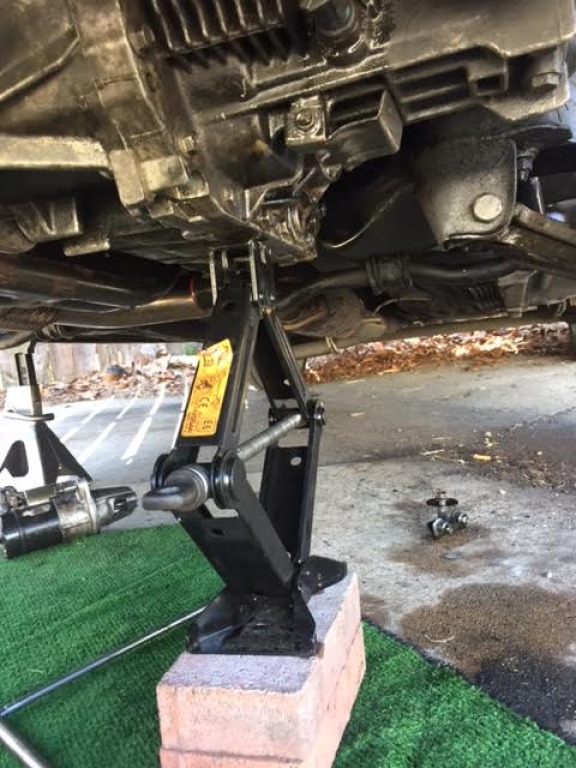
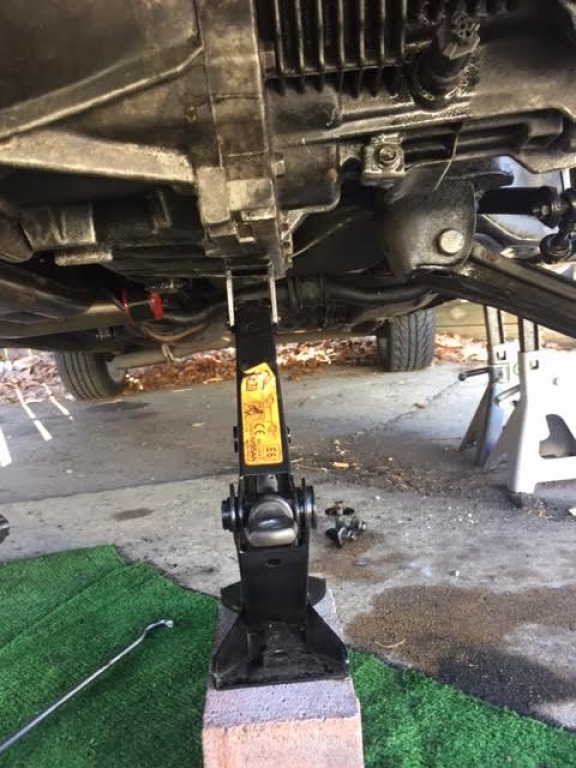 10)
10) Now you should have everything ready to start physically unbolting the transmission to access the clutch! So we need some support for it as it's heavy. This is the part it REALLY comes in handy if you have a friend helping. Support the transmission before you begin to loosen the bolts like I did in the photos above. This is how I did it. You may have a better way. I put a scissor jack on a couple of bricks; using a scissor jack is always a bit risky, but in this case we are only supporting the transmission so it works well and it's small so it's not in the way.
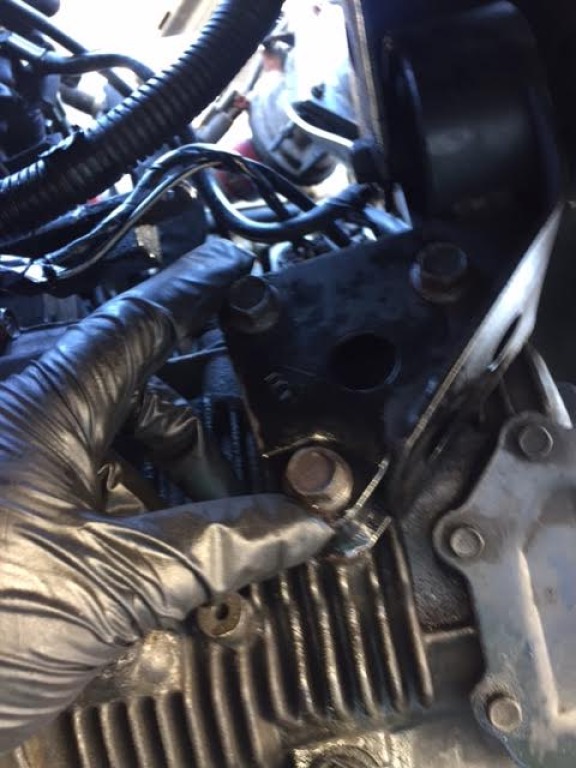 11)
11) Remove the transmission mount bolts. There are 2 mounts: 1 right up front and the much more difficult one in the rear. First, loosen and remove the three transmission mount bolts in front, then loosen the bolt mount and turn the assembly out and away from the transmission. It is not necessary to physically remove the actual mount itself.
 (The rear trans mount with the axle, starter, and a couple bolts already removed. I have a Place Racing polyurethane mount here so yours may look different)
Now, crawl under the car and start unbolting the rear transmission mount. This is probably the most difficult part of the procedure, mainly because of the tight space and some hidden bolts. They are 14mm but there is one shorter one that's hard to see (and find). As long as the jack is still supporting the transmission you are good to go, so keep removing the bolts.
LOOK HARD. Some are hidden. I also recommend possibly labeling and/or putting them in individual baggies so you know which bolt went where, as by now you should have lots of bolts sitting around and only more to come. Loosen the main mount bolt but it can stay bolted to the cross-member below.
12) Remove the crank angle sensor at the front of the transmission - it is located near the center of the transmission and held on by a 10mm bolt. You need to remove it before dropping the transmission or there's a good chance you will break it.
#) Unbolting trans
#) Clutch cable
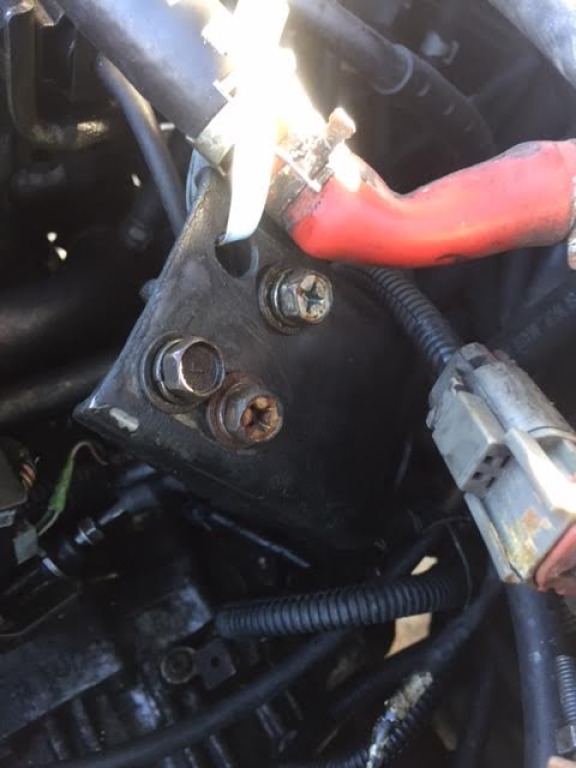
#) Refilling the gear oil and fill plug issue:


THIS SECTION IS BEING WORKED ON - MUCH MORE TO COME WITH PLENTY OF PHOTOS!
The Energy Suspension Stabilizer Shifter Bushing Installation:
Well what can I say:
installing this bushing was a PAIN IN THE ARSE. It was more frustrating than many simpler upgrades, however once completed, the results are quite rewarding. If any of you find yourself in this situation, I hope this can help out a little bit. First, here is a brand new ES polyurethane shifter bushing, both top and bottom, purchased for $25 from Greg Vogel @
www.GSpec.com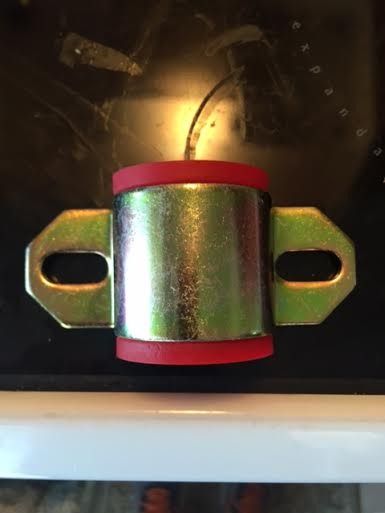
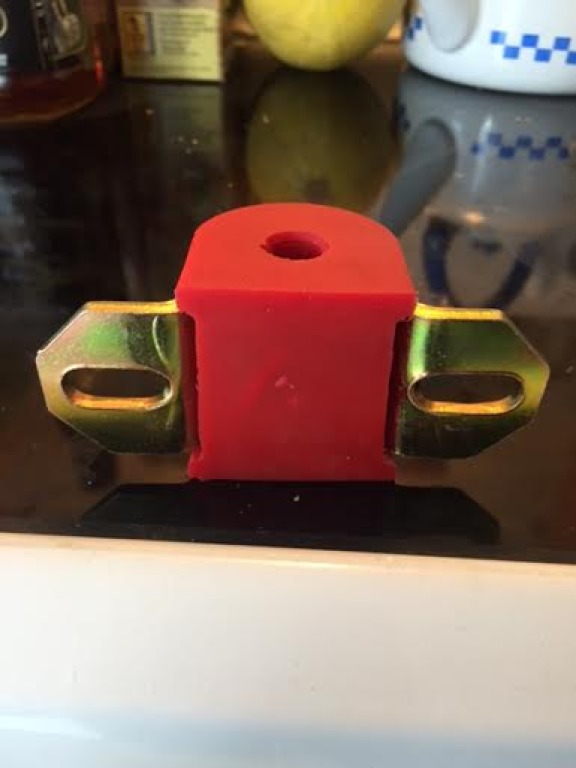
Below is the (still connected) original shifter bushing assembly on my 98 SE-R, this is the view from underneath the car, directly above the catalytic converter. You can see why I chose to replace it:
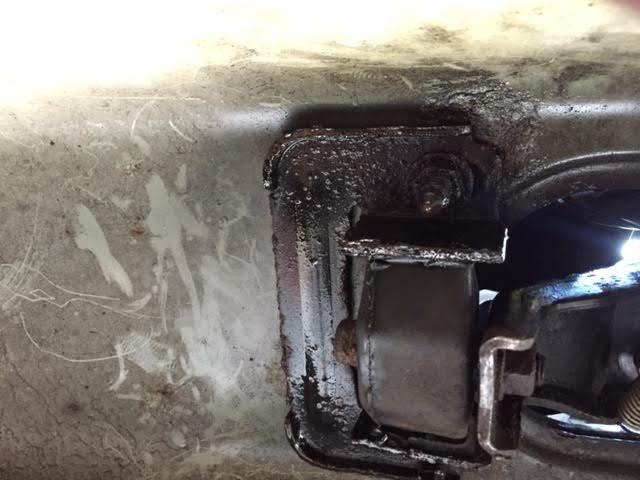
The assembly is rusted to hell, and look what happened to the OEM shifter bushing once I installed a B&M short shifter (perhaps too much stress put on it during the installation):
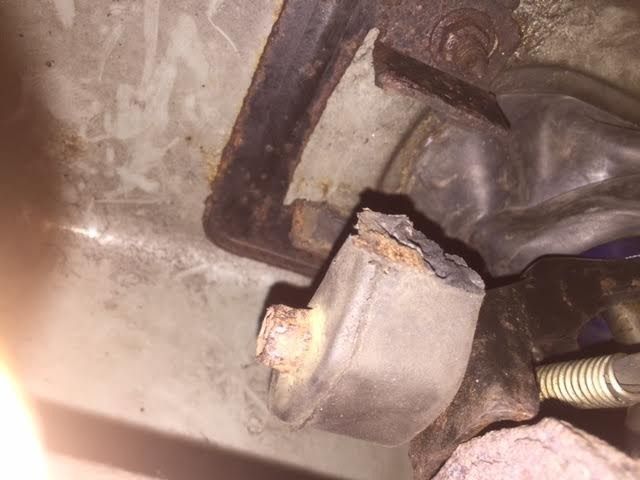
The original bushing, COMPLETELY destroyed, ripped and just hanging there! Since the entire shifter assembly is supported solely by this, it was basically resting on the exhaust system below. This had to be remedied ASAP, but there was a problem. Considering we are dealing with the undercarriage of a 18-year old vehicle, it had long since rusted over. There are two 12mm nuts holding the original (and busted) shifter bushing in, which barely turned with a deep socket. The other problem was this:
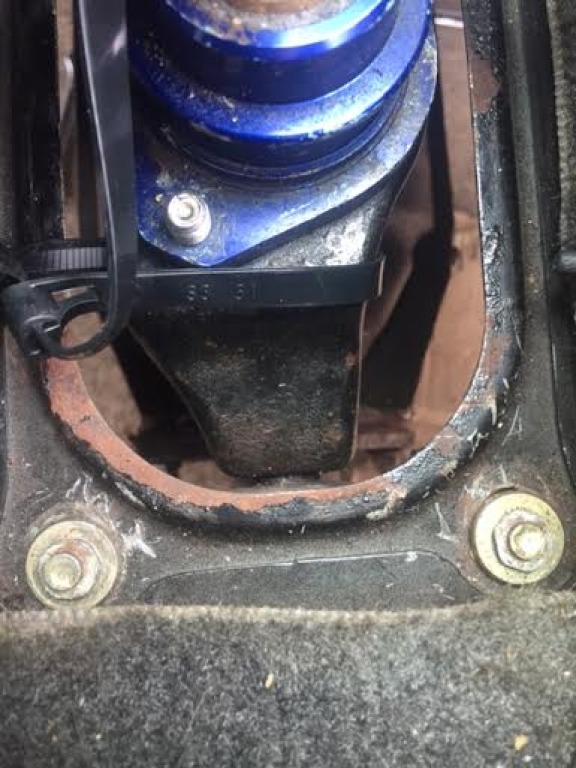

This photo is from inside the cabin showing the exposed shifter assembly (excuse the temporary zip ties). These "bolts" (if you can even call them that) on the bottom left & right are connected to the two 12mm nuts underneath the car (the rusty OEM assembly above). The whole issue here is this:
after years of exposure and rust, the nuts underneath just spin and there is nothing to grab up top inside the cabin to prevent them from doing so. The tops are flatter than pancakes.
So you have to get creative.So here's what we did. My friend Ken & I (who has access to many metal cutting tools) sat inside the car and just went to town on the two bolts. They are spot welded from Nissan from the factory (it appears Nissan never intended them to be removed). After about 20 minutes of dremeling and using a cutting drill we finally broke the upper bolts in half and thus the rusted bushing assembly came off.
So the next step would be to just install the new bushing right? Wrong! As it turns out the ES bushing is *slightly* too large to fit and must be ground down at one of the lips. Grinding down polyurethane isn't exactly easy so once again we had to break out the power tools. For installation in a 95-98 SE-R or any B14, the portion circled in yellow has to be ground away to fit properly:
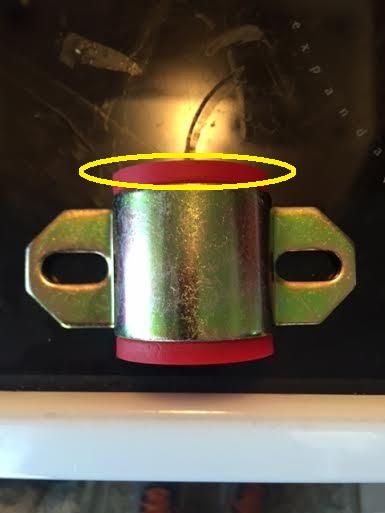
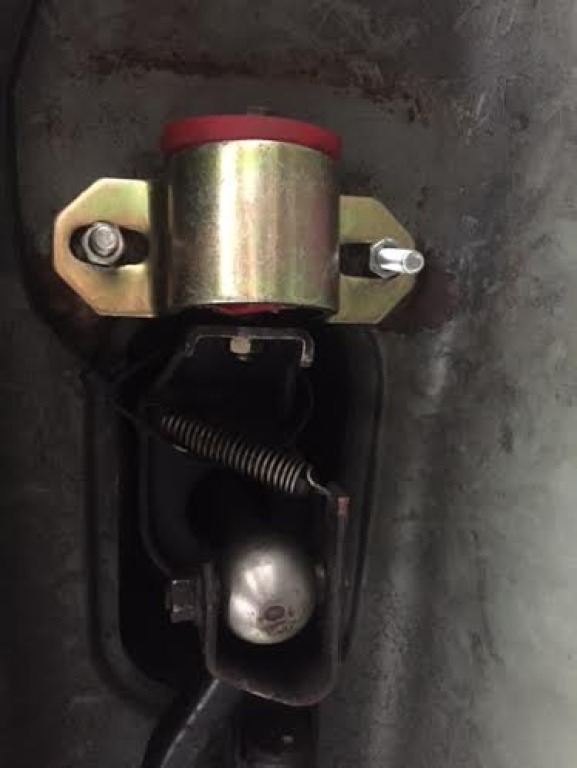
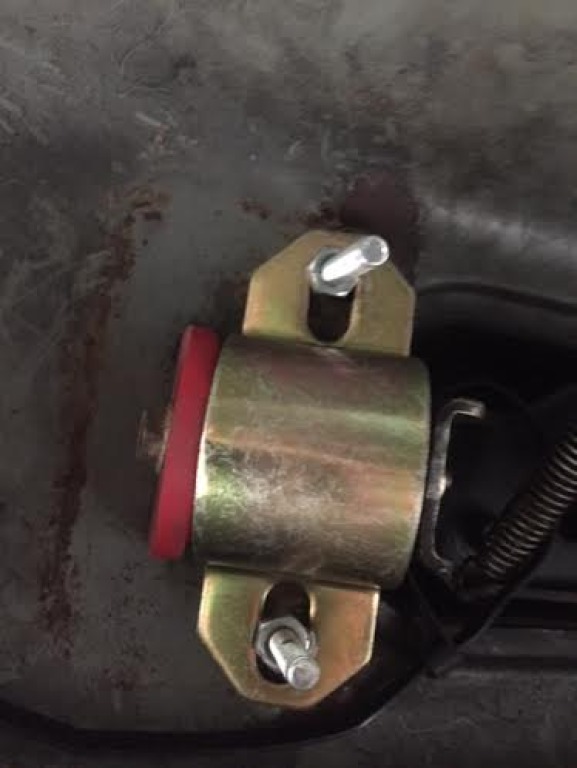

Once the new bushing was ground down to fit, we installed new stainless
hardware (two bolts and 2 washers) to attach it from underneath. The photos above show the new bushing installed and set to go.
Driving impression: despite it being apain in the ass, it's one of the BEST modifications you can make on a B14 SE-R! Each shift feels very precise and smooth, almost as if it's a new gear box. The best part about this mod is you experience it EVERY TIME you drive the car. If you can deal with removing those pesky spot-welded bolts, I highly recommend this mod. Even if you don't get a short shifter you can pick up the bushing which would make a nice difference too.
Waxing the SE-R: making the most of the infamous Nissan "super black" paint:

The paint on my 1998 SE-R is all original, yet despite being 18+ years old, it really shines up nice with a proper wash and wax. Below is my actual reflection in the hood! Scroll down further to see what products I used to accomplish this:

The process is somewhat time consuming (about an afternoon) but rewarding. The hood looked like a mirror when I was finished! I received many compliments and the shine & luster lasted for several months (I need to do it again soon). As a general rule - the older the paint is, the shorter the results will last. So for an 18+ year paint job, this would need to be done around 3-4 times a year. Of course all paint jobs are different, especially ones from the factory, so your results may vary.
How I did it:
I use all Meguiar's products and have for a decade. They do the job and don't break the wallet. I have found almost no difference between the less expensive Meguiar's products and the top shelf products, but again your results may vary. In addition to the products below, you will need plenty of new and clean round applicator pads and perhaps a dozen medium sized, clean, lint free white towels.
1) First, thoroughly hand wash the entire car with water and a strong soap that will lift any left over residues and previous waxes in the paint. Some people use dish soap and some use regular car wash soap but scrub extra hard. Basically we want anything still on the paint removed to allow the wax to do its job later.
2) Dry the entire car with clean lint free towels. Open up all the doors, fuel door, trunk etc so you can hit any areas where water may hide.
3) Park the car in the shade, out of the sun. It also goes without saying that the ambient temperature should be at least 50 degrees or warmer.
4) Here are the cleaner products I used:
This stuff is great. It's used to pull as much embedded dirt from the paint as possible to allow the actual wax later to shine it up. It comes in either the liquid bottle or round cylinder paste. I have found the paste works better. You will also need a bunch of new round applicator pads (they are sold in the same aisle as the waxes for a few bucks).
5) Use the cleaner wax everywhere and you'll see how much dirt comes up and out of the paint from a seemingly clean car!
Depending on how dirty the paint is, you will go through many of the applicator pads, so be prepared and have extra just in case. Follow the instructions on the labels. This is the longest part of the process and you need to put in a lot of elbow grease. It's basically rub on with the applicator pad, allow to haze, and then buff off with the towels. The harder you press on the paint the more dirt will come up. Continue doing the same areas until the applicator pad/towels begin to come up clean (or at least mostly clean). This could take well over an hour if you do the entire vehicle and want to do it correctly.
.
 6)
6) The finals step for me is Meguiar's "Gold Class" carnauba wax. It's a little more expensive but worth it. Again, make sure you have plenty of clean applicator pads and follow the instructions on the packaging. Use the clean white towels to buff the wax off.
Some dirt will still come up on the towels even if you used the cleaner wax beforehand; this is normal. Soon you will start to see the paint shine like you wouldn't believe.
Here are my results: remember this is the original paint
from Nissan in 1998!

BTW, here's another tip. If you also have a Nissan "super black" paint job (code KH3) you can get one of these for around $8 at Autozone for touch ups and scratches.


Update: while thoroughly cleaning out the interior, I repainted the trunk with a rust-resistant black paint. It's drying in the photo above. Much more on that later, including the treatment of other common locations that are prone to rust in the '95-98 SE-R. :-)
THE SR20VE MOTOR:
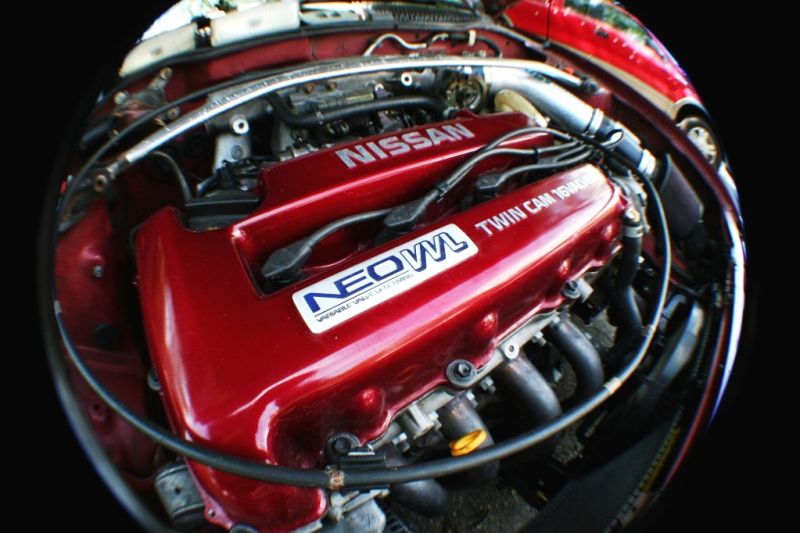
The rest of this page deals mainly with the incredible high-revving SR20VE 2.0 liter DOHC motor, basically the SR20DE's bigger, faster cousin. While I no longer own this motor or the vehicle it was in, I sure do miss it and have kept all the relative information below to answer other's questions. And as always if you have a question for me about anything at all, just e-mail me at Jordan@jordanwhitemusic.com - thanks :)
The SR20VE produces anywhere from 190HP to 205HP right from the factory, these motors were only available in Europe, Australia & Japan until several years ago when they slowly were being imported to the United States. While both motors are in fact 2.0 liter 16-valve DOHC, the SR20DE produces only 140HP. The SR20VE "red top" (pictured just above) goes for $1,000+ with around 60-70,000 miles on it; however the "blacktop" SR20VE motor makes 205HP and typically comes mated to a 6-speed transmission which is fantastic, but these are triple the price. The SR20VE motor swap is very popular amongst Nissan/Nismo motorsport enthusiasts as it is relatively easy to do. It will drop into any chassis that originally came with an SR20DE from the factory and bolt right onto the original transmissions contained/motor mounts. It also uses much of the same wiring harness.

(The B13 shell w/ most of the front end removed for easier access to extract the motor & transmission on the pallet on the right)
A lesson learned:
7/18: There was a STUBBORN oil leak I thought was coming from the lower oil pan since I had removed it to inspect the pickup and baffle. After I replaced and sealed it, waited a day, and refilled with oil, I started the engine and saw oil dripping on to the garage floor so I got under the car with a light and it appeared to be coming from the pan. The check engine light also was flashing. I thought I had a bad pan so I:
1) Located a new lower oil pan (the only U.S. model pans that fits the SR20VE motor is from the 2000-2001 Sentra SE or the 1999-2002 Infiniti G20).
2) Replaced the pan and resealed it very well; waited 24 hours for cure and started the motor after pouring in 4 fresh quarts of oil. DRIPPING OUT AGAIN, just as intense as before! I was not happy.
3) Once again, I pulled the (newer) oil pan out and did an even better job sanding down and removing the old sealant, I even switched sealants in case that was it. I bolted the pan up with no oil in the motor and waited overnight again, then poured in 4 more quarts of fresh oil and started it up. I looked under the car and saw nothing as the motor ran. For about 20 seconds I was happy, until there it was yet again. Drip. Drip. Drip Drip. This time I decided enough was enough. I shut the motor off until the oil stopped dripping down onto the floor, then restarted it and immediately got under the car with a light to find the source. What I saw surprised me. It wasn't the oil pan leaking at all. It was this:
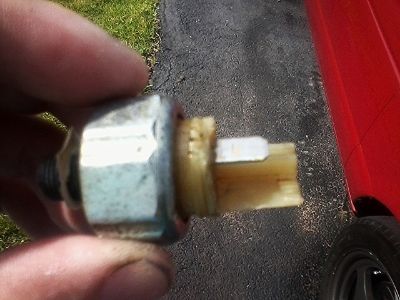
What you're looking at it the OEM oil pressure sensor switch. It has an electrical connection that, if the oil pressure drops below a certain level, it triggers the oil light on the dash as well as the check engine light. I couldn't believe it. Oil was literally just pouring out of it down onto the oil pan below which gave the illusion the pan was leaking. To access this you need to remove the entire oil filter manifold attached to the block by three 12MM bolts. I got a new oil sensor switch at Autozone for $9.19. ALL that time and money in oil (easily $80+ total) and it was something simple as that. I put the new switch in with an open 19MM wrench and no more oil leak!! The lesson to be learned is this: the SIMPLEST explanation is NOT ALWAYS the correct one. I thought it was the pan leaking since I recently removed the pan but coincidentally, or Murphy's law or whatever the switch just a few inches above the pan decided to quit at the same time! DOH!
7/14: Around 30 pounds in weight savings by swapping out the OEM stock hood and adding a carbon fiber one w/ hood pins. Looks cool too! Stock hood weighs 38lbs, the carbon fiber hood weighs 18.5lbs. Every bit helps!
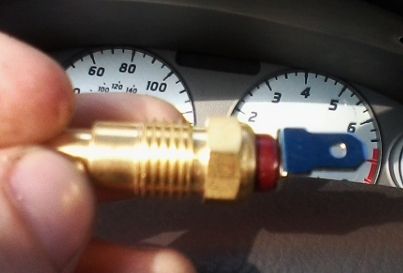
(New temperature sensor; mounts in passenger side of block near above oil filter in the SR20VE)
6/14: Sleeper front end. After learning that the "Tsuru" grille can restrict airflow to the motor, swapped in the USDM 1993-1994 Sentra SE-R grille and headlights/corners setup, with a new radiator. Also put a bra on that I've had:
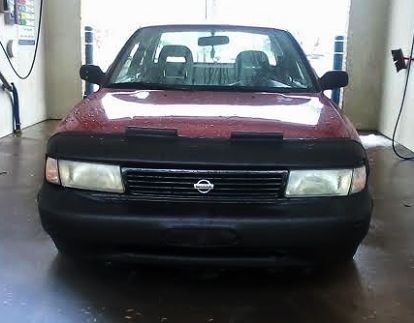
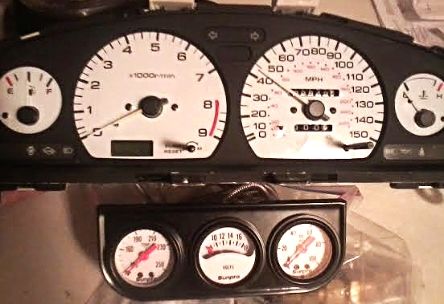
April 2014: the ClutchMasters FX500 6-puck clutch was installed. WHAT A DIFFERENCE! This clutch is a tough SOB and even comes with a warning that says "HARSH ENGAGEMENT - DRAG USE ONLY." While pedal feel is quite good it does "chatter" a bit until it's been warmed up. According to other SR20 owners it should be able to handle up to 400 wheel horsepower. It is easy to stall the vehicle at full stops if you don't pay attention, but a great clutch overall. GEAR OIL: The '91-'94 Sentra SE-R RSF532V manual transmission, which contains a viscous limited slip differential, takes exactly 1 gallon of gear oil. At the advice of my friend Ray who owns a 1998 Sentra SR20DE turbo I went with NEO RHD 75W-90. This stuff is EXCELLENT and an ease in shifting was noted in both cold and hot ambient temperatures. The downside is it's expensive, going for around $80 per gallon in the U.S.
The FX500 fresh out of the box (not sure why they bother painting it as you never see it once installed):
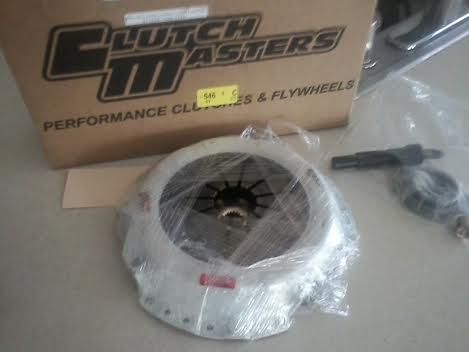
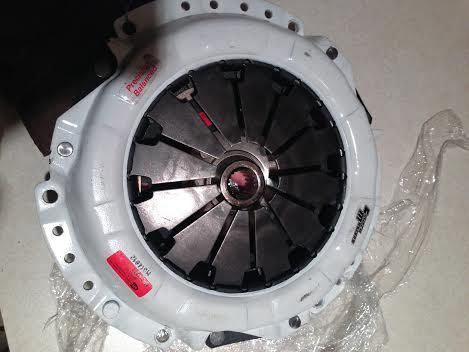
While the engine was apart, it was treated to three-angle valve job, valve re-seatment, re-shimming, AND a port & polish of the head using a Flowbench.
Before:
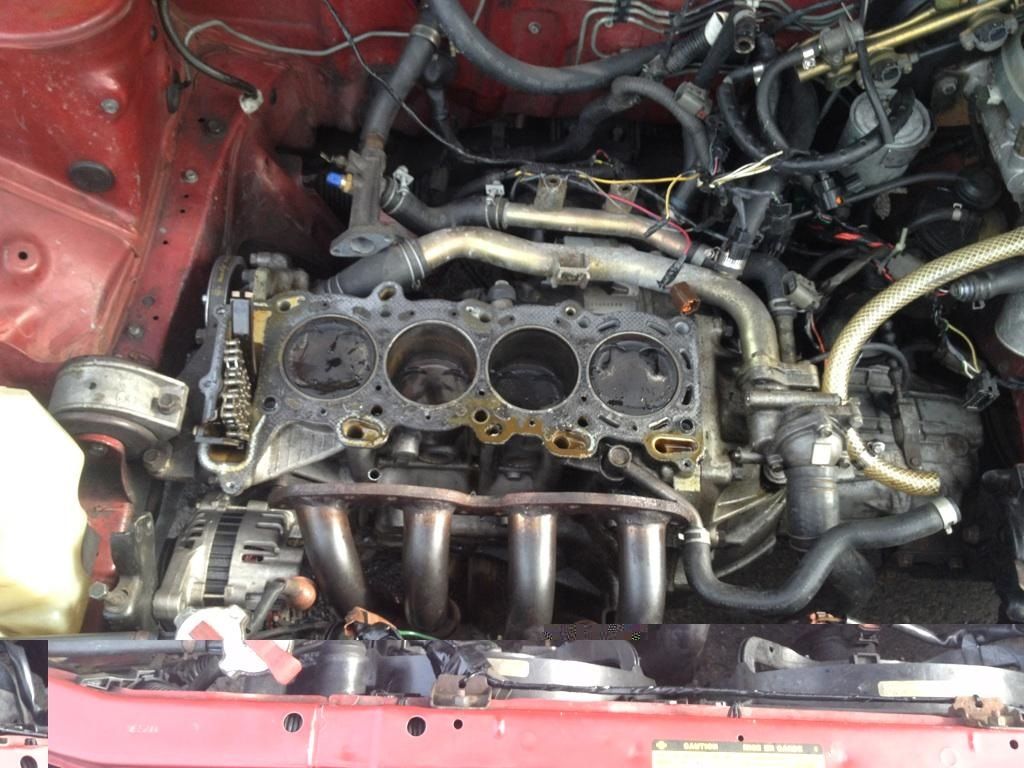
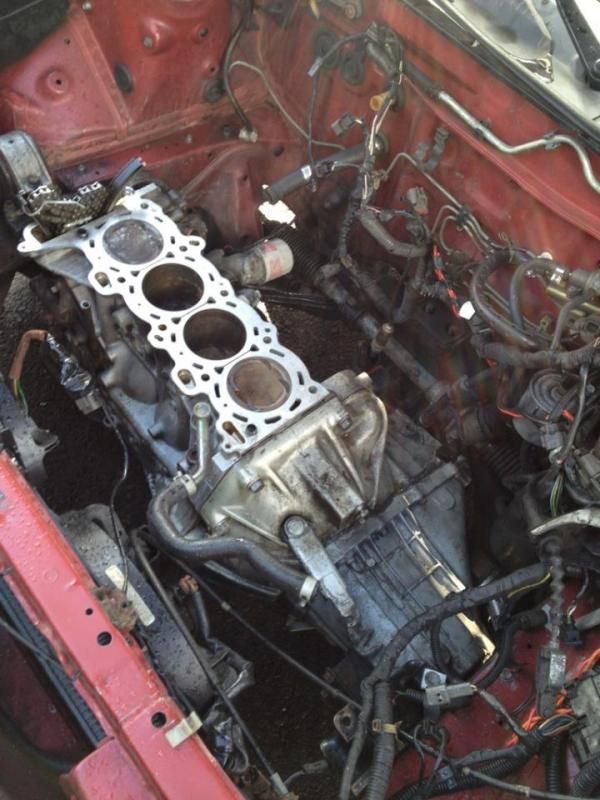
After:
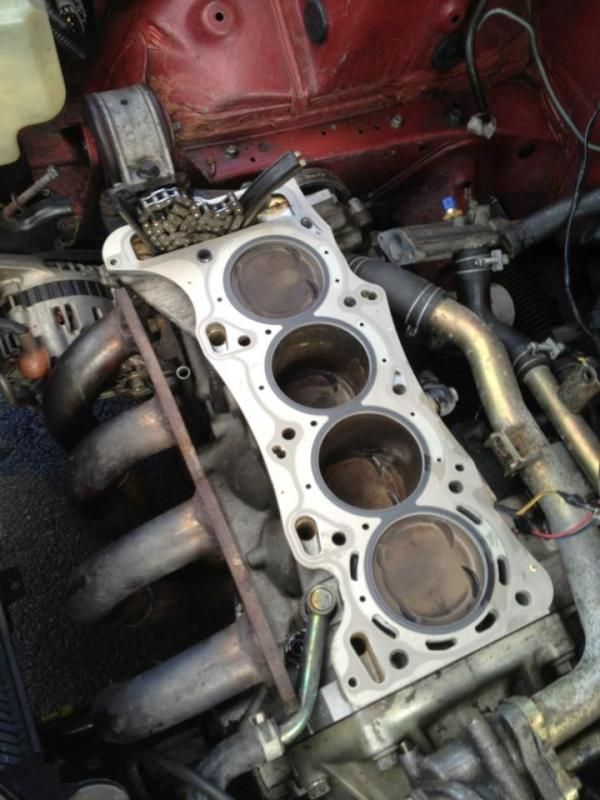
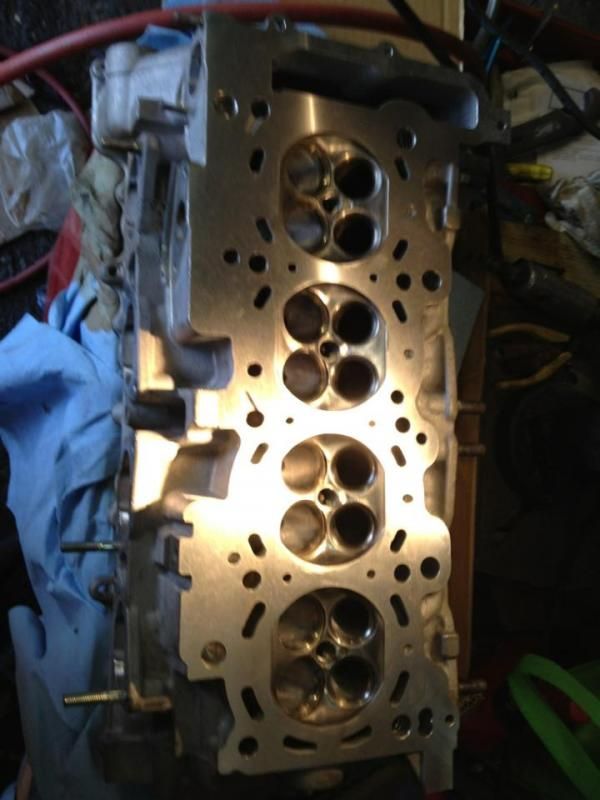
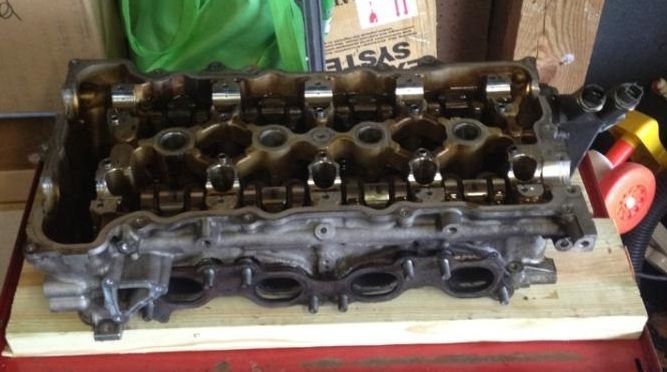
(The SR20VE head all cleaned and polished up)
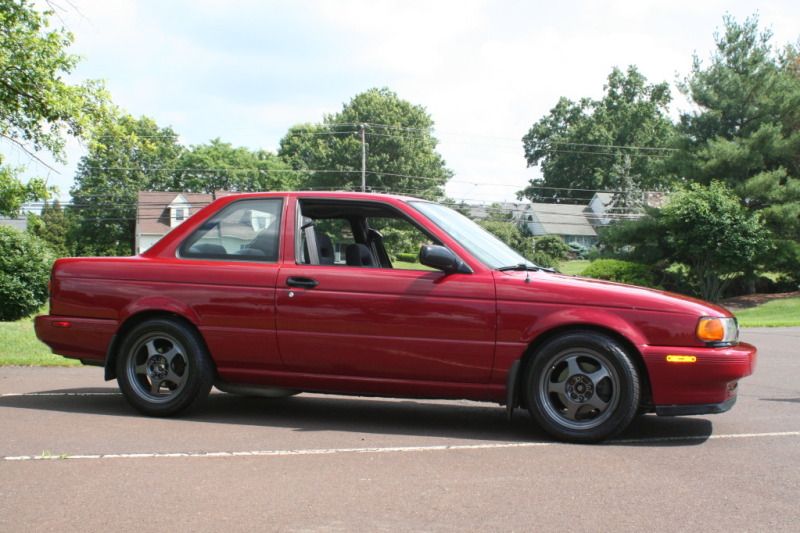
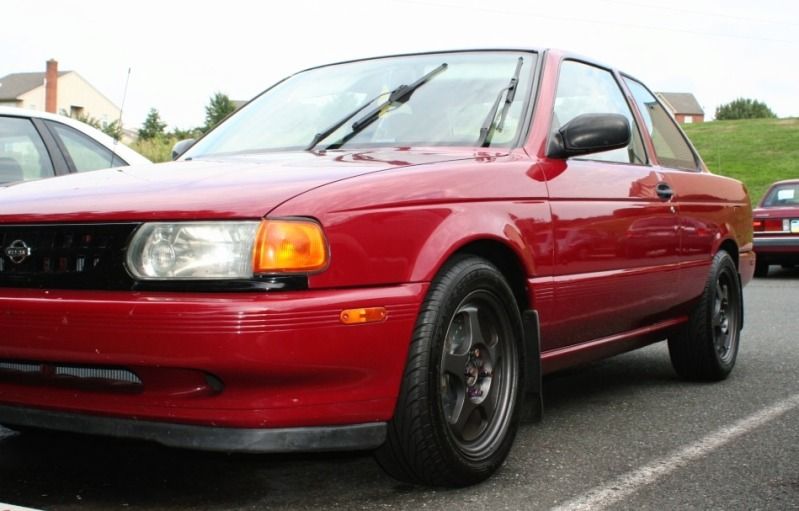
('92 SE-R with 15" lightweight black Rota Slipstream wheels, with a Mazda 626 lip modification)
The Nissan SR20VE engine in different forms:


(Nissan's SR20 motors, blue top and black top respectively. The bluetop was a 1.6 liter making the least power; the blacktop was the most powerful of the VE's making 205HP stock and very rare)
The SR20VE motor is a 2.0 liter 16 valve DOHC, inline 4-cylinder. The motor utilizes what Nissan named Neo VVL, which is a form of variable valve timing. Heard this before? That's because this is somewhat similar to the infamous "V-Tec" used by many popular Honda and Acura motors. In stock form, the SR20VE engine produces 190 HP @7000 rpm and 144 ft lbs of torque @ 6000 rpm.
Originally, the SR20VE engine was used only in European or Japanese vehicles such as:
The Backstory:
The SR20VE engine was NEVER available in any United States Nissan vehicles, but it all began with the SR20DE, also a 2.0 liter, 16 valve DOHC, inline 4-cylinder. The SR20DE began with the now infamous and legendary 1991 Nissan Sentra SE-R, in the Nissan B13 chassis. The SR20DE produced 140 HP and 132 ft lbs of torque, which as you can see, is much less than the SR20VE. The SR20DE engine was also available in the Infiniti G20 and the short lived 1991-1993 NX2000. Except for the Infiniti G20, both the 1991 Sentra and NX were produced primarily as economy vehicles with a small and feeble 1.6 liter 110 HP engine, the GA16DE, in trim models such as the Sentra E, XE, SE and LE. The 1.6 liter version of the NX2000 was called, yes, you guessed it, the NX1600.
The 1991 Nissan Sentra SE-R was nothing to sneeze about. For it's time, it set economy car speed records, was very affordable (one could purchase a brand new Sentra SE-R in late 1990 for less than $11,000) and it was also listed as Car & Driver's Top 10 Cars of the year, in 1991. And 1992. And 1993. And 1994. It is to date the only vehicle that has ever accomplished such a feat, being on the Top 10 list during all years of it's production.


(In their completely stock form, the original 1991 Nissan Sentra SE-R (black) and 1993 Nissan Sentra SE-R (red). The main differences between the year models is a more aggressive front fascia in the '93 model. The seats also changed and the tachometer and speedometer swapped places in the dash. Cruise control became an added option in '92 models, and a front driver's side airbag also becamse standard in the '93 models and up)
How I Got Involved:
It was September of 1997, I was 16 years old, and needed a car. My father had an hour long commute and had already driven his 1993 Sentra XE (his second Nissan Sentra since his first in 1987) to well over 100,000 miles. He decided he wanted a new Sentra, and he offered me his 1993 Sentra XE for only $1,000 - well below it's value of nearly $4,000 (cause my Dad was awesome like that) - and my love affair with the Nissan Sentra began. Now, if you read just above, you will see that the Sentra XE was powered by the relatively weak 110 HP GA16DE engine. It was a 5-speed, and it was very reliable, but it wasn't very fast. What was fast (or at least seemed fast to me) was my Dad's brand new 1998 Sentra SE-R. Technically, this car was called the "Sentra SE" although it did contain the SR20DE engine, and was a blast to drive (at least, when he let me drive it).
I was hooked instantly:
My First SE-R:

After a few weeks, I sold my Sentra XE to a friend of mine and then took a trip up to Boston, MA to purchase my first 1991 Nissan Sentra SE-R which I located for sale on the then popular website, SE-R.net (the site is very outdated now). The car was completely stock, black, and had air conditioning. Little did I know that this was only the beginning. Over the next couple of years I would become obsessed with this car, to the point where my friends thought I was crazy. I probably was. Unfortunately, SE-R.net is down probably for good so now everyone goes on www.sr20-forum.com.
Anyways, for my first SE-R I eventually added a modest exhaust system, a cold air intake, a header, and the most important modification of all, new and bigger camshafts. There is a company out of Southern California called Jim Wolf Technology who have supported the SE-R community since it's inception, and sometime in November 1999, myself and several friends installed the new JWT "S3" cams on a rainy day in the Pocono mountains of Pennsylvania. Then came the Stillen body-kit, and larger 16" wheels with nice, thick rubber.


(My very first all-black Sentra SE-R. Notice in the background is my mom's Nissan Pathfinder and what would eventually become mine, my dad's '98 SE-R)
The car was everything to me, I loved it so much. It was fast and left most other challengers in the dust (mainly, Hondas and Acuras). :-P
But then, my parents divorced, and I was offered my father's 1998 Sentra SE-R, so I took him up on the offer. I sold my first 1991 Sentra SE-R, and I still remember watching it leave my driveway under the power of another. This was in the year 2001, so my "new" 1998 Sentra SE-R, although powered by the same SR20DE engine, had the extras like power windows, power locks, cruise control, a sunroof etc. But it was kind of slow, compared to my modified 1991 SE-R I had just sold. My father bought an MX-5 Miata, and I was left to start modifying my new 1998 SE-R. I did most of the same things, intake, header, exhaust, big cams etc....
Mind The Gap:
Over the next few years, my interest and priorities changed a bit. I finally sold my '98 SE-R in 2005. I would drive a number of different vehicles between then and today. I purchased another Sentra (a 1994 Limited Edition) for a daily driver, then I drove a 2004 Ford Escape for awhile, a 2006 Nissan Pathfinder, and a 2007 Honda Fit. None of these cars were modified, all were for simple transportation. I had lost the "bug."
But my dreams were different. Yes, I literally had dreams about my SE-Rs. Mostly of my first 1991 SE-R. I would dream I would find it somewhere, that it had been there the entire time, and usually wake up just before I was about to drive it. I would dream of seeing it, or just that I never sold it. Those dreams lasted for years, and each time I woke up a little sad that those cars were long gone. Then came the year 2011.
The 20th Anniversary:
The year 2011 marked the 20th anniversary of the original, the one and only, 1991 Sentra SE-R. There were several articles and websites that made a big deal out of it being the 20th anniversary, and I started paying more and more attention. The dreams for me continued, and I gave serious thought to purchasing another one. I saved up some money from performing, and started the search.
1993 SE-R - A False Start:
So in November 2011, I found a 1993 Sentra SE-R, which looked good from the ad, in Connecticut, for sale for only $1,000. I ended up buying it, and soon found out why it cost so little. Let's see: the trunk floor was rusted out to about the size of a grapefruit (and the trunk didn't close or stay open anyway) the steering column had a lot of slack, there was serious rust on each side of the car, the speedometer didn't function, there was no stereo, the tires were bald, and there was no headliner and the sunroof was broken. I did nothing to this car except get ripped off at National Tire & Battery (NTB) for a set of tires (avoid NTB at all costs or it may cost you!) and I fashioned a cold air intake. But there were another 20 minor problems with the car, so needless to say, although it was modified and fairly quick, I didn't hold onto it that long. Although it looked kind of nice:
|
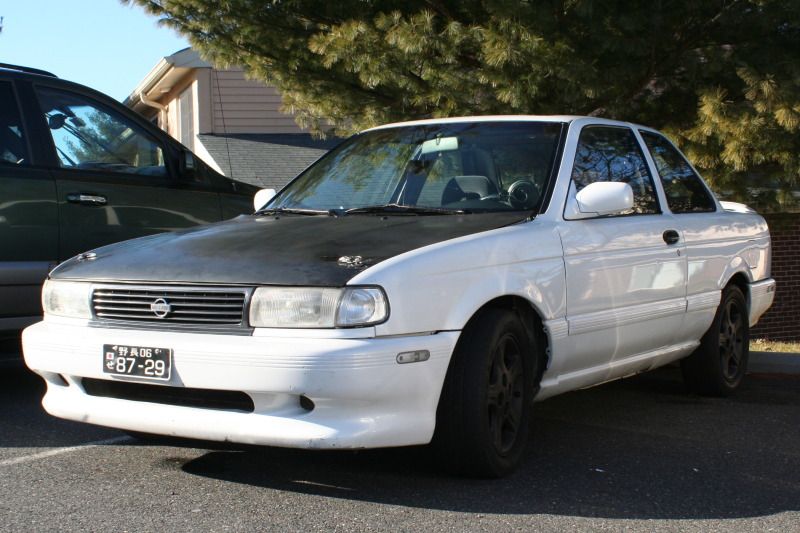 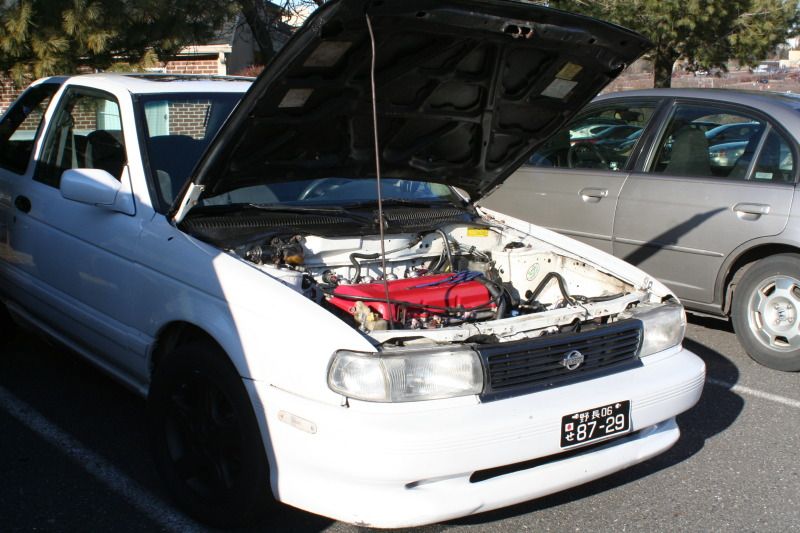
While the above 1993 SE-R brought back a lot of the nostalgia I had been seeking, it had far too many problems to become roadworthy, and I sold it after about two months and began looking for another '91-'94 Sentra SE-R, one that was in much better condition; which I found once again, in New England. (I'm unsure as to why most of the SE-R's I have purchased have been from that area).
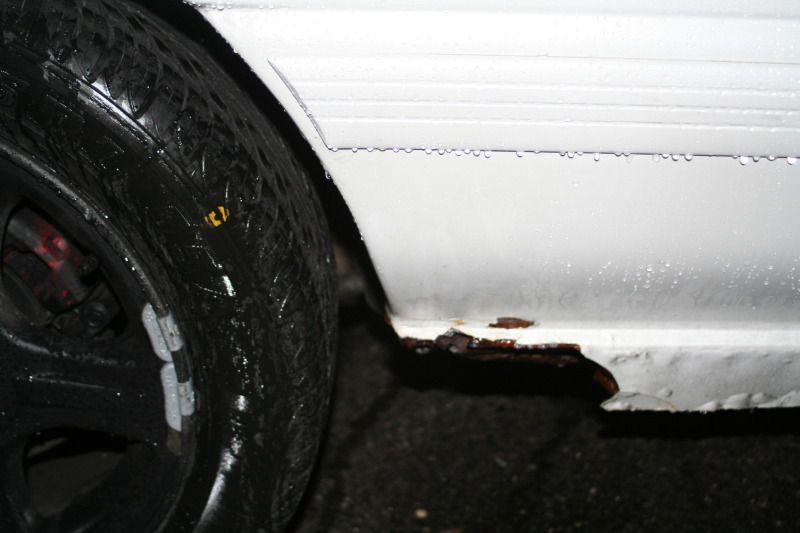 (Photo of rocker panel rust, also known as "B13 rocker rot" - a condition that plagues the chassis)
Back To The Real Thing: My Second 1991 Sentra SE-R:
Alas! In February 2012, I located a 1991 Sentra SE-R for sale in New Hampshire. It was black, slightly modified, in FANTASTIC shape, and was priced reasonably. It looked exactly like my first 1991 SE-R, which I had owned back in 1999; a time of my life I missed so much (and still do) - getting back behind the wheel of the same model of car was the closest I could get. Unfortunately, it wouldn't last all that long (more on that later). This one was had almost no rust, already had an intake, Hotshot header, exhaust, and JWT ECU. It was also lowered on Eibach springs and supported by KYB struts. It drove very well, the only problem I had was a broken front left axle that I soon replaced. I purchased the car on Superbowl Sunday for only a bit more than the last one, and it was well worth it. Here are some photos:

SR20VE Swap "Buzz":
Around the time I purchased my second '91 SE-R (shown above) - I started hearing a lot of buzz about and researching what is deemed the "SR20VE swap" in which the motor from several European and Japanese Nissan models, the SR20VE, (chassis models listed at the top) is imported from companies like SOKO, and dropped into the 1991-1994 Sentra SE-R or the 1995-1999 200sx SE-R. It is compatible with the current transmission and is a relatively easy swap compared to other cars (i.e. - putting a 5.0 liter Ford Mustang motor into a Mazda Miata or something) I knew very little but I was determined to find out about it all. I wanted to make a lot of power but was unsure about going turbo. With turbo, there's A LOT of extra things that can break. So, knowing that a stock SR20VE still makes 50 more horsepower than a stock SR20DE, I was very intrigued, and knew that the SR20VE was not that difficult and I could add bolt ons and make it even faster. So, I began a light search, but in the meantime, I kept my eye out for any other SE-R's for sale and I came across an ad for a 1997 Nissan 200sx SE-R down in York, PA.
Spring 2012, my first B14 200SX SE-R:
A 1997 model year, it was not perfect, needed new paint, and had some minor body damage. It also needed a new axle and clutch really soon, but for the asking price of just $1,000, I had to pick it up. It would soon become the greatest handling SR20 car I've ever owned. I had the car professionally repainted the OEM Nissan "cloud white" color and also any dents and dings fixed.
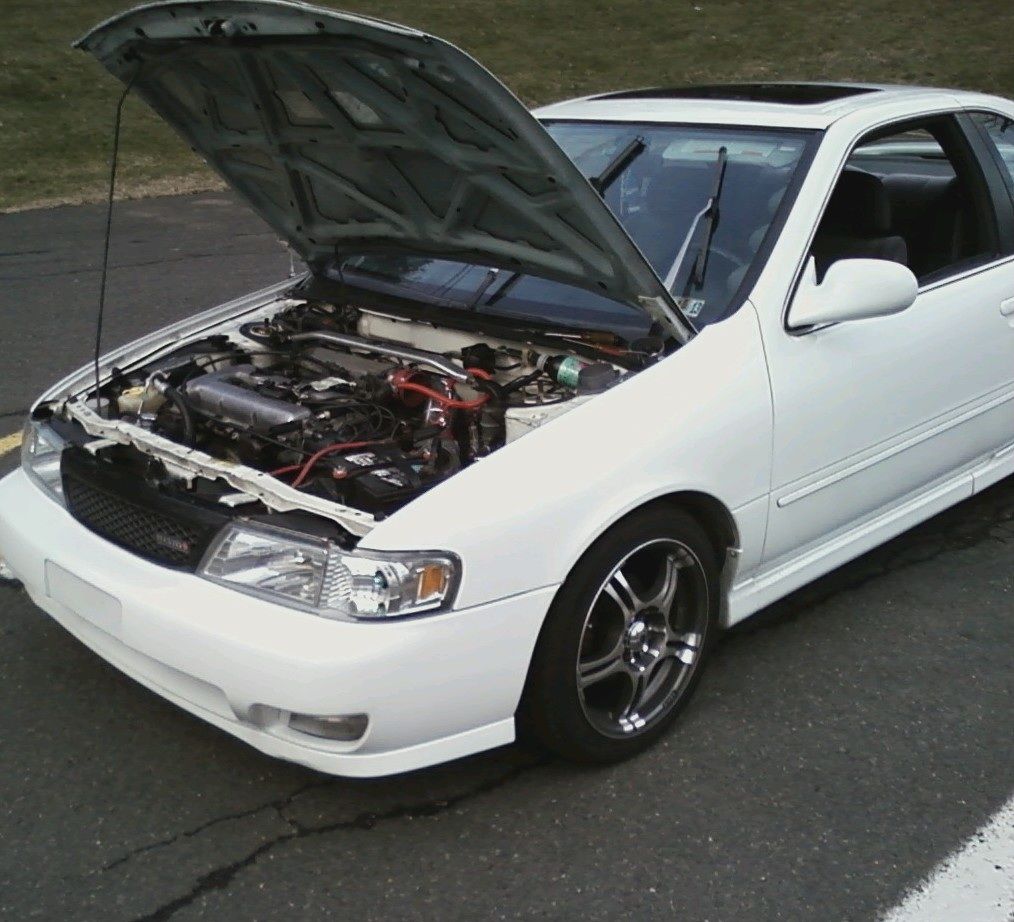
(photo after brand new paint, JDM crystal 1-piece headlights & corners, Nismo Grill, and new 16" Konig Wheels on fresh rubber)
Main Modifications: Motor: OBX 4-2-1 header, custom exhaust, G-spec under drive crank pulley, Tomei camshafts, JWT ECU
Suspension: Tein 22-way adjustable coilovers, adjustable camber plates, front & rear strut tower bars
Now I originally intended to keep this car fairly stock as a daily driver, but seeing it already had nearly $2,000 worth of modifications in it, I decided to add more parts over the next year, mostly for power. Plus the '97 SE-R, in a nearly stock form was slow as a dog. It felt like it couldn't get out if it's own way. Both monthly car mags Car & Driver and Motor Trend gave Nissan's new 1995 200sx SE-R (known as the "B14" chassis) mixed to mostly negative reviews. Most opinions were that the '91-'94 Sentra SE-R was vastly superior in performance, handling, and overall. So I had to add some extra power to my new '97 SE-R, because it certainly WAS slower. Among the major differences were that the redline of the 91-94 Sentra SE-R was 7500 RPM; for the 95-99 200sx SE-R, Nissan (for unknown reasons) lowered the redline to 7100 RPM, and also added a 109 MPH speed governor. Not to mention the previously rear independent suspension in the 91-94 SE-R was replaced by a cheaper and less effective multi-link beam suspension.
In a simple analogy: the 200sx SE-R was like a watered down version of the original Sentra SE-R. However, with the proper modifications, the 200sx SE-R could run just as hard and fast as the Sentra SE-R; it just required more money and time to do so.
After doing a basic tuneup with new plugs, wires, and a oil change to Mobil-1 synthetic, I added a cold air intake, an OBX 4-2-1 exhaust header, Tomei camshafts (270 degrees), a JWT ECU and d G-Spec under drive crank pulley. The car pulled harder than when I got it, but it still wasn't very quick. Handling though, it was a different story! With the Tein adjustable coil overs, sticky rubber, strut tower bars and bigger anti-sway bars, it handled like it was on rails. Absolutely fantastic.
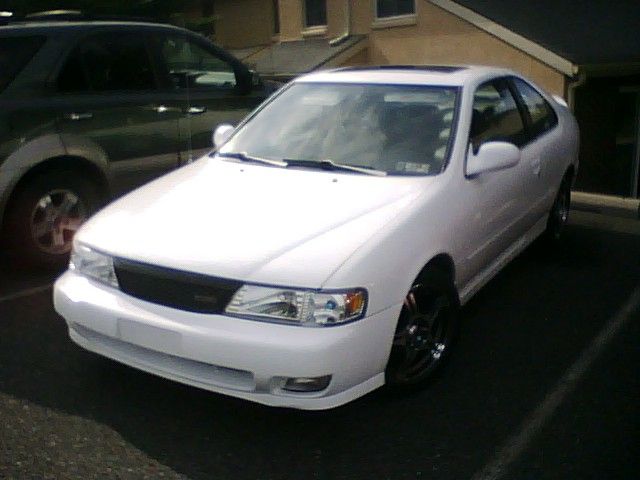
Click the YouTube links below to view short videos of 1st thru 2nd gear passes @ WOT:
1) http://www.youtube.com/watch?v=fHUsiWHjgFI
2) http://www.youtube.com/watch?v=f0QaKCo_UJ0 Fall 2013 update: I sold my lovely 1997 Nissan 200SX SE-R after I moved into a new home, and it gave me 60,000 trouble-free miles in just 18 months.
|
Sometimes Nissan does things that don't make much sense. Read on.
Without explanation, (possibly for better fuel economy?) Nissan chose to activate VVL in SR20VE powered vehicles just before redline which is quite frankly, a waste. So with proper wiring of an MSD window switch, you can change where VVL activates. Currently it is set at 5000RPM, the engine redlines at about 8200RPM, and the fuel cut is at about 8400RPM. It's a real screamer, the motor can go even higher than 8400RPM with a quick reprogram of the ECU (although in the current setup the dynojets show peak power drops off after 8000RPM). That RPM range is Integra Type-R territory, and just like the B and K series motors from Honda, that's where the SR20VE makes much of it's power.
So why didn't Nissan ever sell any vehicles with the SR20VE engine in the U.S. if it's so great?
This is a really good question. Frankly, there's no clear answer. Nissan certainly had the opportunity. The 200sx was dropped in 1999 and the Sentra was completely redesigned in the year 2000 into the B15 chassis, and then again in 2002 with a new power plant, the QR25DE. The 2002 Nissan Sentra SE-R "Spec-V" was released with massive hype but unfortunately it failed to live up to high expectations. (Just do a quick search on your local Craigslist for "SE-R" in the cars for sale section, you will find dozens). The QR25DE had a lower redline, although it did make more horsepower and torque than the SR20DE, but still, did not compare to the SR20VE. There was much speculation in the years of 2000 & 2001 (well, "hope" more than anything) that the new Spec V would contain the SR20VE, due to the "V" in the title. Not so. And once again, many Nissan enthusiasts were left scratching their heads. Why would Nissan do this? To be honest, no one really knows, although it must have come down to marketing purposes. Perhaps Nissan believed they needed an engine with more torque than the SR20 platform, as the QR25DE made 175hp and around 168ft lbs of torque from the factory. However, the SR20VE still was more powerful, on a proven bottom end and gearing, but it was left for Europe and Japan, once again. In my opinion, this was a huge blunder by Nissan, among many many others. A great example is the 1997-1998 240sx S14, a fantastic looking RWD vehicle but relativley underpowered in it's stock form.


Above left is a 2002 Nissan Sentra SE-R Spec V and right is a 1998 Nissan 240SX SE. I love the aggressive look of the 240SX, but both vehicles had controversial motors. In mid 2001, around the height of the "Import Tuner" culture, Nissan announced the revival of the "SE-R" badge trim level for the 2002 Sentra Spec V. People were very excited, but unfortunately it was more hype than anything else. The Spec-V's QR25DE, a 2.5 liter 4-cylinder was more of a mid range motor with a lower redline than the SR20DE, although it made well over 30HP & 40 ft-lbs of torque over the SR20DE, the vehicle was much heavier, the suspension was suspect and the car was too large. There are also many problems with the catalytic converters. It was a disappointment and mostly deemed inferior by the SE-R community. A good example is Nissan slapping the QR25DE into the base model 2002-2009 Altima while the higher trim model received the powerful 3.5 VQ35DE 6-cylinder. The QR25DE is an under square engine meaning the length of the stroke is greater than the diameter of the bore. This engine does not rev high and does not make power up top without some more work. This alone is a reason some folks dislike the QR25 engine. The pistons are a good design with regards to the skirts, but the piston top is thinner than most SR20DE pistons between the first ring and the combustion area. The block is an open deck block and some argue no where near as strong as a closed deck design. The rods are tiny and thin and made to be lightweight, not strong like SR20 bull rods are.
As for the motor in the S14 240SX, at the time it was Nissan's only RWD "sports car" (as the 300ZX Twin Turbo was discontinued after 1996) - it was simply under powered. The KA24DE, a 2.4 liter 4-cylinder from the factory made a mere 150HP although it contained a fairly firm suspension and a limited slip differential. In a strange coincidence this motor was also used in the FWD 1993-2000~ish Nissan Altima models, and it's also not surprising that the popular engine swap for the 240SX is a SR20DET - if you can find a 240SX that's not beaten up. The 1997-1998 model shown above had a more aggressive headlight design sometimes referred to as the "angry Kouki" or just "Kouki" and is exceptionally rare.
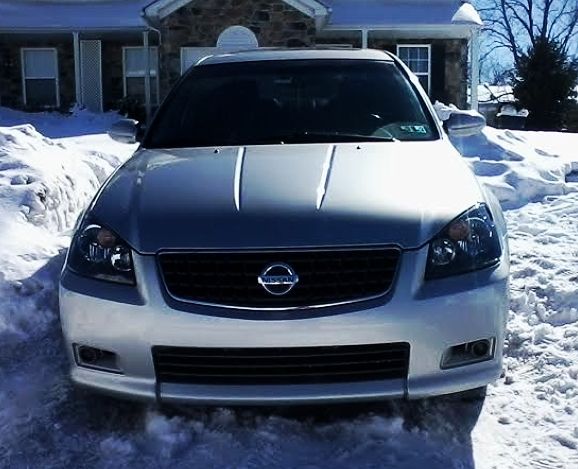
My 2005 Altima SE-R, winter of 2013 in my driveway. I really loved that car: so much interior space, lots of goodies, and a powerful V6 engine. It just wasn't very good on gas.
Modifications to my '92 SE-R VVL:
Well actually, before we get to those, let's first discuss what is more of a neccesary fix, addressing the 5th gear "pop-out" problem that has plagued the Sentra SE-R since it's release in 1991.
I was driving one fall day and the motor was running great, and I merged onto the highway. I shifted into 3rd gear, then to 4th gear, then into 5th gear, hit the accelerator, and the motor revved up like it was in neutral. Confused, I downshifted back into 4th gear, and back into 5th. Same thing. I was completely confused. And then I remembered.
My car had just now developed what is known in the Nissan world as the dreaded "5th gear pop-out" problem. Most of the time it happens more gradually, but for me, it was fine one moment then gone the next.
Here's what happens:
In the manual transmission 1991-1994 Sentra SE-R's the teeth on the 5th gear input shaft gradually wear down until they are no longer able to "bite." When you shift into 5th gear, the shifter can either pop out into neutral or stay in it's 5th gear position where the motor just revs up and the car goes no where.

(A faulty 5th gear)
Here's the part that bothers me most: Nissan never officially acknowledged this problem. Even though the problem was found in nearly half of all Sentra SE-R's. There was no "recall" where you could get it fixed for free. Those owners lucky enough to develop the problem during their factory warranty period saved a lot of cash. Unfortunately, many of the 5th gear "pop-out" problems developed in vehicles well after the warranties expired. Being that the Sentra SE-R is fundamentally an economy car, many were driven well past the mileage warranties and then they developed the problem.
Now, unless you don't mind driving in 4th gear everywhere, the solution is NOT cheap. Courtesy Nissan out of Texas, and G-Spec Tuning (a popular Nissan performance website) offer what is called the "5th gear pop-out kit" which runs around $340.00 and contains all the parts necessary to repair the 5th gear parts. I won't bore you all with the specifics here, but you have to drop the entire transmission and dismantle the gears to replace everything. It's a huge pain, and in my opinion, one of the few blunders by Nissan for an otherwise remarkable and fantastic car. The problem is most prevalent in the 1991-1992 Sentra SE-R's; the number of SE-R's with the 5th gear pop-out problem declined dramatically in the 1993 and 1994 Sentra SE-R's, although on occasion it still happened (there have been some reports of 5th gear pop-out even in the B14, the 1995-1998 200sx SE-R, although quite rare).
So now the 5th gear parts have been replaced, as well as a new clutch disc, the JGY 6-puck competition disc installed failed after only 4,000 miles. The springs busted. From much research it seems wise to stay away from JGY products. Sorry guys, I've heard a lot of negative things, and the JGY clutch disc is the only product I've ever owned from there, and it failed.
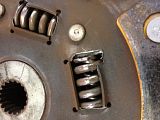
(JGY clutch disc; the springs are breaking out into the plastic)
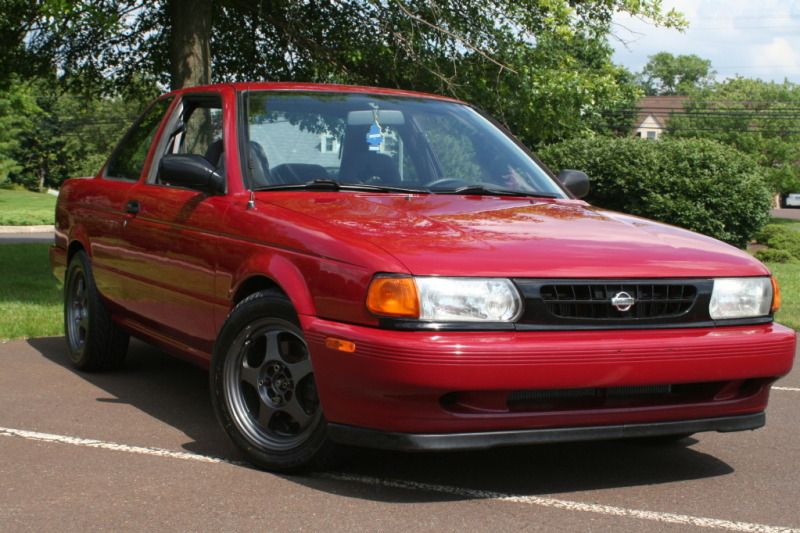
K-Sport Coilover system:
This Sentra SE-R suspension setup is centered around the K-Sport coilover system. Each corner has 36 levels that adjust dampening and rebound
by turning the little dial at the top of each strut tower. Adjustable camber plates are included and ride height can also be lowered or raised. The reason my car doesn't appear all that low in the photos on this page is because the Sentra SE-R/200SX SE-R suffers from a relatively small amount of suspension travel so an optimal lowering height is just about 1 inch. That doesn't sound very low but when you begin to go lower than that, especially past 1 1/2 inches the vehicle actually begins to handle worse than it would at the stock ride height because it begins to bounce off the bump-stops. It looks cool lowering it 2" or so but it's just for looks at that point. I once had Eibach Sportlines on my '98 SE which lowered the car 1.8" and the ride in the back was terrible. Eventually a couple of the KYB struts blew from potholes.
G-Spec Underdrive Pulleys:
I recently installed a set of G-Spec underdrive pulleys, both crank and waterpump, in my SE-R. These are much lighter than the OEM pulleys and work by "underdriving" them and thus freeing up horsepower, since less intertia and centrifical force is needed to turn them. (Kind of the concept behind a lightened flywheel) These do not make a HUGE difference in horsepower or torque gains, however they have been shown to increase power by as much as 8 horsepower, all over the power band, on the dyno. The biggest pain is getting off the original pulleys (either use a pulley-puller or, if you're brave, a bunch of screw drivers) - you also should and need to replace the crank oil seal. Also, it can be somewhat difficult to find the correct size belts depending upon your application. My SE-R does not have power steering or air conditioning, and thus there are only 3 pulleys in the car, a crank pulley, water pump pulley, and alternator pulley. I felt no need to purchase an underdriving alternator pulley, as this can cause electrical problems, (even though it's a brand new alternator) - I didn't want to take the risk. There is already the risk when using an underdrive crank pulley in a high horsepower, high revving engine - that it can throw off the balance of the crank. This risk is very low in the SR20 series engines however as the crank itself comes balanced from the factory. Other engines do not. So it is use at your own risk.
Here are some photos of the pulleys:


The G-spec underdrive water pump pulley on the left vs. the stock OEM water pump pulley on the right and vice versa. But wait, I thought you said they G-Spec pulleys are lighter?! It actually is, although from the photo it is hard to tell. It "underdrives" the OEM pulley by 30-40 percent or so, and thus frees up a few horsepower.

(The G-Spec underdrive crank pulley, front, with the Fidanza lightweight flywheel)

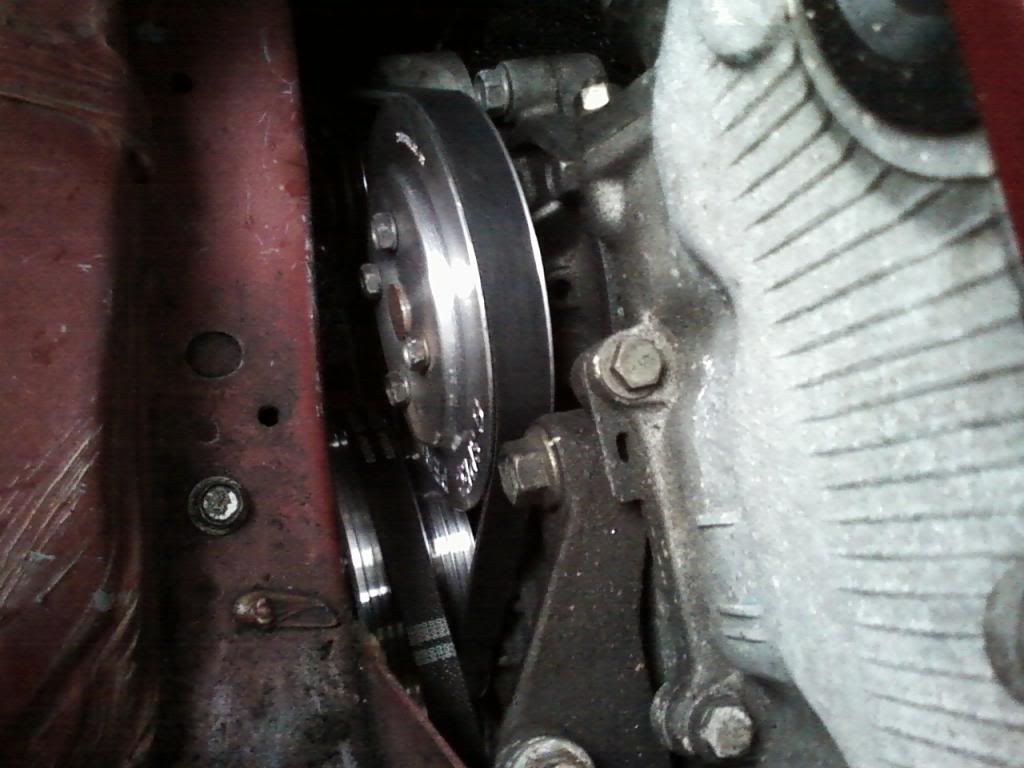
(Water pump pulley installed on the engine - notice the OEM Nissan oil filter in the top left photo that I use for this motor. The Nissan OEM oil filters are vastly superior to most common filters as they have a floating ring that collects more substance, although they need to be ordered in advance from any Nissan dealer parts department, you can't just walk into an Autozone and buy one)

(For the crank pulley, the rubber seal shown in this photograph needs to be replaced, outlining the hole. These are available from Nissan for $8 and really SHOULD be replaced, especially if you used the controversial "screwdriver method" to remove the pulley. This is a spare front cover of an SR20 motor that I have used for the photo)
Modifying an original SR20DE distributor for the SR20VE motor:
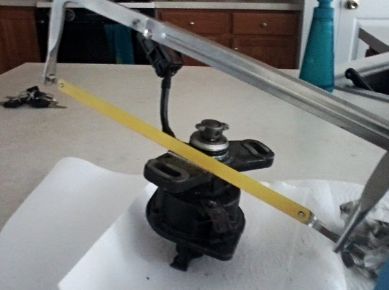
In the photo above I'm literally using a hacksaw to cut off the bottom "ear" of a SR20DE distributor to fit on my SR20VE motor. This is done for two reasons:
1) The SR20VE distributor is more expensive and harder to get your hands on,
2) If you are dropping a SR20VE motor into your SE-R you already have a distributor that just needs "the cut."
The bottom is cut because it makes contact near the driver's side of the VE valve cover and will not sit flush. The VE distributor does not have the bottom "ear" but the DE does, hence the cutting. After that there are wiring diagrams on many websites that help you to wire up your DE distributor to the VE motor (and VVL solenoids).
The Fidanza Lightweight Flywheel:
When I was having the clutch replaced, I had a lightweight Fidanza Flywheel installed that I purchased used from another SE-R enthusiast. The Fidanza flywheel weighs around 9.5lbs, whereas the OEM Nissan flywheel weighs 19.5lbs. The difference is signficant. While the flywheel does not "make" horsepower like a set of bigger camshafts would, it does allow the engine to spin more freely due to it's lighter weight.
Sitting at stoplights now in neutral, with the light flywheel and underdrive pulleys installed, the engine revs to 8000RPM very quickly, almost as if it was a 10 second motorcycle. This car doesn't run 10 seconds of course, as you'd need turbo to do such a thing, but it does run 13's.

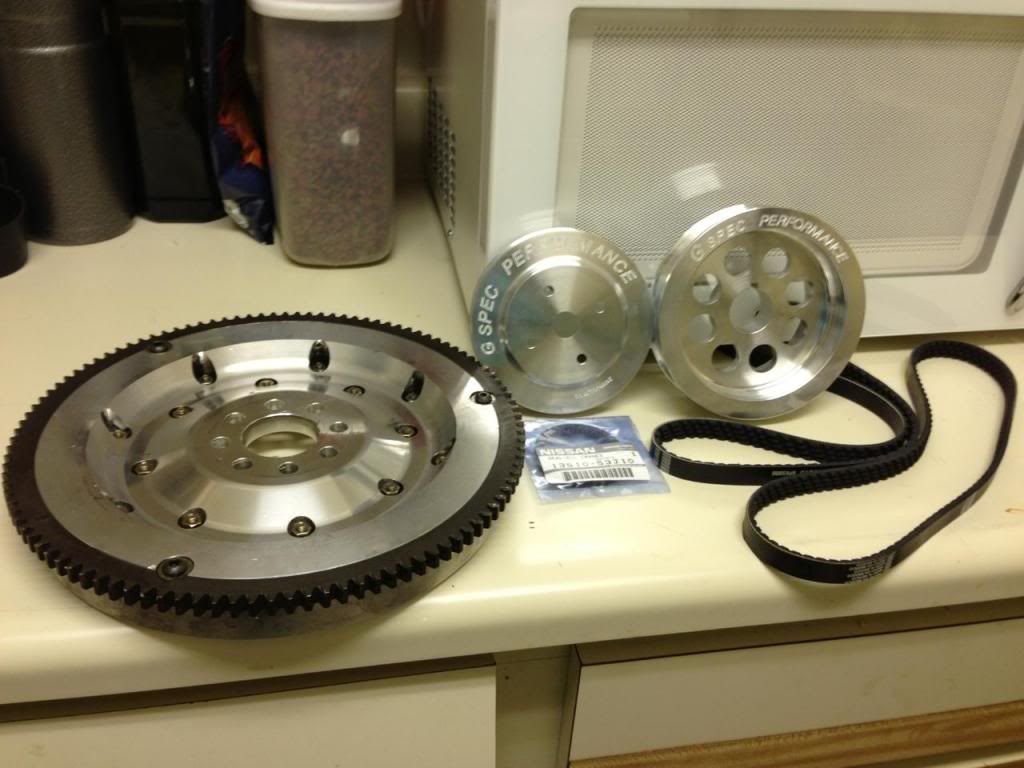
(The Fidanza lightweight flywheel, all polished up and looking good; the Fidanza flywheel, G-spec water pump pulley and crank pulleys with their brand new belts)
The Warm Air Intake vs Cold Air Intake Debate:
So, there has considerable debate and controversy regarding which setup is better for almost decades at this point. Which one should YOU use, you ask? Well I have an answer for you: it depends. Don't put a far reaching air filter to the ground to get colder into your throttle body if you live in an area that is prone to heavy rainfall and flooding (below, right). Instead, choose to have the air filter up higher (below, left). The good thing even if you DO live in rainy climate most of the years, it only takes a few minutes to swap out the warm air setup for the cold air setup (which has been shown to produce an additional 6-10WHP)

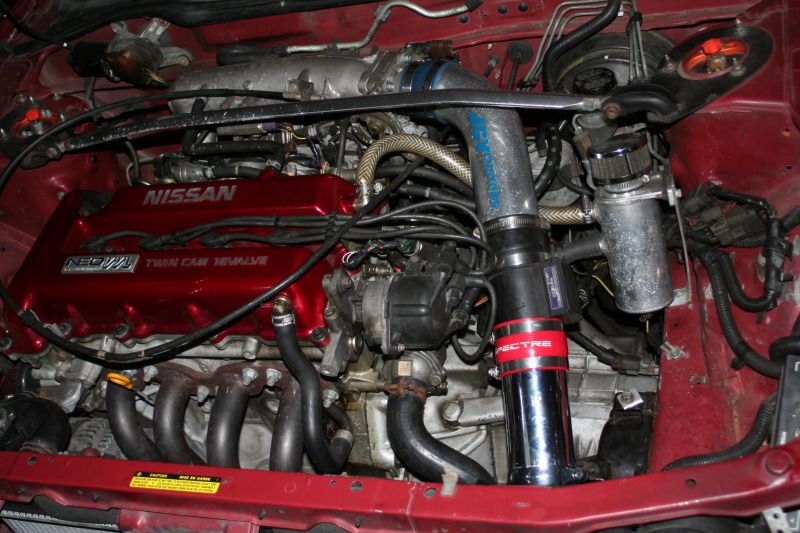
(Warm air setup vs. cold air setup. In the second photo, the air filter is just out of sight)
How does it work?
In these types of engines, the colder the air is going into the throttle body, the better. The cold air intake works by doing 2 main things:
1) Instead of drawing warm/hotter air from locations inside the engine bay, the cold air intake pulls in air from other locations such as the inner fender well, where that air itself cannot be warmed up from the engine. It also picks up more of the air flowing under and around the car, the outside air, which may be cooler.
2) Resonance. A cold air intake requires longer piping to get the air filter as far as possible away from the heat of the engine. Resonance acts almost a form of supercharging because the long piping can cause the air to be sucked up faster than a traditional warm air setup where the intake piping is shorter in length, and less likely to occur.
The main issue with the cold air intake is that the filter is often situated in a location that makes it easily suceptible to water, meaning, the filter gets wet from rain, and there is the possibilty of hitting puddles while the throttle plate is open and inhaling water into the engine. Water can kill an engine faster than a pissed off "enemy combatant" with a rocket launcher. There are stories of people who have unknowingly tried to cross deep puddles from flooding on roadways, and then ended up inhaling gallons and gallons of water up there intake into their engine, and the engine blew, which is known as "hydrolock." When this happens, the water inside the engine causes the compression ratio to become so high that is basically explodes. Well maybe not literally, but it will never run again without some serious rebuilding. Most engines that hydrolock are scrapped for salvageable parts.
Now for me, this car is a weekend and track car. Not my daily driver. However I did remove the cold air section of the intake for my dyno runs to see if there was a difference between the cold and warm setups. We found no difference in the numbers because no air was blowing over the engine AND the hood was open for all the dyno runs. The only way to test which intake is better would be to dyno the vehicle with a strong stream of air pushing into and over/under the engine bay, to simulate driving conditions, with the hood closed.


(Above left: removing the cold air intake piping, above right: holding the cold air intake piping, ready to reinstall)
I can tell you undeniably that for my car, in real-world driving conditions, the cold air intake makes more power. When I removed it and returned to the warm air setup I was unable to get the tires spinning in 2nd gear where they usually would do so. The car feels more sluggish up top. I believe the warm air intake kind of "stunts" the acceleration however again, if you live in an area where standing water on roadways is common, you may want to save the cold air setup for a dry, sunny day or the racetrack.
Overheating Issues:
So I was beginning to notice that under hard driving conditions, the motor would begin to overheat, even in the winter. I traced this back to a short at the ECU for the radiator coolant fan. Normally, the ECU automatically turns the fans on at around 202 degrees F; however in my car they were not coming on at all. So we wired a switch directly to the coolant fan, bypassing the ECU. The switch was mounted on an unused section just under the stereo on the right.
OEM SR20DE MAF vs N60 MAF:
Now, with all this power, the the original MAF (mass air flow sensor) needed to be replaced with something larger. I chose the Nissan N60 MAF since it's bigger and less restrictive. Since the MAF is attached to the engine's intake, it has it's limitations in stock form. When you need more air in an engine that dyno tests at over 200hp @ 7800RPM, the stock MAF doesn't cut it because of it's small opening. The ECU also needs to be reflashed to accept and work with the different MAF. See the photos below.
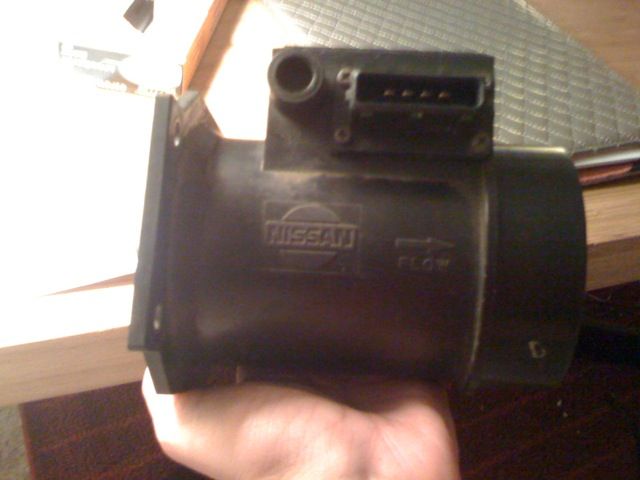
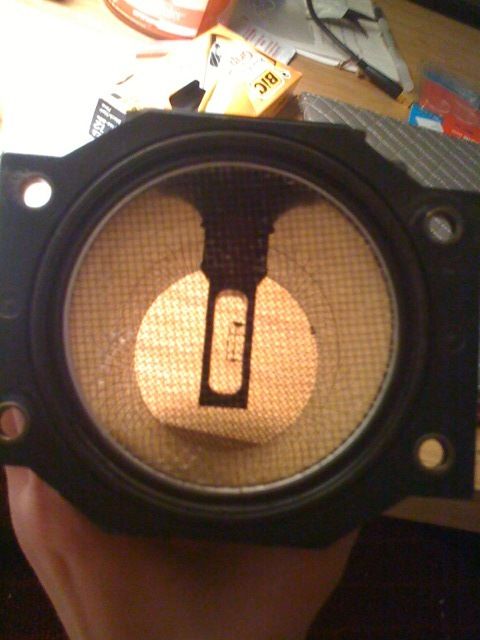

The larger, much less restrictive N60 MAF (two left) vs. the OEM DE MAF (right). The N60 MAF came from the factory on the 1989-1994 Nissan Maxima and the ECU you choose to run must be preprogrammed for it to operate correctly.
The JMR 4-1 Header:
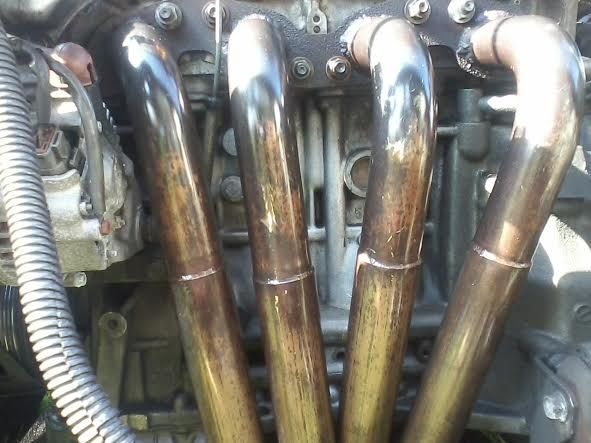
The header pictured above is at this time probably the BEST header for a naturally aspirated SR20VE motor. Just look at those beautiful primaries! Remember though - you get what you pay for, and this header is not cheap.
On The Dyno-Jet:In January 2013, I took the car to a dyno. Little did I know that it was actually Mustang Dyno (as it even says Mustang dynamometer at the top of each graphic sheet). The operator also dialed in the vehicle as weight 2,875lbs instead of the correct weight of about 2,400lbs. So my numbers were not quite as high as I'd like. Some photos:


This time particular the car made a peak of 195.7 HP @ 7834 RPM. This is 10 HP less than the car made before a few modifications on a different dyno. According to many, a FWD car on a Mustang Dyno will often yield lower peak HP number than a dynojet which I plan on going to soon. Even by the operators own admission, he told me "if you go on a dynojet you should be 20-30 HP more" ::smacks forehead::
UPDATE: A few weeks later, in February 2013, I took the car to an actual dynojet and the numbers were much better. Max horsepower was 206 and max torque was 148 at just about the same RPM)
Did *I* Have The Very LAST OEM Nissan Sentra "SE-R" Badge?
:)
It was posted on www.SR20-Forum.com that Nissan no longer is producing the original 1991-1994 SE-R trim level badge that goes on the trunk. I am not suprised and let's face it, we don't see many early 1990 import economy cars anymore. So long story short, I never put the badge on my car as I intended to do, and I ended up selling it to another list member after I received about 20 e-mails about it. :)

(Could it be, the very last OEM Sentra SE-R badge in the world? :) )
More on Nissan's NEO VVL (variable valve lift & timing):
Instead of me trying to explain in my own words what the SR20VE engine does, here's Wikipedia's take (pay most attention to the very last paragraph in bold :)
Nissan Ecology Oriented Variable Valve Lift and Timing is a variable valve timing technology. VVL varies the timing, duration, and lift of valves using hyrdaulic pressure switch between two different sets of camshaft lobes. It functions similarly to Honda's VTEC system.
The SR20VE is the most common engine with NEO VVL. There have been two main versions of this engine. The first version made 187 hp and 145 ft lbs of torque. This engine was used by Nissan from 1997 to 2001. The second variant of the SR20VE is found only in the 2001 and later P12 Nissan Primera. This version of the SR20VE makes 204 hp and 152 ft lbs of torque.
The most powerful VVL engine so far is the SR20VET. The SR20VET is a turbocharged SR20VE. It uses a Garrett GT2560R turbocharger, and makes 276 hp. Compared to the SR20DET (used in the Nissan Silvia and Bluebird), the SR20VET (aside from having VVL technology) has improved airflow in the cylinder head, higher compression, and also improved coolant passages.
How is it different from Honda's "V-TEC?"
One difference from Honda's V-TEC system is that NEO VVL engages the change of intake and exhaust cams independently for a flatter, more consistent power band. On the SR20VE, the intake camshaft is switched at 5000 rpm, and the exhaust at 6500 rpm. Think about that, Honda/Acura guys. Ok so I must admit something; besides having a very powerful engine, I did lose twice this past summer. Once to a Chevy Cobalt SS turbo and once to an Integra with a K-series engine swap. Hey, at least I can admit it!
SR16VE (N1 cams) swap w/ Supertech valve springs (product SPRK-H1022D)
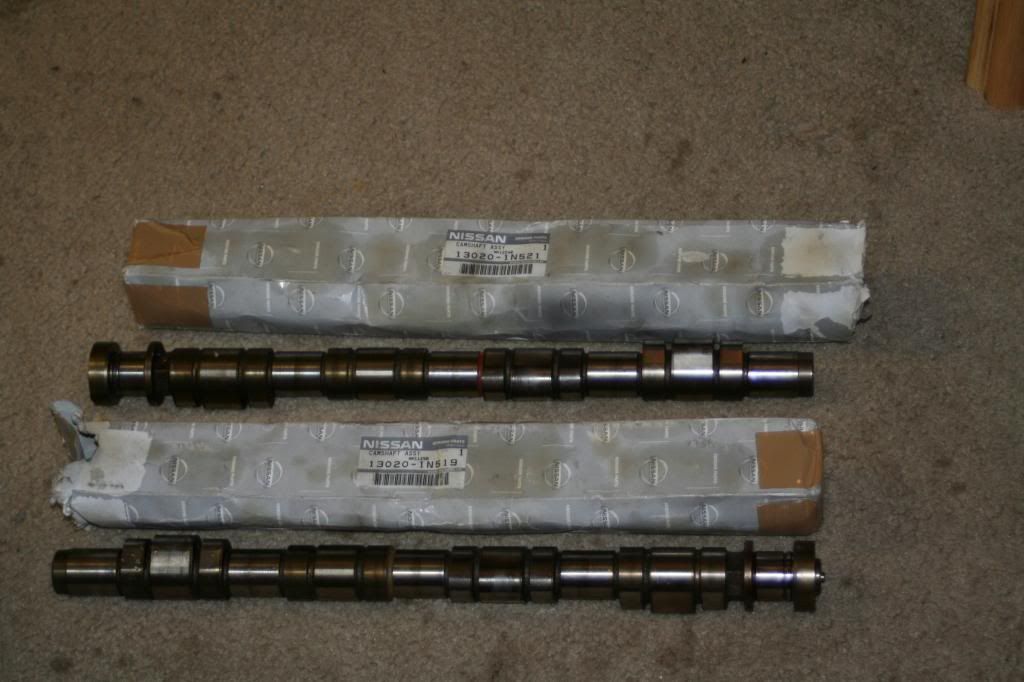
(The N1 cams, direct from Nissan, outside their boxes, ready to be installed)
- G-Spec under-drive water pump pulley
- G-Spec under-drive crank pulley
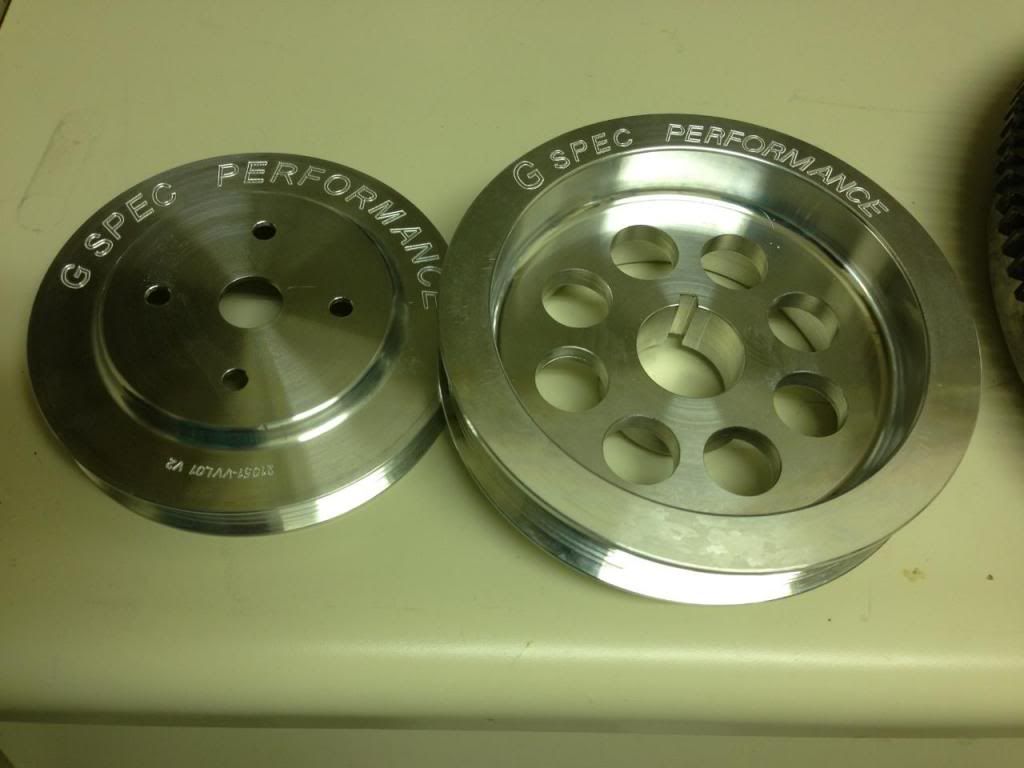
Here is the G-Spec underdrive water-pump pulley actually installed:
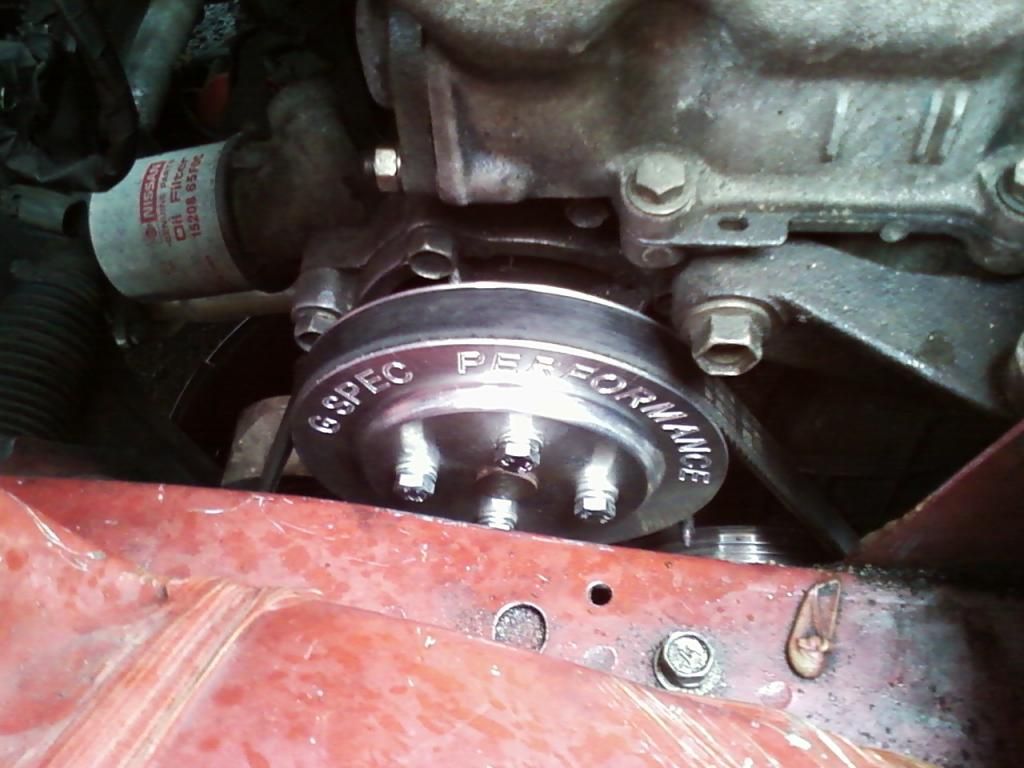
- Lightweight Fidanza Flywheel (8.5 pounds, stock flywheel weighs 18.5 pounds)
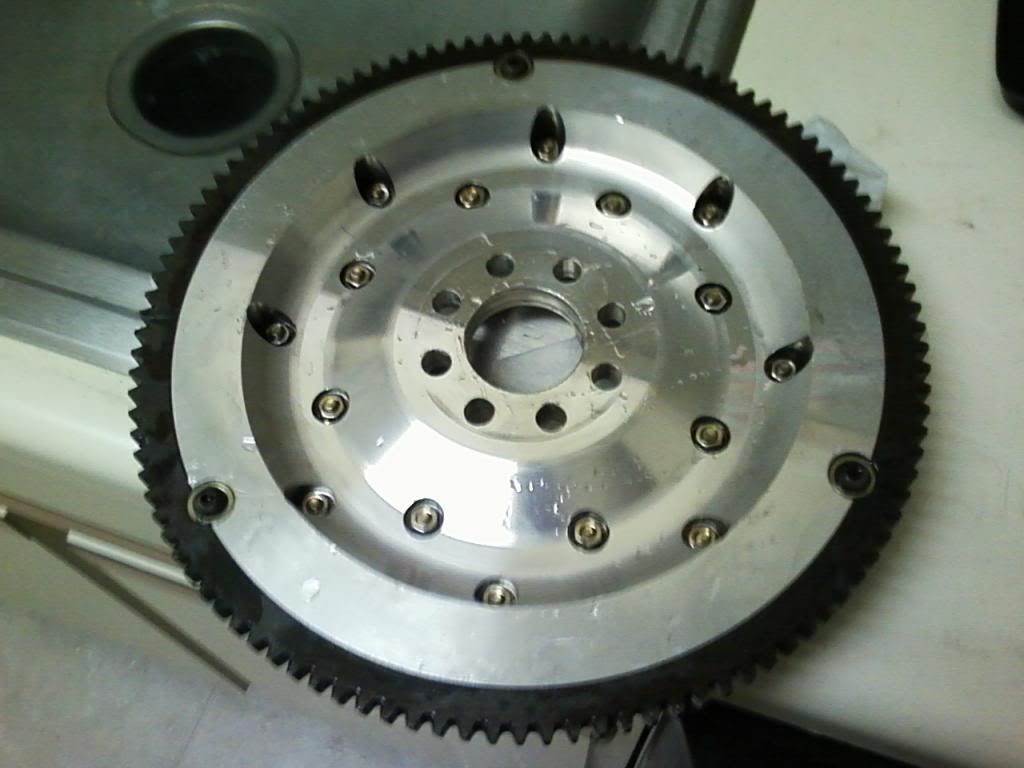
- Full mandrel bent 3" exhaust to Magnaflow universal muffler
- N60 MAF (mass air flow sensor)
Braking:
- Nissan NX2000 complete brake upgrade: calipers, rotors, master cylinder
- G-Spec cross drilled & slotted rotors (pictured below)
- Goodridge stainless steel brake lines
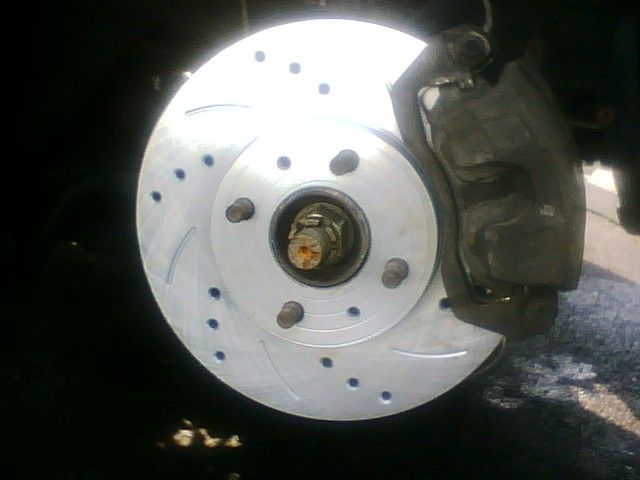
B13 Sentra Weight Reduction:
Engine power is closely related to weight in moving vehicles (meaning the less weight and more torque = faster). During the relentless winter of 2013-2014 as the car sat in the garage endlessly I did some minor weight reduction. In these sub-2,400lb B13's, you'd be surprised at how much removing some things makes a noticeable difference. You can of course remove the seats temporarily, race on a track etc. and then replace them, as you can with the stereo and speakers etc. but I was more interested in long-term weight reduction. I removed ALL of the under-carpet sound deadening tar that Nissan put into each Sentra to lower road noise. If your car is stock your car will sound considerably louder, however it's basically unnoticeable when you're talking about a 4-1 header with a 3" cat-back exhaust with a straight thru Magnaflow muffler. So I removed about 46 pounds from the car for good. Here's how:
Tools needed:
Socket set & wrench to remove front seats, rubber mallet, large flathead screwdriver, Phillips head screwdriver, sand paper (100-240 grit), primer, a close match to your exterior paint (for the trunk). Optional: clear coat.
What you do:
1) Remove both front seats. First remove the plastic coverings with a screw driver to access four large, possibly 16mm bolts. (I can't recall exactly but they're large). Unclip the seatbelt indicator connector harnesses under each one. Take them out of the car.
2) Remove the rear seats. These are much easier and are attached by large retaining clip sections, 2 on the top, 2 on the bottom.
3) Remove the carpeting from the plastic interior door trimming. It's attached by plastic retaining clips, it's not necessary to remove all of the carpeting at once, you can simply pull it off on the side your working on and work there, then do the same for the next side.
4) Once the carpeting is removed you will see a thick tar like substance. That's what you want out. This one all depends. My best luck was just hitting a large flat head screwdriver with a mallet and pulling it out piece by piece. Collect it all in a big trash bag so you can weigh it later. There is tar everywhere. Anywhere you see it, just work on it to get it out. Some of it will come out easy in large chunks, some will be a lot stickier and won't give in as easy. Then once your done, vacuum very well. You will see some small dime sized holes where you can see the ground underneath. Plug those up with whatever works so water doesn't get up into the cabin if you drive in the rain.
5) Remove the rear trunk bottom carpeting/support wood to access the strip of tar behind the rear seats. This part is of course optional as it only weighs about 6lbs, but every bit counts. It's more difficult to access because of the angle and it being deep in the trunk. I had better luck using a the Phillips head screwdriver, sort of stabbing into it and pulling it out in strips. Once you're done it should look something like this:
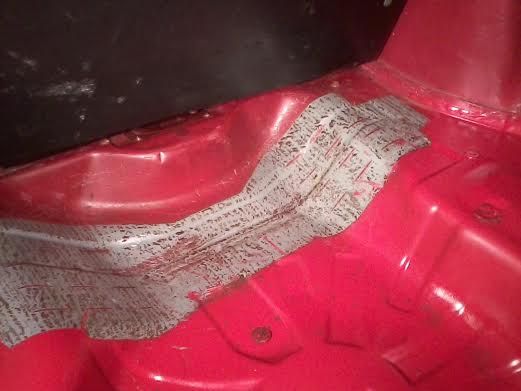
6) Use the lower grit sandpaper and really go at it to get the rest of it. In time, it will all come off. Then vacuum again, very well.
7) Cover exposed areas and spray some primer on the new bare metal strip. Get paint that closely matches the color of the rest of your trunk. Seeing as these cars are at the youngest, 20 years old, you may opt to sand down any surface rust and prime and paint the entire trunk anyway like I did.
8) Take that bag of all the tar you removed and weigh it. See how much yours weighed! Mine was 46lbs. (You can also remove that lint under the carpeting to remove an additional 8-10lbs).
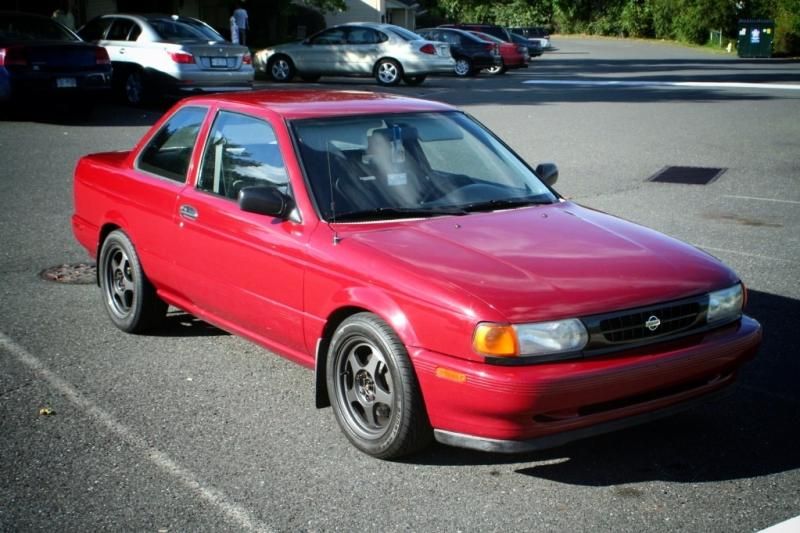
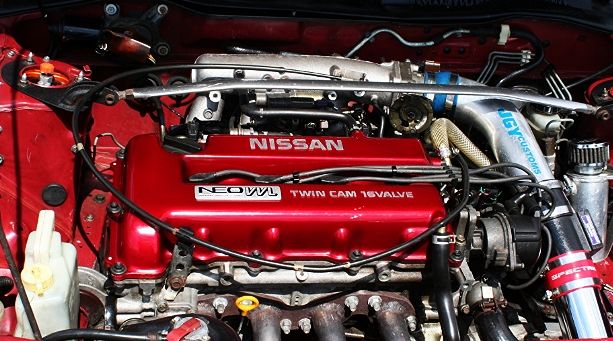
The Sentra SE-R and the SR20VE motor just after being professionally detailed & steam-cleaned.
My Brother Austin's Cars:
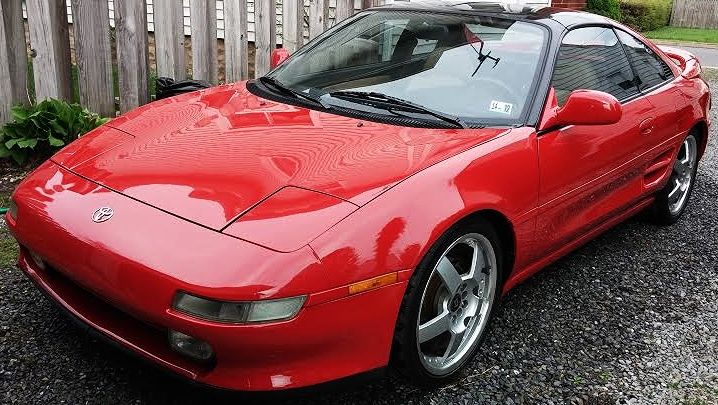
This car is one the RAREST early-mid 1990's Japanese sports cars in existence. Sure, you may see an early '90's MR2 non-turbo putting around town, every couple of years, but they put down barely 140HP, my brother's car is the real deal:
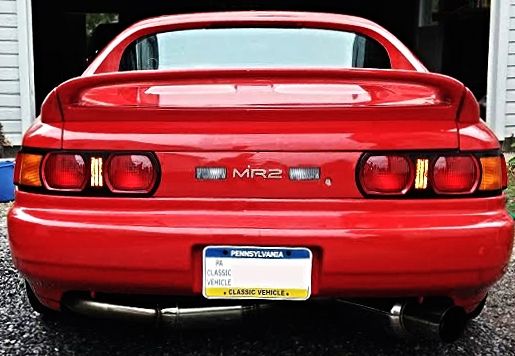
MODIFICATIONS: He won't tell me! He wants to keep it a secret. What a nerd!!
More information on some other vehicles of this nature:
The U.S. available 1993 MR2 Turbo (W20 chassis) produced 200HP powered by a 2.0 liter 4-cylinder motor and was able to accelerate from 0-60 in 6.1 seconds and complete the 1/4 mile in 14.7 seconds, debuting in the U.S. in 1989. At the time, the automotive press dubbed it as "the poor man's Ferrari." However, looking at these photos I believe it looks just as good! Also recall this was the year 1993. Look at the styling of my 1992 Sentra SE-R on the rest of this page. True, the Nissan Sentra was and always has been a FWD platform as opposed to the RWD MR2, yet I had to wait until the year 2008 for the SR20VE motor (producing about the same power as the MR2 Turbo) became widely available to get my hands on it.

(MY 1992 Sentra SE-R VVL next to my brother's 1993 MR2 - summer 2014. All the NA modifications along with the SR20VE engine swap put the Sentra just a tad slower than the boosted Toyota)
Some Thoughts on the Toyota MR2 Styling & Design
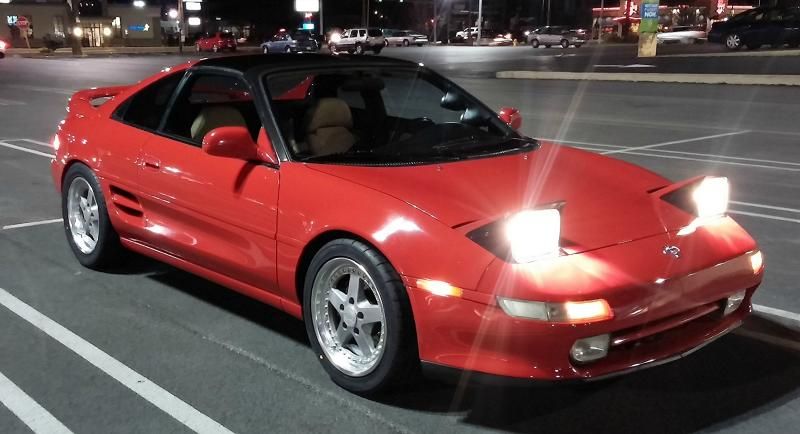
As briefly mentioned, the Toyota MR2 W20 chassis debuted in 1989. It's hard to believe that was 26 YEARS ago! (where does the time go?) Despite this, it doesn't look dated in my opinion. Toyota was ahead of it's time. To me, the W20 MR2 looks like a mash-up between the 3rd generation Mazda RX-7 and the C5 Chevrolet Corvette. Both are great looking cars, but what do you think?
 :
: 
The Chevrolet Corvette C5 & the Mazda RX-7 3rd generation, respectively. If they had a baby, perhaps it could look something like this:
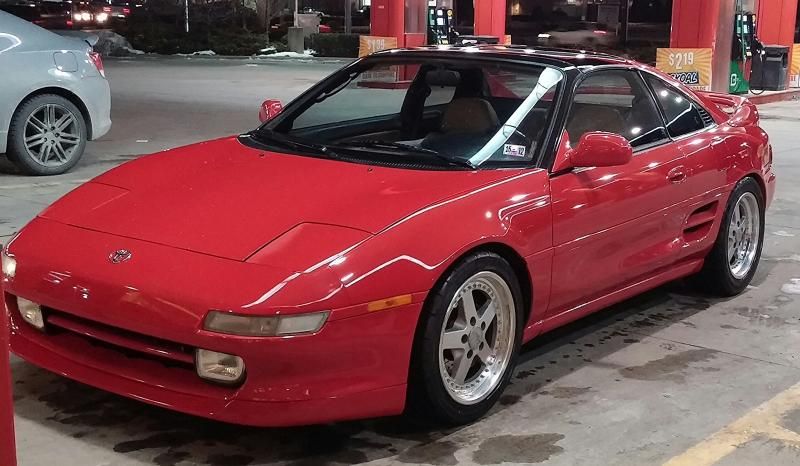
2015 Subaru WRX:


The 2015 WRX next to the 1998 SE-R, spring 2016. The SE-R w/ aftermarket header, exhaust, cold air intake, and JWT S3 cams keeps right up with the WRX, although it is 100% stock.
Although neither of us own one, another vehicle that comes to mind as a bit ahead of it's time are models like the third generation Mazda RX-7 (discontinued in the U.S. after 1994). The twin-turbo Mazda RX-7 produced 255HP with it's controversial rotary motor. While looking fantastic, it was plagued with issues due to the rotary design and costly repairs were often needed. Following that lesson very few vehicles in the United States were released with a rotary-based motor setups. Another vehicle in the vein of the MR2 turbo was the Nissan 300ZX Twin Turbo (Z32) chassis as well (available from 1990-1996 in the U.S.) The Nissan 300ZX TT was named one of the best cars of the year by Car & Driver Magazine, however it's timing was poor. In the early 1990's the United States government entered a mild recession and fuel economy became a very high priority of consumers especially leading up to, during, and after the 1991 Persian Gulf War. Consider also that even though the 300ZX TT unleashed 300HP with 0-60MPH times of less than 5.5 seconds, in the year 1989 the MSRP was $30,000 and in its final year of U.S. sales (1996) the price had increased to a whopping $50,000 which when adjusted for inflation comes to over $76,000 in the year 2016.


(1990 & 1996 Nissan 300ZX TT)
Please email any comments/questions/corrections etc. to Comments@jordanwhitemusic.com - feedback is always welcome and thanks for checking out the page! Click HERE to go back to the music.
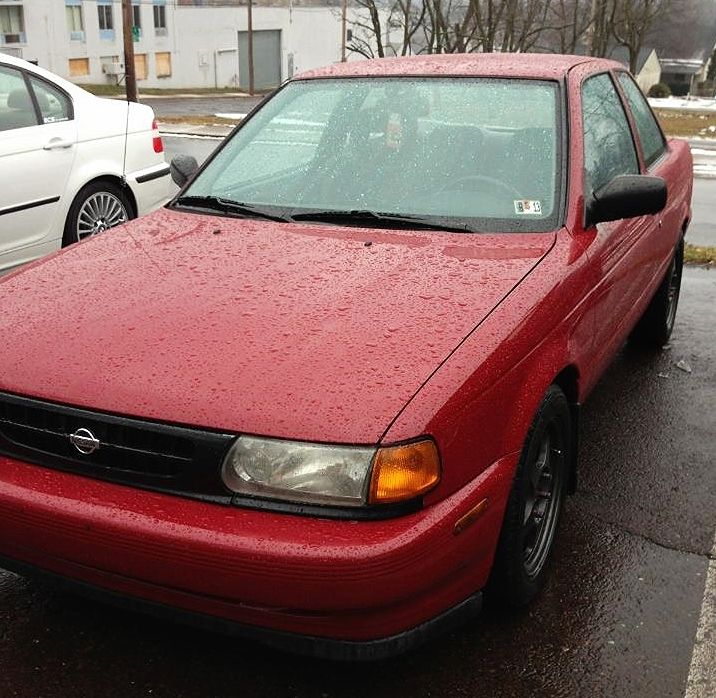
Still the one, and only one....
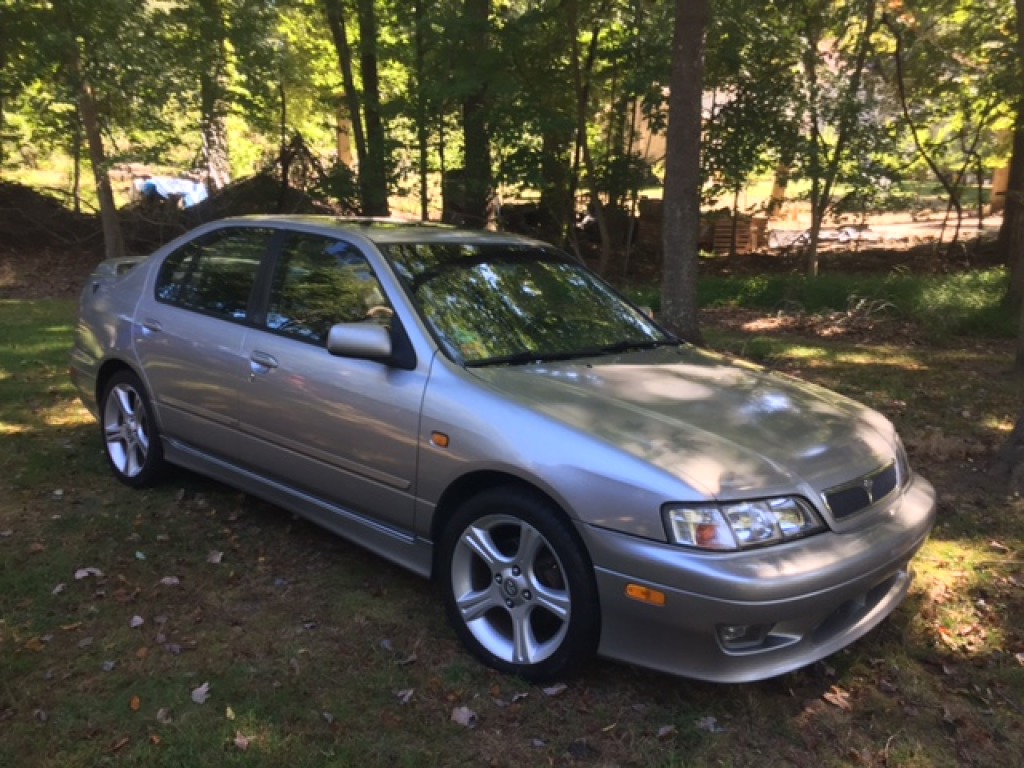
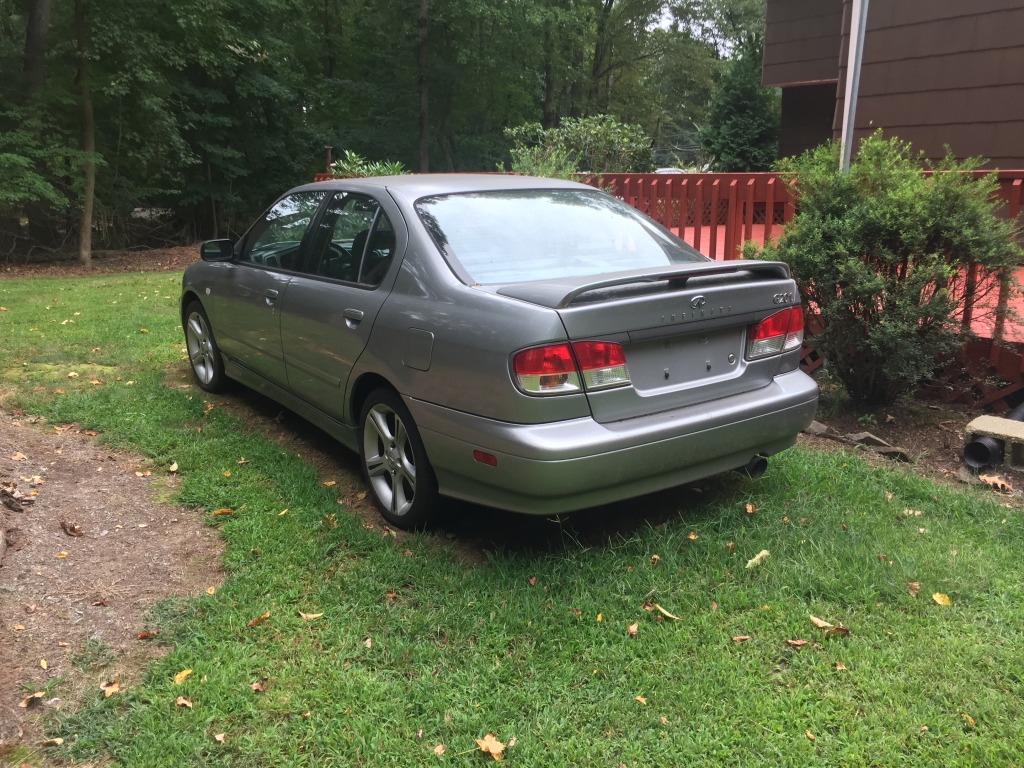
.jpg)